Quite possibly one of the best subscription services for games right now, the Xbox Game Pass offers a ton of different games under its umbrella, including EA Play and Ubisoft Connect games. While this deal is amazing, it unfortunately isn't natively available on the Steam Deck. It isn't possible to download and play Game Pass games, but Microsoft has provided a couple ways to play them, including streaming!
Using Microsoft's Xbox Cloud Gaming service, you can stream all the games that are available on the Game Pass! This can be done via the browser or even some third-party applications that the community has made. In this guide, we will cover how to use any of these methods to set it up so you can enjoy the Game Pass on your Steam Deck.
Note: This is purely to set up cloud streaming for Game Pass, which means you will need an active internet connection. The only way to natively download these games and play them is to put Windows OS on your Steam Deck.
Xbox Cloud Gaming with Microsoft Edge
When the Steam Deck came out, Xbox Game Pass was one of the services people hoped would come to the Deck natively. This wasn't the case, but Microsoft did outline a way to stream games from the Game Pass on your Deck using Microsoft Edge and xCloud! They did create a guide for it, but we decided to make our own and simplify it into 6 steps! Here is how to use Microsoft Edge and get it set up for streaming on the Steam Deck:
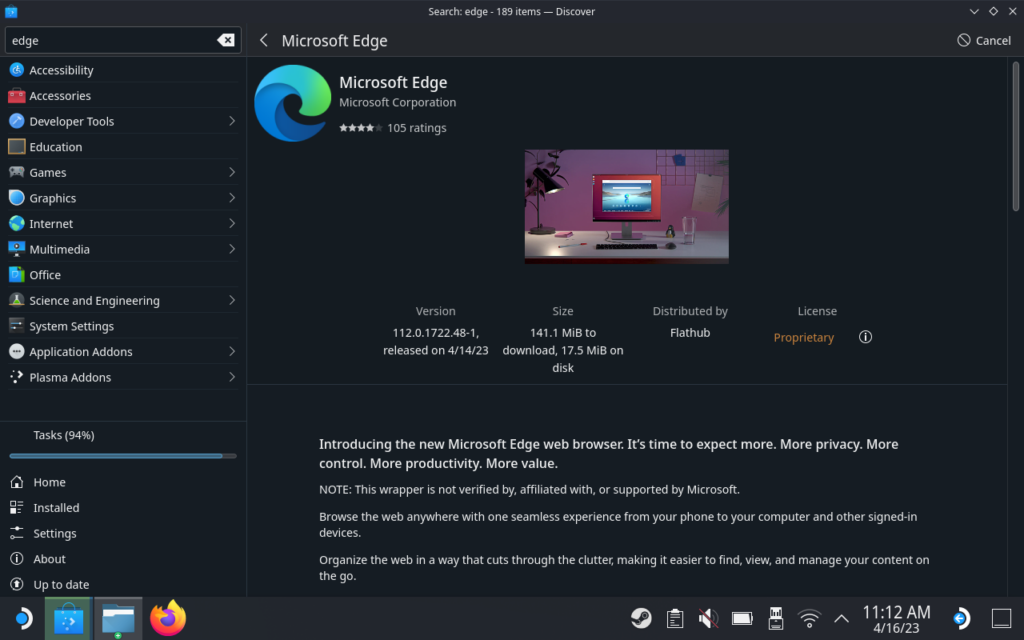
Step 1: Go into Desktop mode on your Steam Deck and download Microsoft Edge from the Discover store.
Step 2: Go ahead and launch the Konsole from the System tab in the Application Launcher and enter the following command. This will give Microsoft Edge access to the Steam Deck controls. You will know if it worked if you press enter and it goes to the next line with no error messages!
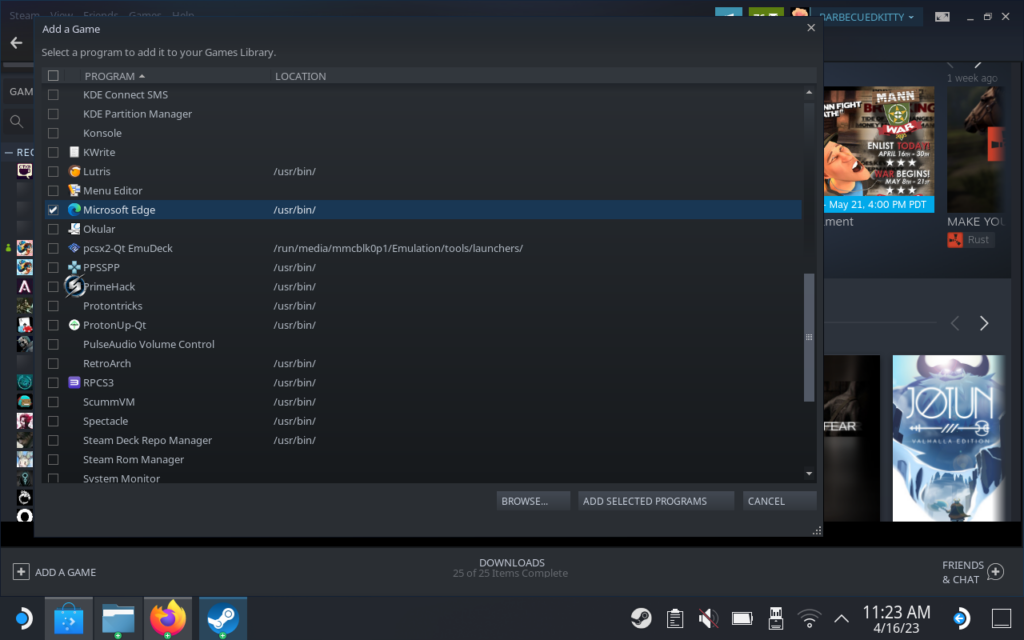
flatpak --user override --filesystem=/run/udev:ro com.microsoft.EdgeStep 3: Launch Steam and add Microsoft Edge as a Non-Steam game. To do this, go to the bottom left of the Steam window and click "Add a Game", scroll down and you will find Microsoft Edge on the list.
Step 4: Now we need to change the launch options for Edge. Go into the Preferences and scroll to the end of the launch option there. After the @@, paste the below command after! Make sure this is after the @@, which is also at the end of the launch option that's there, and do not delete anything. This will force the window size and full screen, as well as automatically go to the Xbox Cloud Gaming website when launching.
--window-size=1024,640 --force-device-scale-factor=1.25 --device-scale-factor=1.25 --kiosk "https://www.xbox.com/play"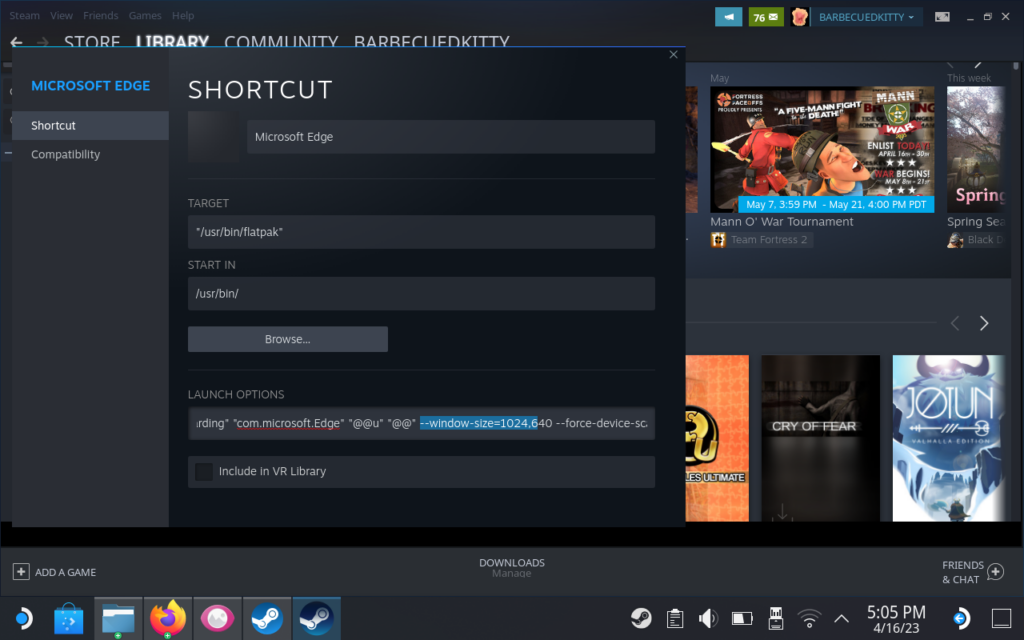
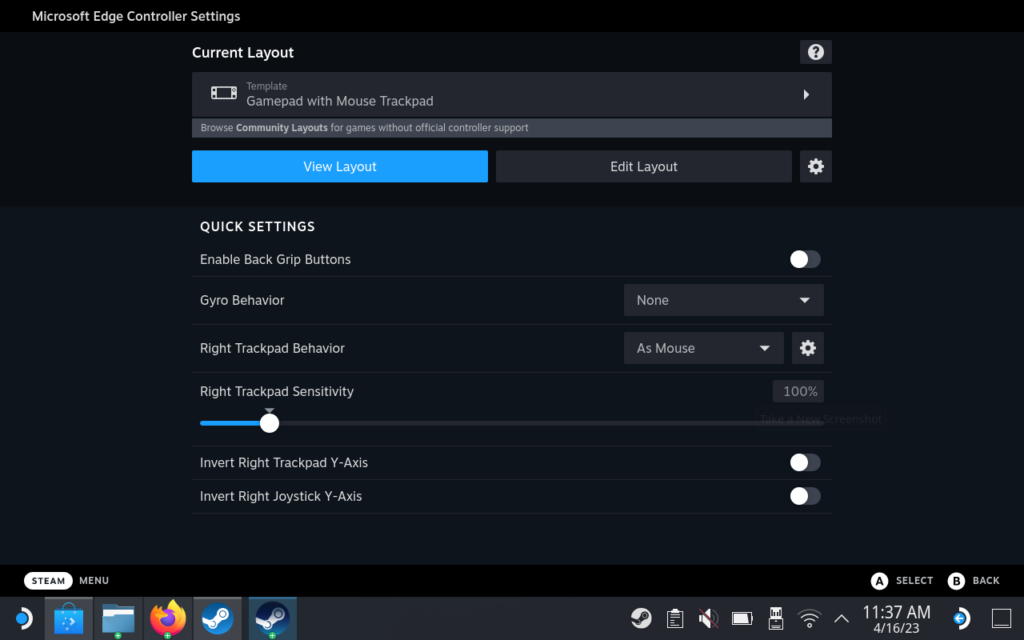
Step 5: Next, go into "Controller Layouts", which should be in the Manage tab in Preferences or underneath the green Play button while in Desktop mode. Change the controller layout to "Gamepad with Mouse Trackpad" and hit X to apply the layout.
With that, everything should be set up! Microsoft Edge should launch, go full screen, and work with the Steam Deck controls. You can now change the name of the shortcut to "Xbox Cloud Gaming" or whatever you'd like! You can also download the Cloud Gaming artwork from Microsoft or use some custom ones from SteamGridDB to make it look nicer. If you are using the SteamGridDB plugin from Decky Loader, you can also click "Change Artwork" and type in the name of the game, which in this case would be "Xcloud".
Before you start playing, you will need to log into your Microsoft account which has Game Pass on there, so if you have a Keyboard and Mouse you can plug in, it will make this a lot easier. I also recommend launching the browser once before going into Steam, but if you don't and you open it in gaming mode for the first time, just go through the set up and quit the browser and re-open.
To make exiting games easier, make sure to go into the controller scheme and make the right trackpad emulate a left mouse click when pressing down on it. This will allow you to go into the menu to close the game without needing to use the touchpad!
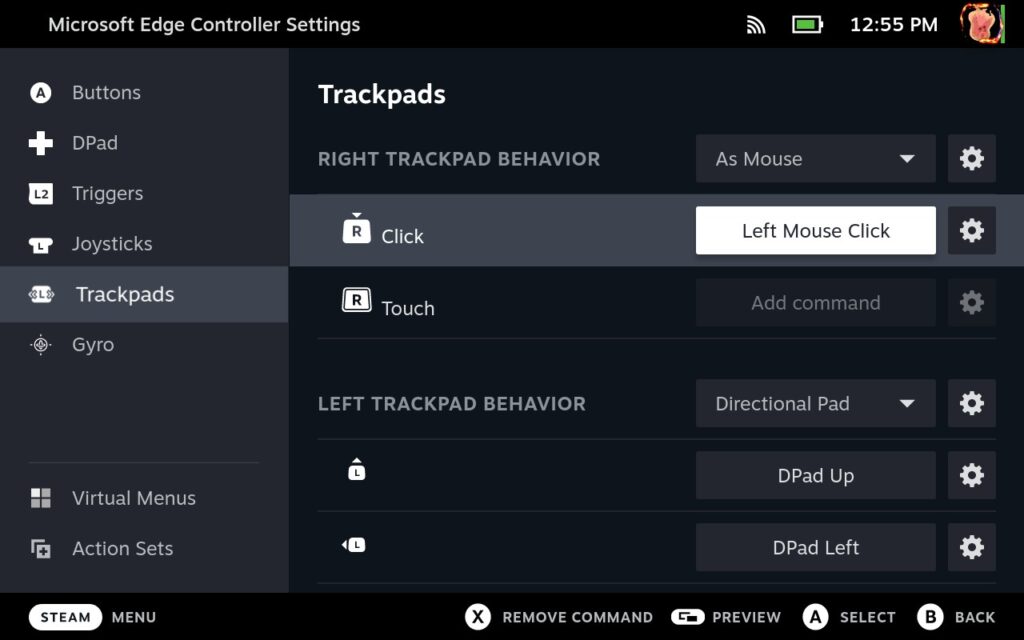
Everything should be working after that and you are ready to start gaming!
There are two other alternatives currently that, while others have reported them working, they didn't completely work for me. I will go through them here so you can try using them as well, but I personally recommend using the above method as it works completely for me.
Alternate #1: Greenlight - An Open-Source xCloud Client
The first alternative to check out is Greenlight. Created by unknownskl, Greenlight is an open-source application wrapper around the xCloud player.This application runs natively on Linux, which is fantastic, but it does have some issues.
Greenlight has a nice interface, gives the option to remote play from your Xbox, and gives you easy control over video bitrate, but the main interface won't work with a controller and you must use the touchpad or touch screen to navigate. Once you are in, the game will recognize the controller and work fine, but navigating the xCloud menus isn't as straightforward. I also encountered an issue where just quitting the game didn't work and I had to use the touchpad/mouse cursor to hit "Disconnect" in the top left corner.
Overall, it is a good alternative if you don't want to install a whole browser! So here is how to install and set it up:
Step 1: In Desktop mode, Go to the Greenlight Github page and download the newest version of Greenlight. I recommend using the newest pre-release, 2.0.0 beta 7, as it includes updates to the player, bug fixes, and optimizations. Make sure to download the AppImage version.
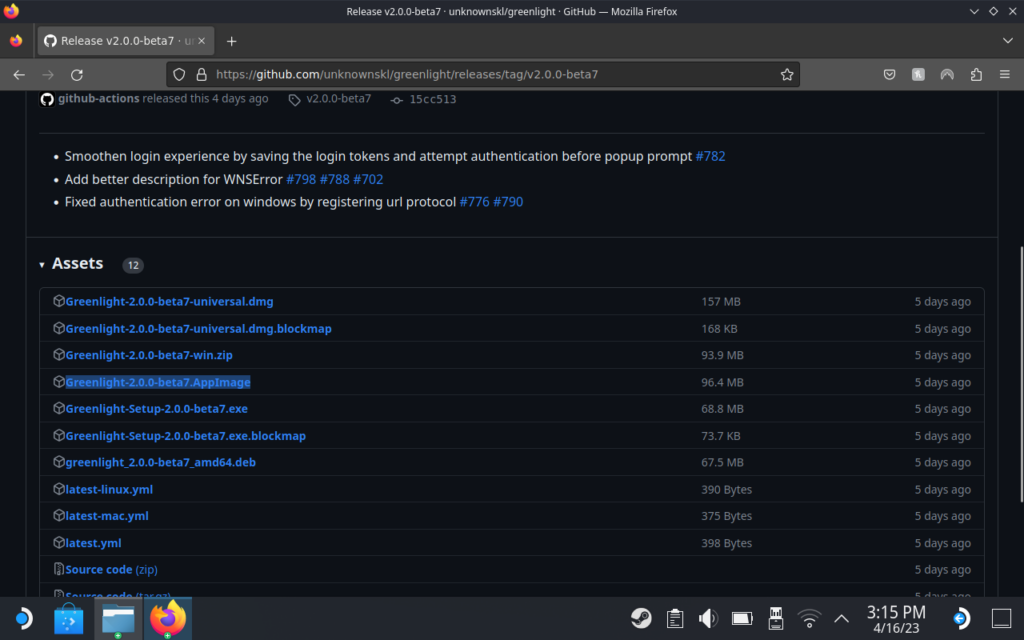
Step 2: Add Greenlight to Steam as a Non-Steam game. To do this, go to the bottom left of the Steam screen and click "Add a Game", then choose "Add a Non-Steam Game". You will need to click on "Browse" and go to the home/deck/downloads folder and add it from there. It will appear in that folder if you download from Firefox, otherwise, you will need to manually navigate to wherever downloaded if you configured it to go somewhere else.
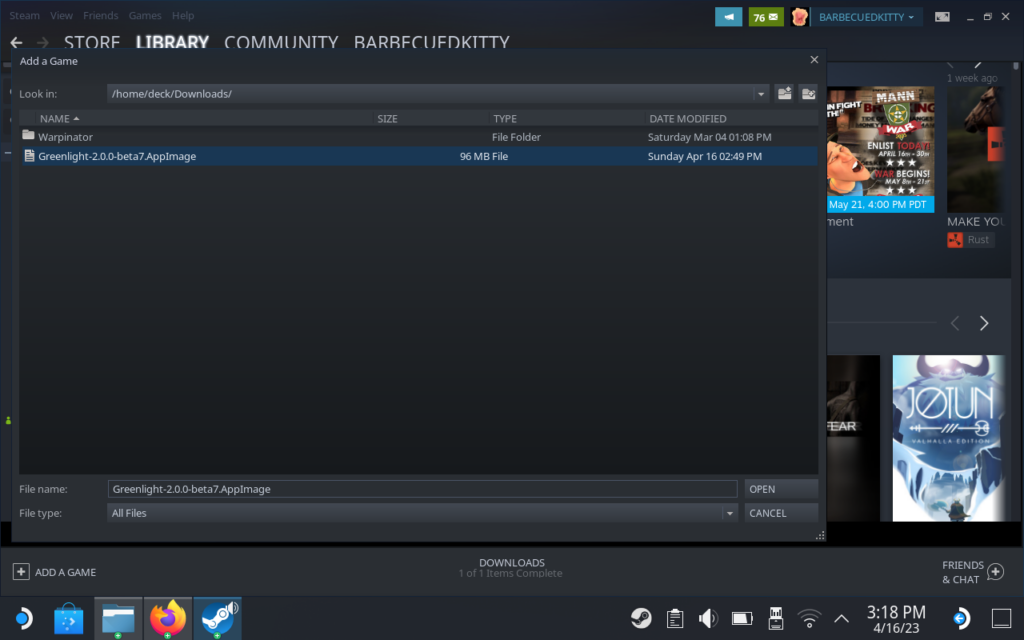
Step 3: Go to the properties of the game on Steam and to the "Shortcut" tab. You will need to add this command as a launch option to make the game work and force it to go full screen:
--no-sandbox --fullscreenStep 4: Launch Greenlight and log into your account. Make sure to select the option that will make you stay logged in, if it pops up. This is easier to do with a Keyboard and Mouse if you are able to plug them in, otherwise, press Steam + X to bring up the virutal keyboard. Then, click login!
Step 5: Change the controller layout in Steam to the "Gamepad and Mouse Touchpad" option. After pressing X to apply the layout, edit it and change the right touchpad press to emulate a Left Mouse Click. You should also make one of the back buttons, I use L4, recognize as the "N" key on a keyboard as this will act as the "Xbox" button to easily close the game when done.
And that is it for setting it up! You should be able to start this in game mode. Like I mentioned above, you will need to use the touchpad or touchscreen to navigate the xCloud menus, but in-game should work just fine! You can find artwork on SteamGridDB or, if you have the plugin with Decky Loader, you can search "The Green Light".
Alternate #2: xbPlay - An Application with Individual Game Shortcuts for xCloud
Our second alternative on this list is xbPlay, made by Studio08, which is an application for Xbox streaming. With it, you can stream from your Xbox and use xCloud, both with gamepad support. Just like Greenlight though, it does have its pros and cons.
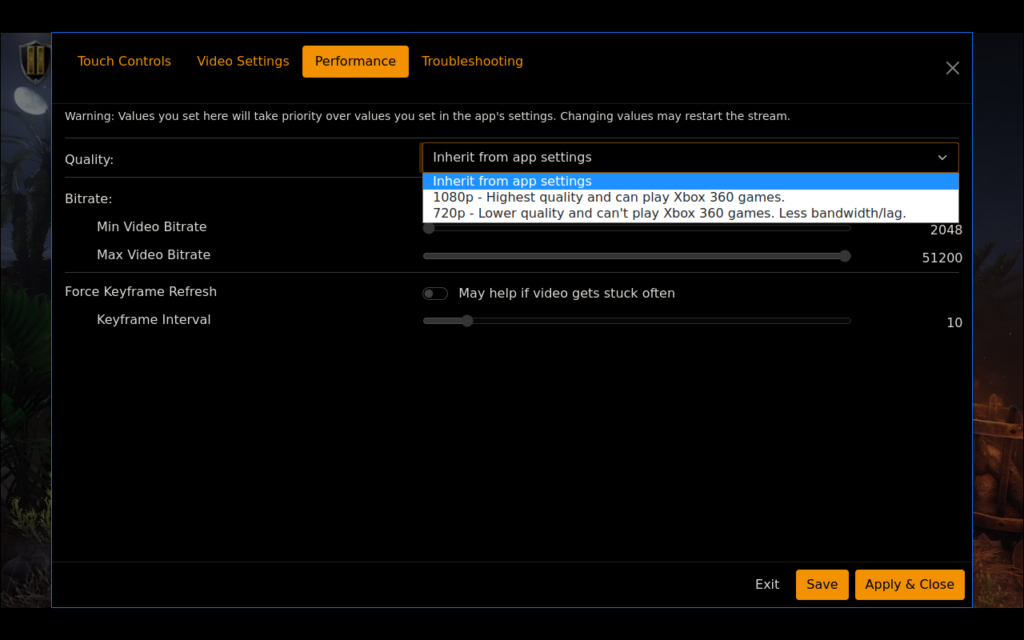
The biggest pro with this one is the ability to create individual game shortcuts. When selecting a game, it will give you the option to add a shortcut to Steam which, when you go back into gaming mode, will appear there. After starting up the game in Steam once, it will also automatically scrape artwork for you so you don't have to manually find it! The menus also can be navigated with the Steam Deck controller, but there is a big catch.
First, the application costs $5. Without paying, you get 20 minute trials, but if you want to play longer, you need to pay a one-time $5 fee. To pay it, you will also need to use a smartphone to download the xbPlay mobile app and purchase it there. You link to your Microsoft account and it will carry over to the downloaded app on your Deck. Second, when I was playing, I had no sound in my games. This can be a deal breaker here, but I have asked others to try and they had sound, so it could be something on my end.
You also can't add the base application to Steam as the .desktop file won't run, but the individual game shortcuts do work! And if you quit the game, you can then go to the main menu and change games. I would say this application will be best for those who want the individual shortcuts! With that in mind, here is how to install and use it:
Step 1: In Desktop mode, go to the Discover Store, search "xbPlay", and download.
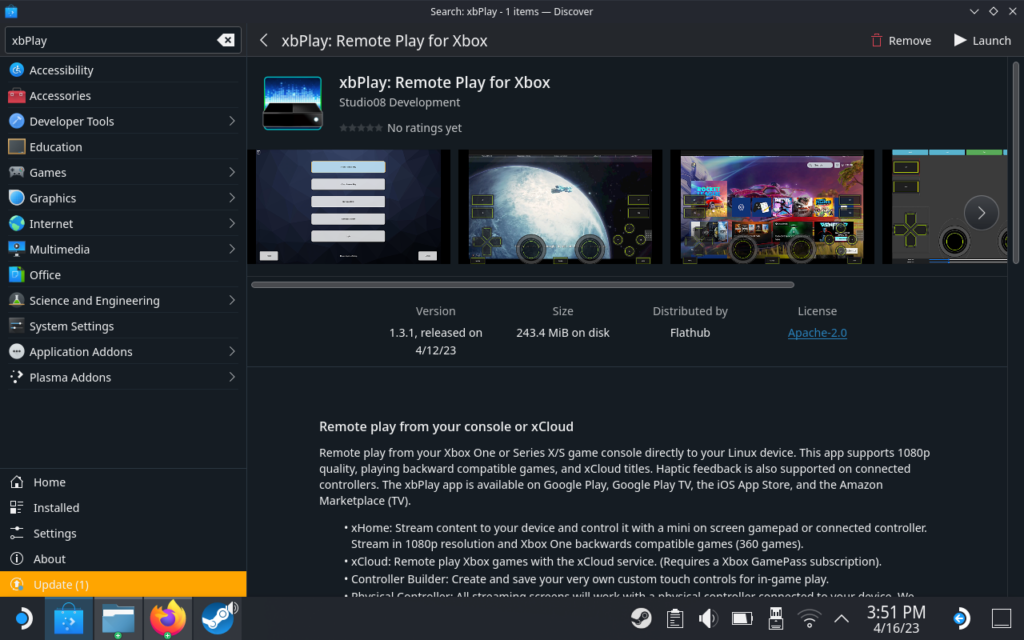
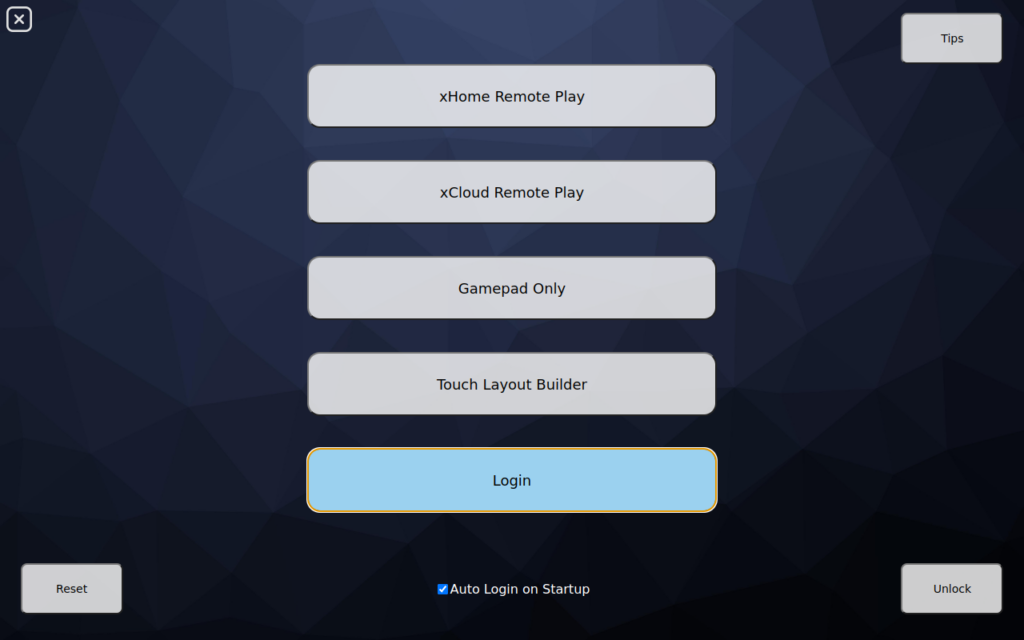
Step 2: Launch xbPlay through the Discover Store or in the Application Launcher (under the Games tab). Check the "Auto Login at Startup" box at the bottom and then click on the login button. Go ahead and log into your Microsoft account and hit "Yes" to the Stay Logged In prompt.
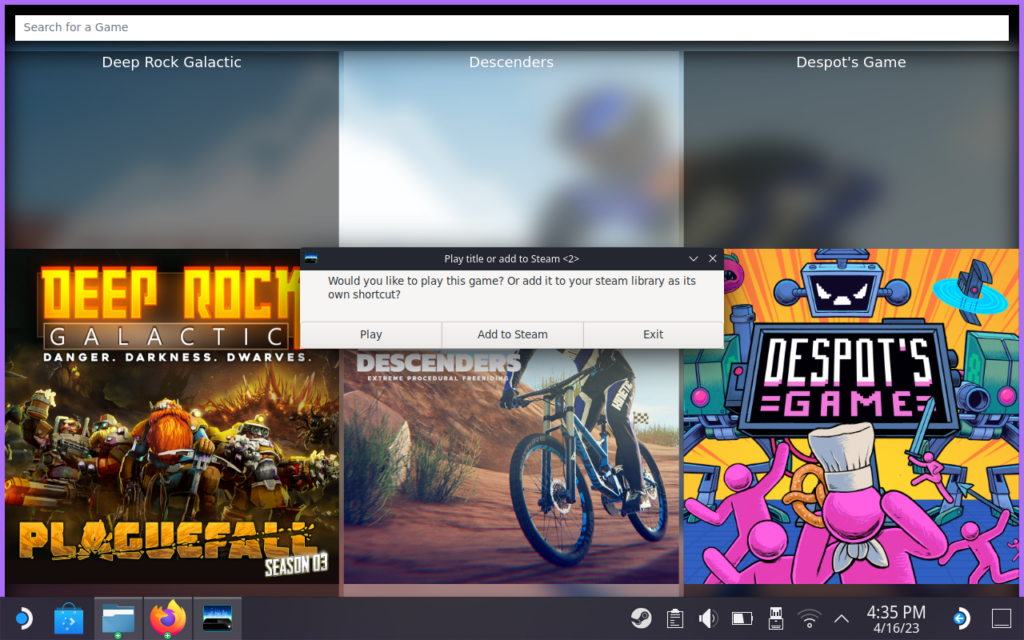
Step 3: Once logged in, go ahead and choose "xCloud". Pick a game and press "Add to Steam". You can also search for specific games in the top bar or just keep going to the right to browse. The game will be added to Steam when you go into game mode.
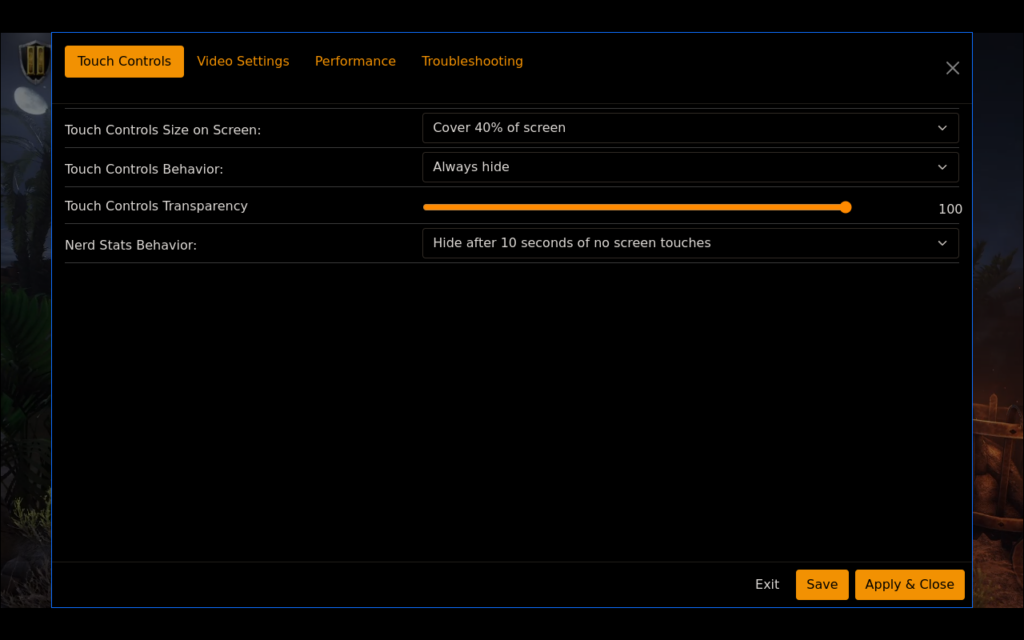
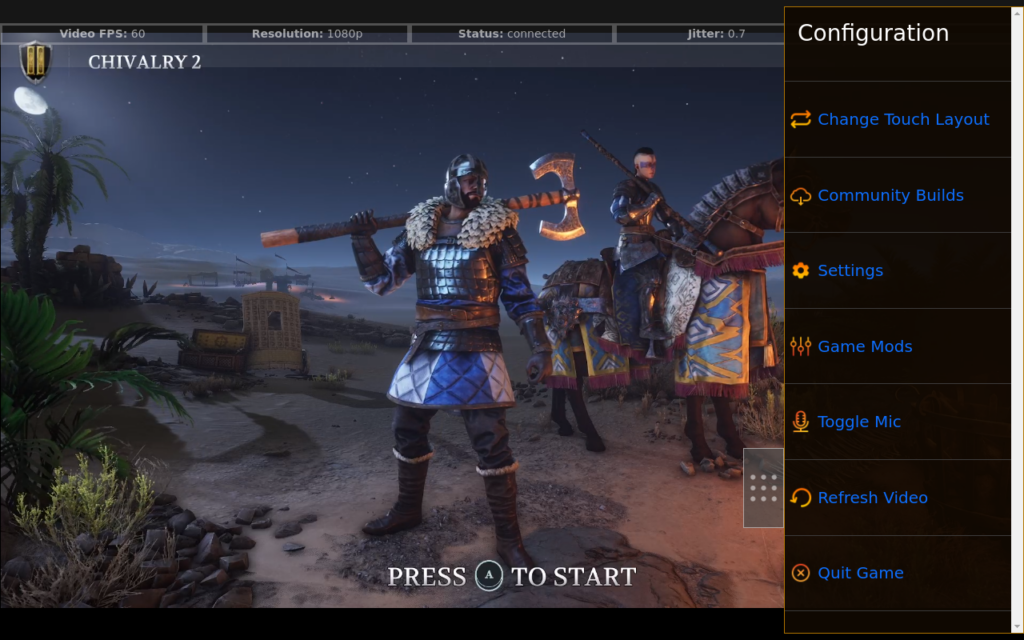
Step 4: Go ahead into a game and click on the button on the right to open up the menu. Go to settings and into the Touch Controls tab. Make sure the Touch Controls Behavior is set to "Always Hide" to make sure the controls aren't overlaying and see the screen fully.
And you should be all ready to go! Just go ahead and add whatever individual games you would like to Steam and you are all set. xbPlay does have some unique features to it like game mods and an expansive list of settings, including being able to easily change the streaming resolution to save on bandwidth, if the stream is a bit slow! Again, the full version will cost $5, but it is a one-time fee.
And there you have it! Those are the ways we found to stream Game Pass games onto your Steam Deck. Each method has its pros and cons, and while I personally recommend the way Microsoft mentions to do it using Edge, the other ways are great in their own right. As long as you have a Game Pass subscription, you can use each of these methods for free and try them out, though xbPlay has a fee if you want to play more than 20 minutes.
If you enjoyed this guide, be sure to check out the rest of the content on SteamDeckHQ! We have a wide variety game reviews and news that are sure to help your gaming experience. Whether you're looking for news, tips and tutorials, game settings and reviews, or just want to stay up-to-date on the latest trends, we've got your back!



It also runs well on chrome, which is already installed on my deck!
Just replace com.microsoft.edge with com.google.chrome in the flatpak command shown above, and everything should run fine.
You can also use the same startup command as for edge for the full screen startup 😉
This guide was absolutely wonderful! I now use and absolutely love the xcloud experience. Sure there are still features that need to be fixed and not having access to all the games does lower the value but for me personally I love it and will probably use it for a few months and play the games I'm interested in. Thank you HQ!
What’s the link for xbPlay
xbPlay is on the Discover Store on the Deck!