If you haven't yet, follow us on X (Twitter), Mastodon, or Bluesky to know when we post new articles, and join our Reddit or Subscribe to us on YouTube to check out our content and interact with our awesome community. Thank you for supporting us!
So you have just updated your Steam Deck to the newest client and want to start recording your games and sending them to your friends. However, it isn't the most straightforward, and while it is easy to record your footage, finding it, cutting it, and exporting it can be a bit harder. So, I wanted to create this guide to help you navigate the Steam Game Recording feature and make you aware of its limitations. Yes, there are some limitations (especially for clips you can send to your phone or friends).
What Is The Game Recording Feature Exactly?
Before getting into how to use it, let's start with what the feature is. Steam Game Recording is a new feature of the Steam client that allows you to record gameplay of your games directly within Steam with as little of a performance drain as possible. It tries to use minimal CPU power with GPU encoding to maximize performance while also working with any Steam and non-Steam game. While in Steam, you can edit clips and send them to friends, and some developers can even enhance their games with special features to see highlights or events on your recorded timeline.
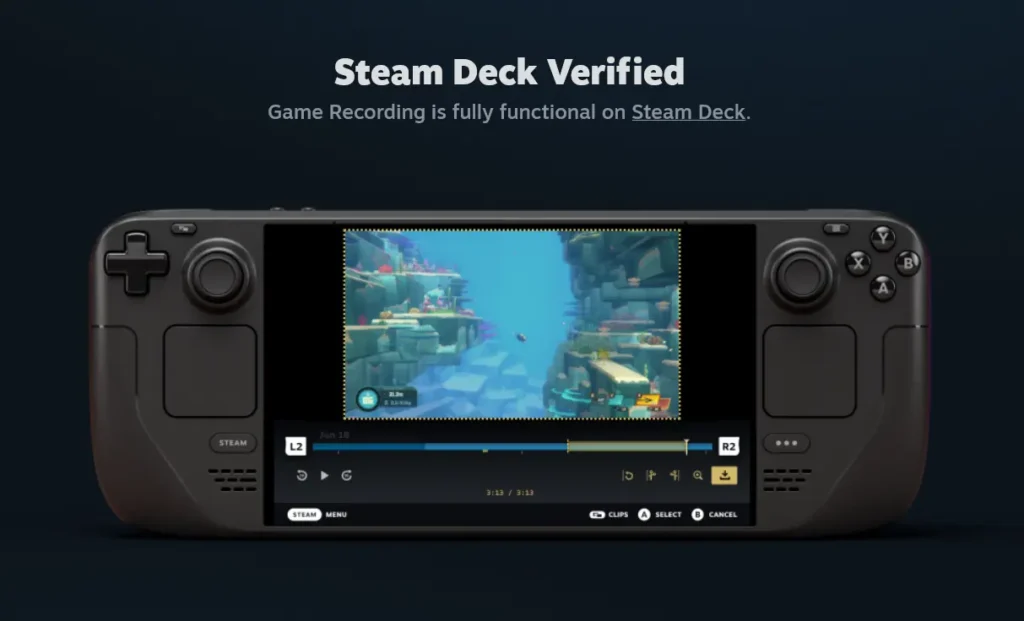
It's all packaged nicely, and it's a great new feature overall, but there are some limitations to go over.
How To Record A Game
First, let's go over how to even record the game you are playing. By default, Steam assigns the "Steam + A" shortcut to start and stop recording while in-game. So, when you go into any game, you just press the "Steam + A" shortcut to record. A little notification should appear in the bottom right of the screen when you start and stop, and the recording won't pick this up. When you are done recording, the clip will now be in your "Media" tab in your client.
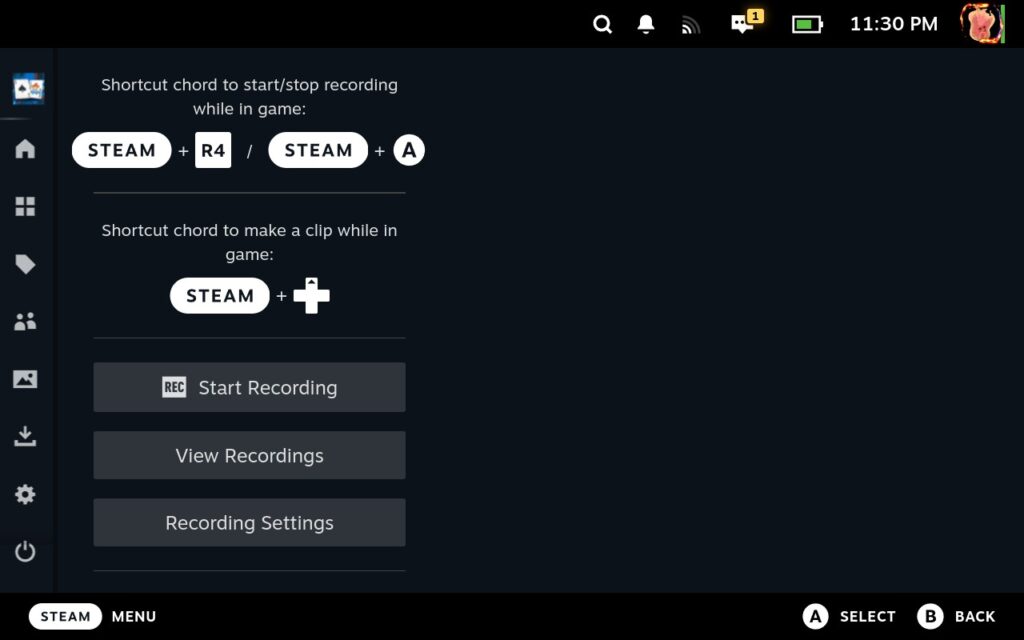
While recording, you can also press the "Steam + Y" button to add a timeline marker so you can easily figure out where to clip the recording later on, or press "Steam + Up-Dpad" to create a clip. The latter of these two did not work for me specifically while recording a game of Balatro, but the timeline marker did.
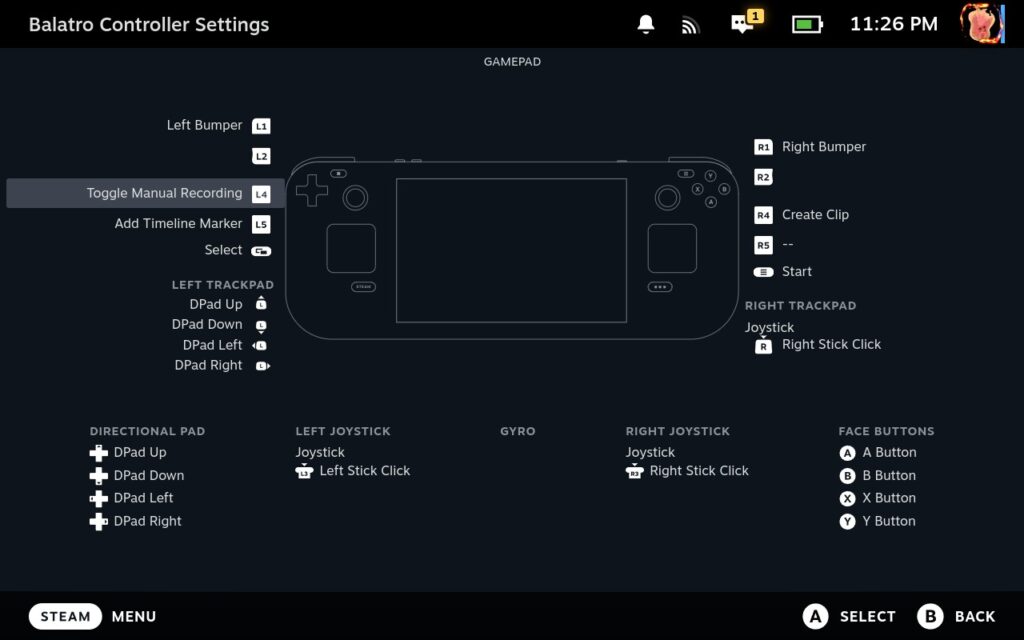
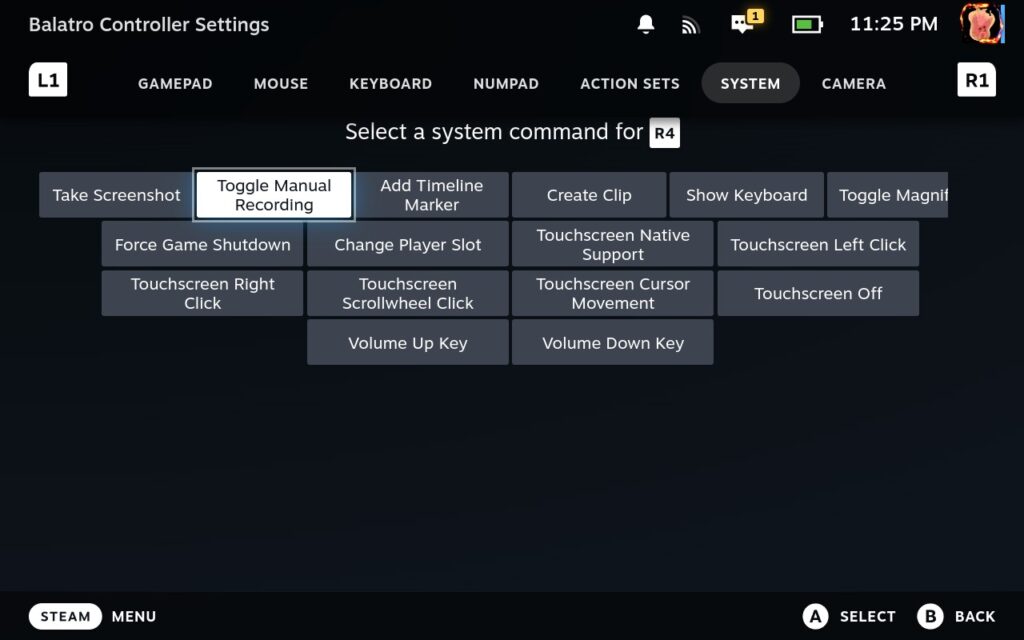
You can also assign these actions via Steam Input and assign a different button entirely to do it. For me, I went and assigned one of the back buttons (R4) to Toggle Manual Recording, but you can also do this with "Add Timeline Marker" and "Create Clip" if preferred. You can find these in the System tab when changing your controller settings, and I recommend it to make it easier to use.
The Different Types of Recording and Settings
Now that we know how to record in-game, I want to go over all the settings you can change for your recording. These settings can be found in the Game Recording tab in your client's settings.
There are two types of Recording Modes: Record in Background and Record Manually. The latter of the two is more obvious and forces you to manually activate recording (which I went over how to do above). As for Record in Background, choosing this will automatically record your game and keep the last two hours (or 120 minutes) in a temporary format for you to replay and clip before it deletes.
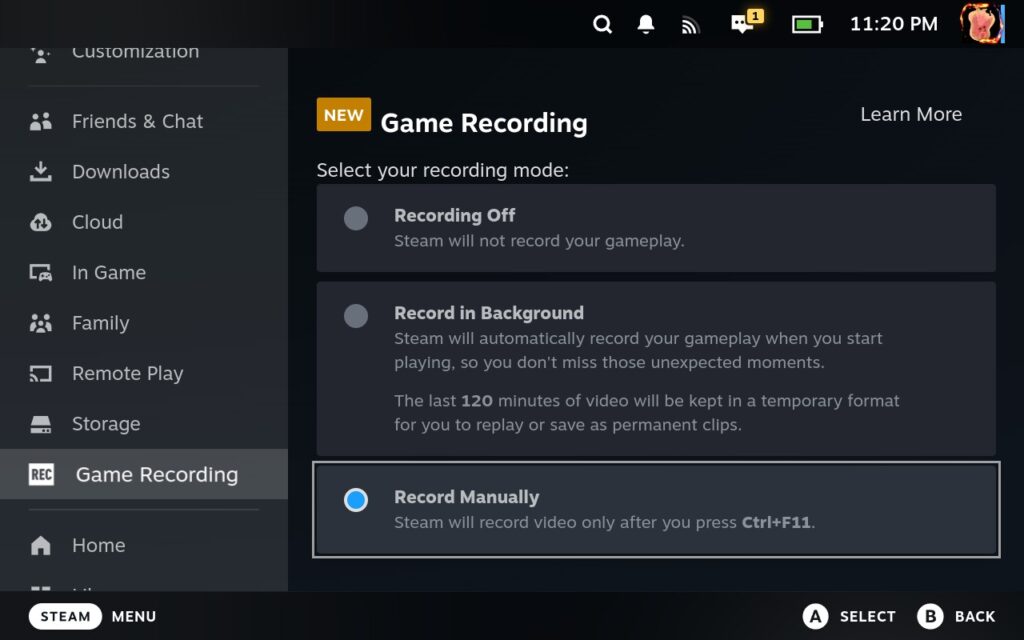
A little further down, you can change the recording quality, as well as the maximum framerate and video height. I would keep the Maximum Video Height at "No Limit," so it automatically sets the aspect ratio correctly, and the maximum frame rate only has a 30 and 60 option. On the other hand, recording quality can be changed between Low, Medium, High, and Ultra. Ultra will look the best overall but take up the most space, while Low will take up the least amount of space, but it isn't the best looking.
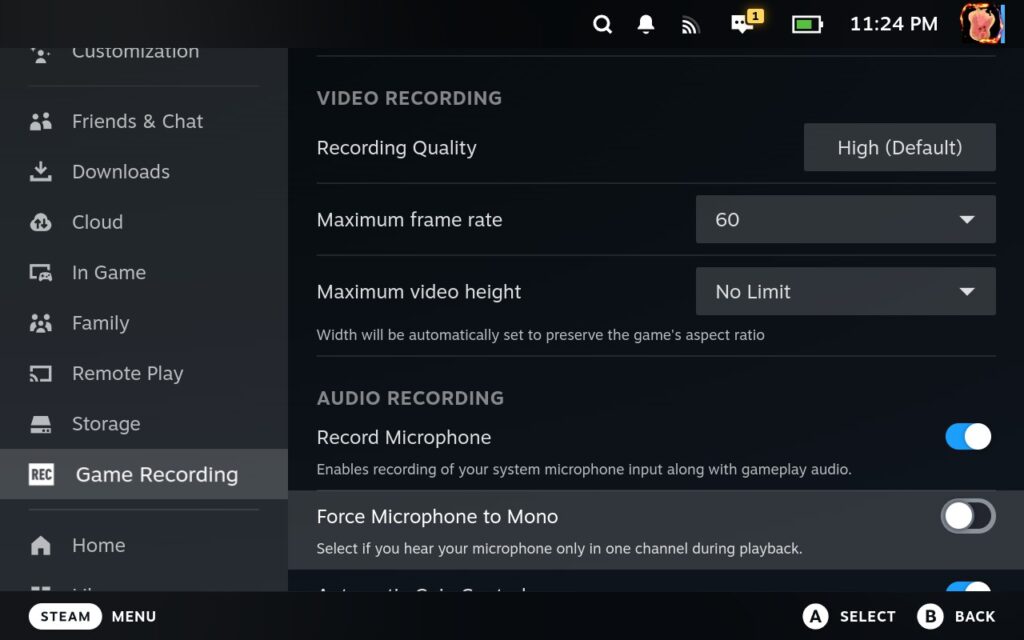
You are also able to plug in a microphone and record yourself as well as the game audio. By turning this on, you are able to choose the device that the audio will record from, as well as force it to only one audio channel (Mono) instead of two (Stereo) and have the system auto-adjust the recording level for consistency. I don't see any reason to change the audio channel away from Stereo, so I would leave it off, but keeping the other two on is great in general.
Editing Your Recording
So now you have your wonderful recording, but it is 20 minutes long, and you only want a short one-minute clip from it. That's where editing comes in, and it's relatively easy to do! First, you have to get to your clip, which you can find in your client's Media section. Once you click on it, you can scroll through your video and watch it, as well as make clips and cut it.
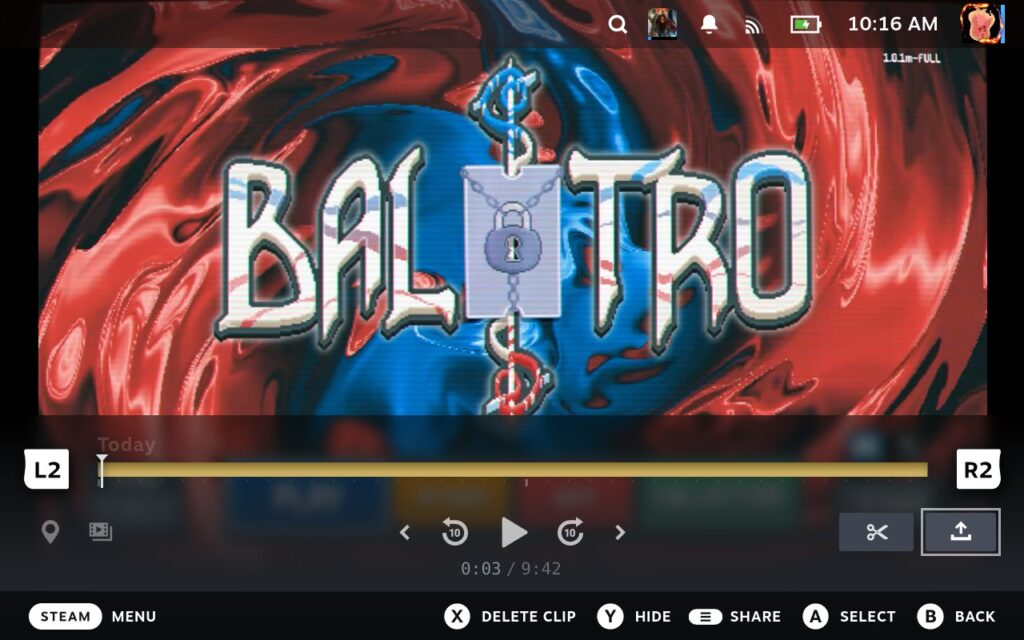
This is also where you will see some differences in how the timeline looks for supported games. You may see random icons on the timeline or the color change a bit based on whether the developer added in special features to highlight what happens in-game while recording.
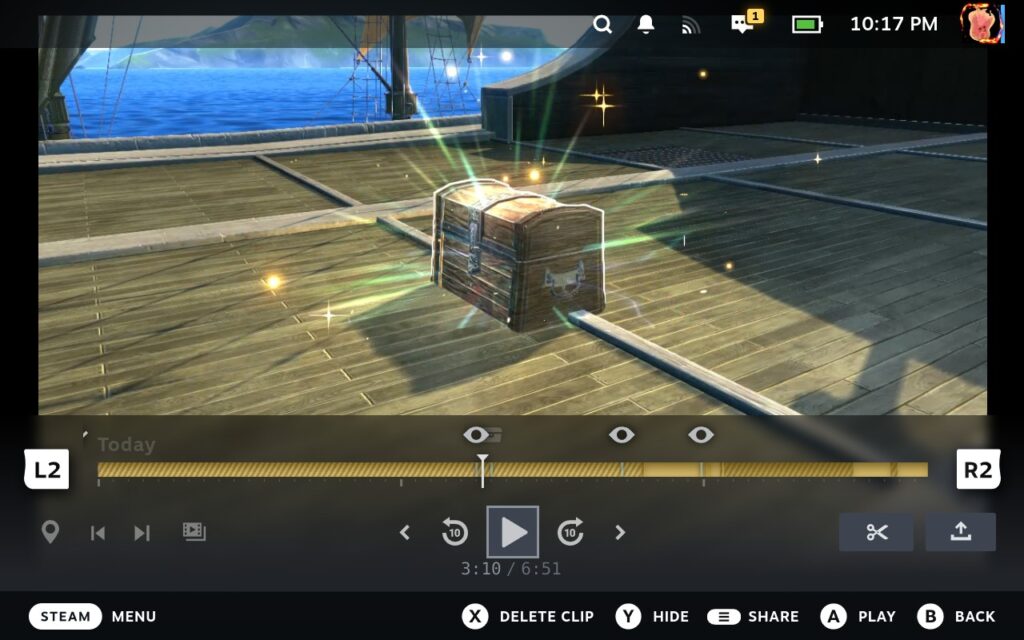
To do this, get to a section of the recording you want to clip and press the Scissors button in the bottom right. This will take you to a new screen where you can edit your clip's length and choose where it starts and finishes. The clip's length goes from 10-12 seconds from wherever you started. You can use the two new scissors icons at the bottom right to increase the length. The one with a dotted line on the left will adjust the start of the clip, whereas the dotted line on the right will adjust the end of it. You can use the left and right triggers to move along the timeline to align the clip the way you want to, and then use those buttons to set the length.
The button to the left with the circle and dotted line will let you watch your clip from the beginning of the clip's defined length, while the magnifying glass will zoom in to the clip so you can make some finer changes.
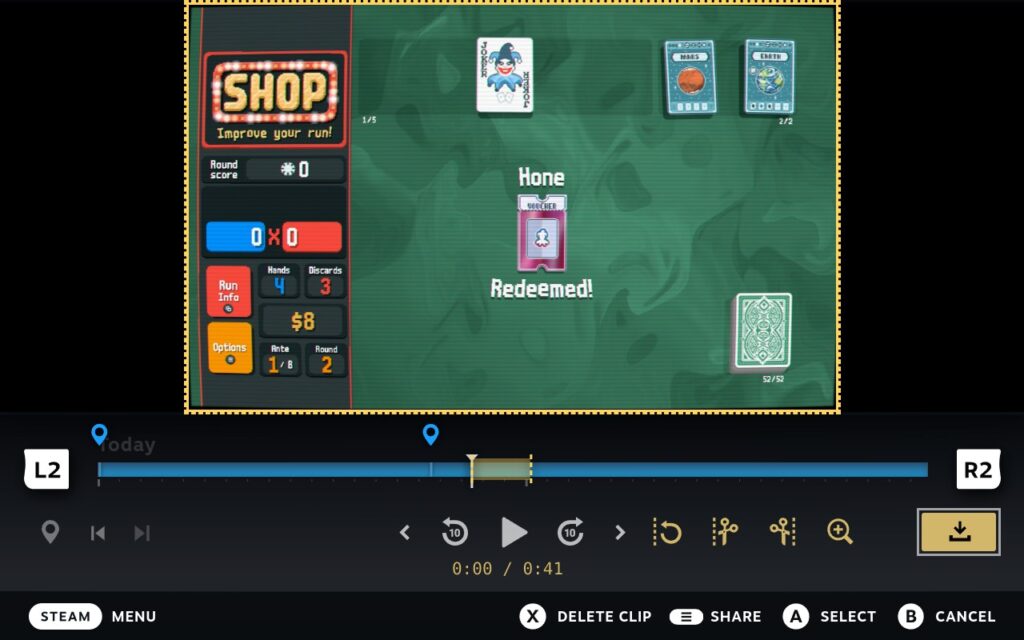
Once done adjusting your clip, click the "Save" button on the bottom right hand corner and it will give you the chance to "Save Clip" (which deletes the old recording) or "Save new Clip" (which saves it as a completely new clip while keeping your recording in-tact. There are some sharing options as well, but we will get to those momentarily.
On the left-hand side of the screen, you can set markers in your timeline to make sure you come back to those spots.
Sharing With Friends
So, you have your clip and are ready to share it with your friends! There are multiple ways to do this, and they are all pretty easy.
So, there are four ways to share your clips. You can send it to another device on your network, send it directly to your phone, create a QR code link to check out the clip, or share it directly to a Steam chat. When you send it directly to a device, you have to log into your account on the other device, and once it is sent, it will appear in your Screenshots and Recordings library. Send to phone will allow you to send through your Steam Mobile app, while the QR code link allows anyone to scan the QR code and download/view the clip. Alternatively, you can just upload the clip to a chat you have going on with someone.
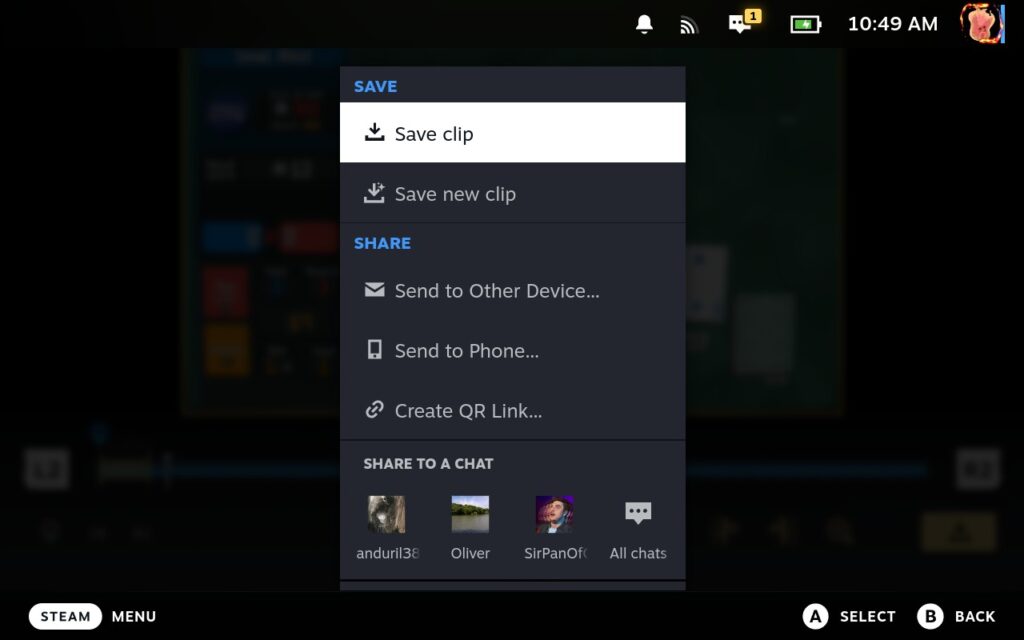
However, there are some limitations to note here.
You can't send clips that are too big or too long. The three quick options you have to share all have limits. If you want to send it to your phone, share it in a chat directly, or create a QR link, you must keep your clip at a maximum length of 59 seconds. To send to another device, you must keep your overall clip size below 100MB. There are ways to still use bigger recordings, which will be very useful for content creators, and I will go over that after this.
Exporting Bigger Clips as MP4 Videos
If you are a content creator, you may want to record gameplay for videos, and it's a great way to do it. However, the recordings aren't in MP4 format when you record them and are in a format only Steam can read. Thankfully, there is a way to export them, but it is a bit of a process and one that can't be done from Game Mode.
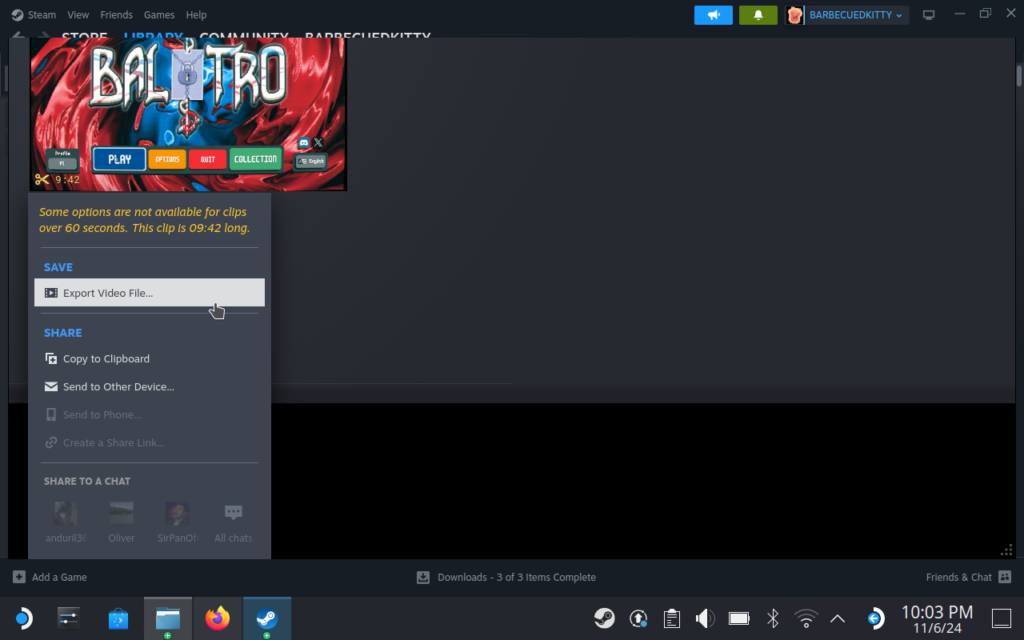
First, you will have to head to Desktop mode. Once you do, go to your Steam library and view your Recordings and Screenshots (click the View tab at the top and select Recordings and Screenshots). Once there, right-click the clip you want to use and select "Share." There should be a new option at the top to "Export Video File," so go ahead and click on that.
You will then be taken to a new screen where you will change some exporting settings. There are three tabs for exporting your video: Original, File Size, and Custom. Original is the easiest one and will just export the clip without any changes, while File Size allows you to compress the clip and lower the quality before exporting it by changing the file size on a slider. Custom gives you more options, like changing framerate, Bitrate, and Codec, to customize before exporting it.
Each option lets you change the clip's name and where it is saved, but it should default to the home/deck/videos folder. At the top, you will also see an estimated file size and bitrate as well as the length, resolution, and frame rate.
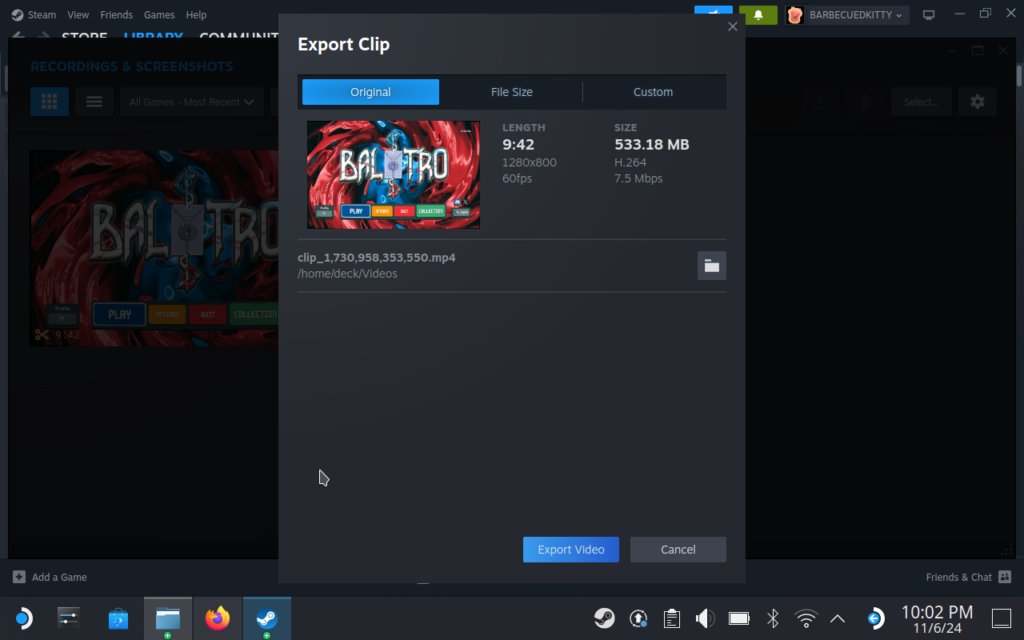
Once you have decided, hit "Export Video," you should be all set! It takes some time for it to export, depending on how long the clip is and how big the end file will be, but it works!
And that's everything you need to know about Game Recording! It's possible the feature will change a little bit in the future, but this is everything you can do with it for right now.
If you enjoyed this guide, check out the rest of the content on SteamDeckHQ! We have a wide variety of game reviews and news that will help your gaming experience. Whether you're looking for news, tips and tutorials, game settings and reviews, or just want to stay up-to-date on the latest trends, we've got you covered!


Is there a way to have a keyboard shortcut for create clip?
I play games on mouse and keyboard a lot and right now the only way I can record is by hitting the "A" button on the Steam deck itself which messes with the game and makes it think I'm now using a controller
It looks like currently, you can change the hotkey for game recording and recording in background, but nothing for clips. I will look around and see what I can find out!
Does anyone look at this site?
Our analytics say yes, lots of people are looking at our website 🙂
im unable to right click and find the share option on my deck? I only get view or delete?