Emulation is one of the essentials of the Steam Deck and Nintendo games have always been at the forefront of that. With the Deck though, we are now able to emulate more intensive games portably that couldn't have been possible before. One of the biggest of those is Wii U games. These games are a bit more intensive and wasn't easily able to be run on a device like this and it is wonderful.
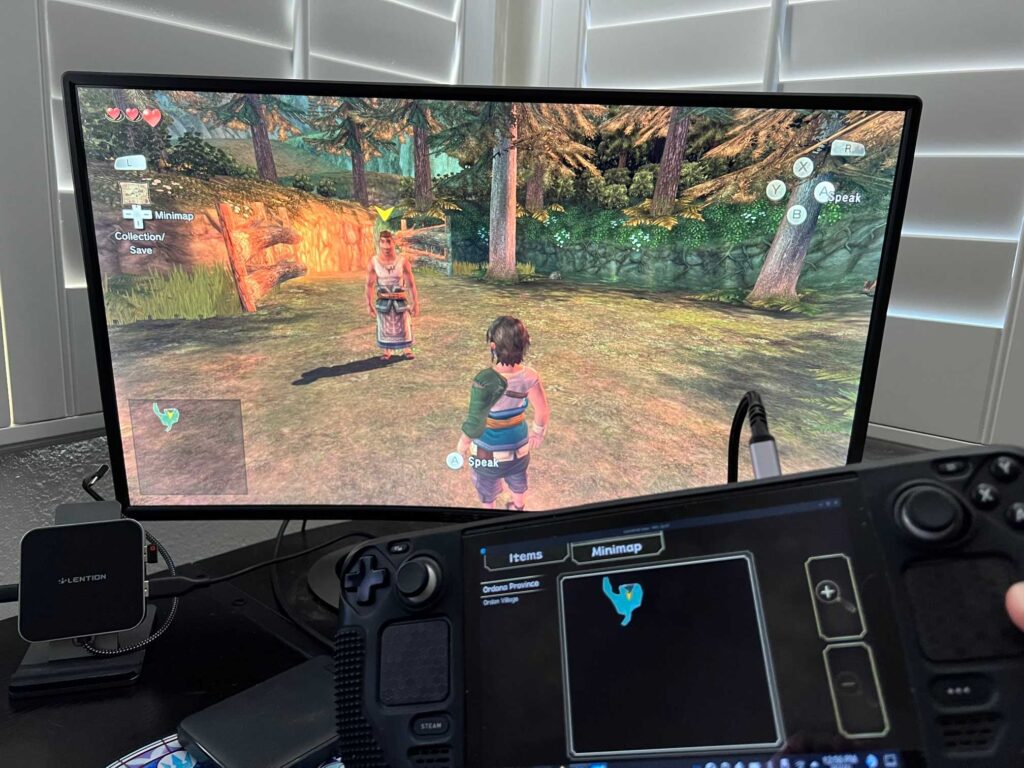
Now, while you can play these games on just the Deck screen, there are some that take advantage of the Wii U Gamepad + TV setup. And today, I am here to show you just how to do that using Cemu, the Wii U emulator! This also must all be done in desktop mode, this can't be done in Game Mode. We also are using EmuDeck's install for parts of this guide. If you are not using EmuDeck, we assume you have Cemu on your Deck already.
Required Physical Items for this Guide:
- Steam Deck (Duh)
- External Monitor (We will be using one with HDMI inputs)
- HDMI Cable
- HDMI to USB C connector
Installing and Updating Cemu - the Wii U Emulator
So first, we actually have to install Cemu. We did create a guide on How to Setup Emulation using EmuDeck, so you can check that out to set it up fully.
For this guide, we are using Cemu 2.0 Experimental as it is able to utilize Vulkan. Assuming you are using EmuDeck, all you have to do is go into the Tool Upgrader, check all the boxes you want to update, (though we will only be checking the Cemu box), and then choose the 2.0 option at the bottom. Once you hit "Okay", it will update on its own!
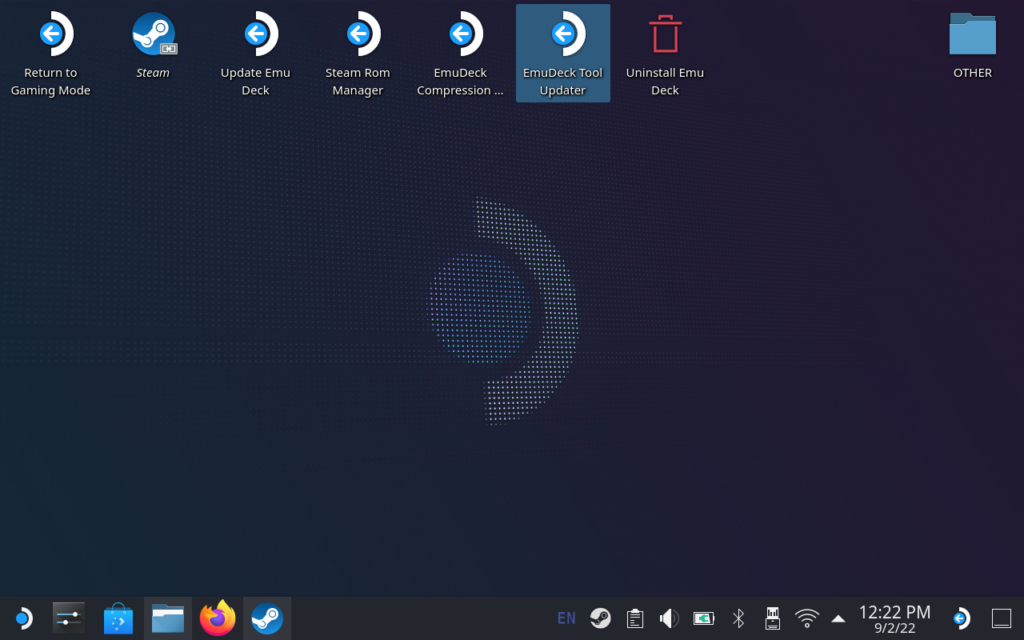
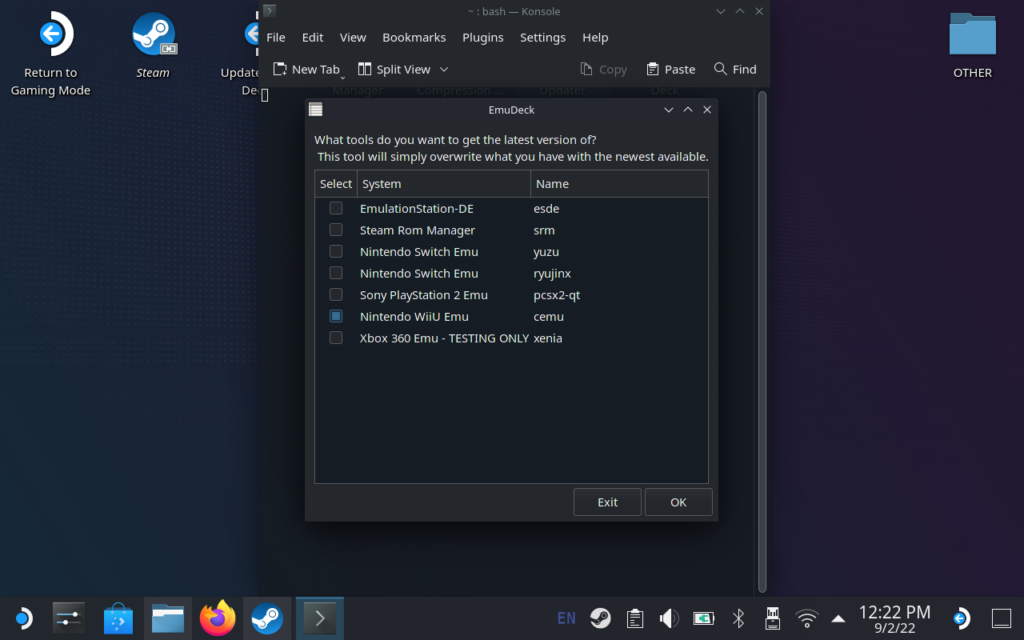
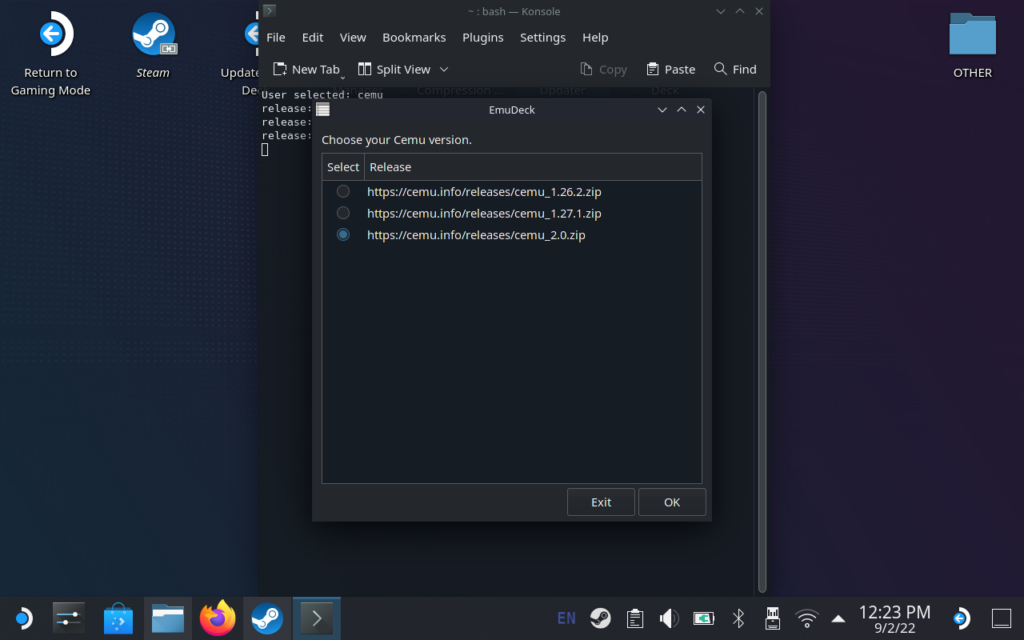
Now, you will need to add the Cemu.exe to Steam as a non-steam game. To do this, click "Add a Game" in the bottom right corner of Steam and then "Add a Non-Steam Game". From there, you will have to navigate to where Cemu is installed, make sure the bottom is filtered to "All Files", and then double click and add Cemu into Steam. After that, go to the game preferences for it and make sure the compatibility tab is checked and set to Proton 7.0-4.
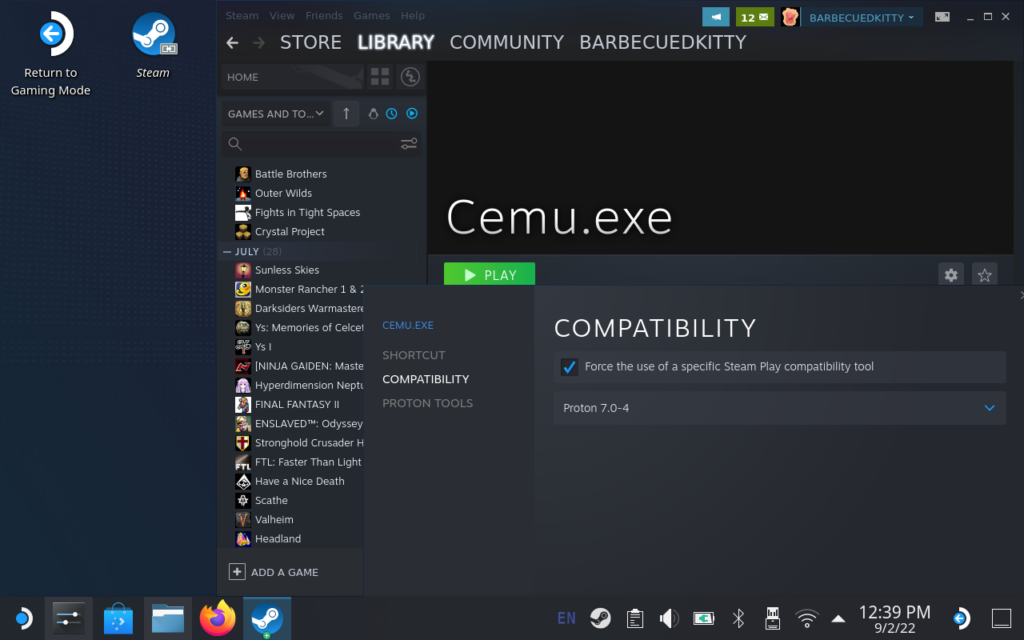
Now you are ready to set up the second monitor!
Setting Up Your Second Monitor
When you connect your Deck to a second monitor, you will want to make sure it EXTENDS the desktop. You don't want it to duplicate or make the external monitor the only one available. Making sure there is no replication or anything, you can keep your Deck's screen as the primary.
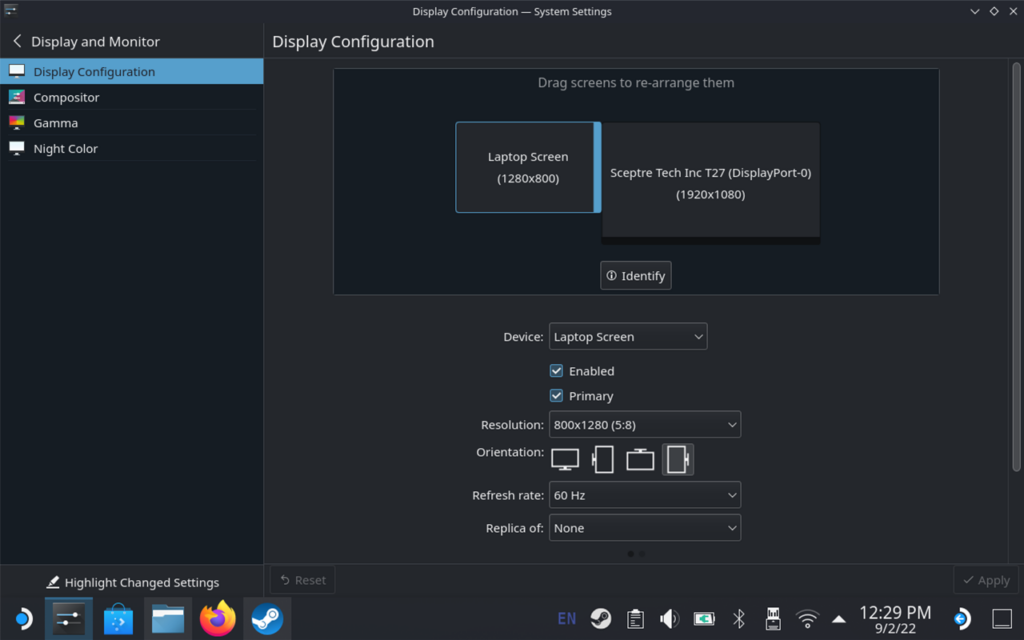
I set my 2nd monitor to be on the right side. This means, to access my 2nd monitor's screen, I need to move my cursor all the way to the right. You can change the placement however you like, as long as it is extending the desktop.
Setting Up Cemu for Dual Monitors
Setting up dual monitors for Cemu is actually quite easy and comes with a built-in way to do this. So go ahead and launch Cemu from Steam. Once you do, go up to "Options". Then, in the dropdown menu, select "Separate GamePad View".
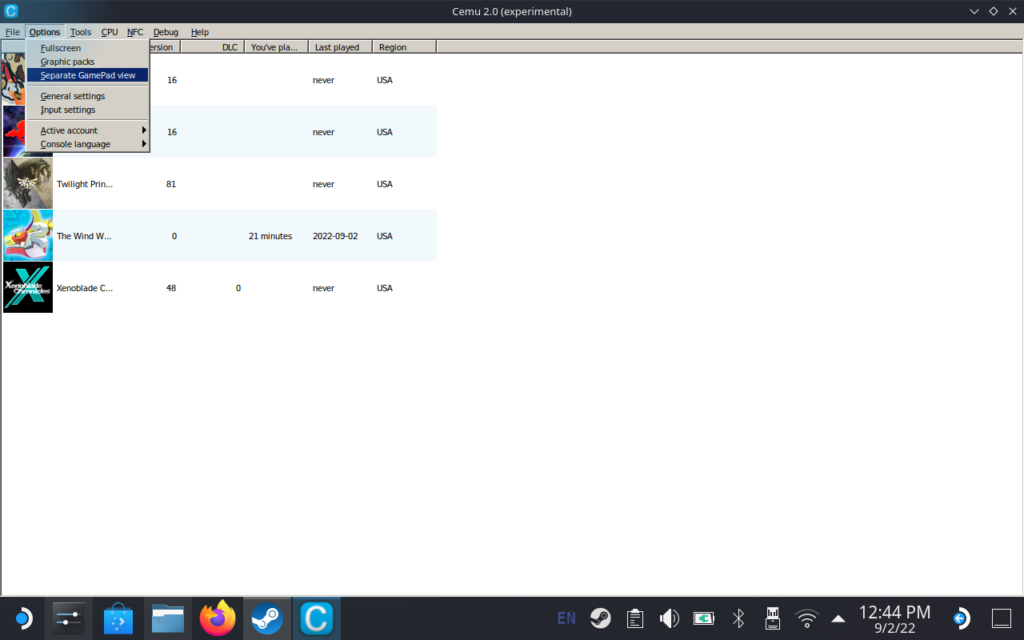
After that, you will see a new screen will pop up. Go ahead and move the main Cemu screen to the bigger monitor and make it full screen. Now make the GamePad view screen full screen on your Deck.
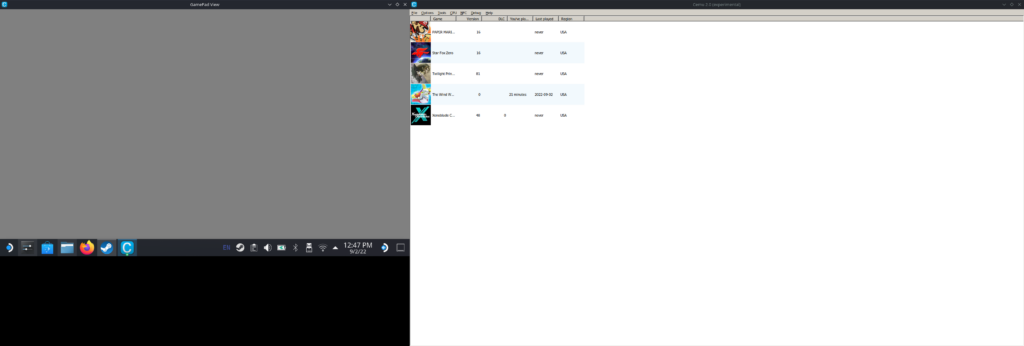
My Deck's screen is on the left while my external monitor's screen is on the right.
You can also select the "Fullscreen" option from the "Options" tab at the top if preferred. But that's it! Everything should be good to go now. Cemu luckily has the options and makes it super easy to just set it up!
Thank you guys for reading! If you enjoyed following this guide, please consider supporting SDHQ by donating on Patreon. Your support will help us continue to grow and provide the latest and best Steam Deck content!


I got it setup, but touching the screen doesn't work for making a selection on the gamepad screen. How do I fix this?
Hey I don't know how to say this but whenever I try to use the seperate gamepad view option nothing pops up. Not in game or outside. The button doesn't function as intended for me. I had installed graphics packs for several of my games like Wind Waker HD and Twilight Princess HD. This happens no matter whether I use emudeck's 1.2.7 or latest 2.0 windows build. Have been trying to figure this out cause the windows version is the easiest Ive been able to get working with gyro using steamdeckgyrodsu. The app image doesn't appear to work with that script when I tried. :).
Cemu 2 isn't on the list of versions to update to... Anyone got this working?
This should work with 1.27.1, but we will look into this as something may have changed recently.
2.0 won't show up for me, only 1.27.1
2.0 experimental doesn't show up on the EmuDeck tool updater?
Thanks for the guide, it turned out to be very clear and informative. It would be great to see similar guides for DS/3DS emulators.
We are working on one for DS, but we actually did create a guide for 3DS dual screen using Citra!
https://steamdeckhq.com/tips-and-guides/how-to-play-3ds-games-dual-screen-with-citra-and-steam-deck/