The Steam Deck has become a phenomena and truly incredible. Using it has been a blast, but there are some things that can't be done on it easily or at all. One of those things, unfortunately, is the ability to use some programs that call upon other windows-only processes or batch files (like compressing certain emulated game ROMs/ISOs). Some things must be done on a Windows computer due to support, but then you have to use a USB or external hard drive and then dock your Deck and move it over. At least...that's what you had to do before.
Warpinator is a free program designed to eliminate any sort of necessity to plug things in. This program is designed to share files, at a decently high speed, across your LAN (Local Area Network). After some initial setup, this program can be used to bring over any files you may have on your Windows computer, even full games downloaded from Steam so you won't have to download them again! So let's take a deeper dive and take a look at how it works.
NOTE: This is only for Windows computers currently. Linux can work too, but Mac cannot.
Downloading Warpinator and Winpinator
So first, before we get to transferring, we have to get our programs setup. Warpinator is what we will be using on the Deck, while Winpinator is the counterpart to be used on a Windows computer. Both of these are relatively easy to install and do not take up much time to do so!
Warpinator/Steam Deck
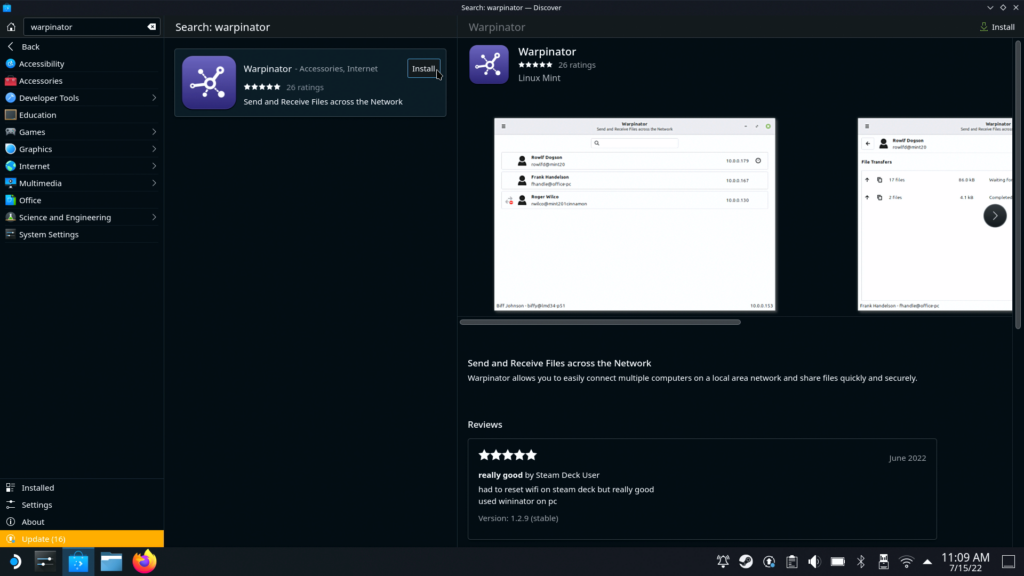
Downloading Warpinator is insanely easy. All you have to do is go to the Discover Store, search for Warpinator, and click install. That is it. You are ready to head on over to your Windows computer to download Winpinator.
Winpinator/Windows Computer
Winpinator has a bit more to it than just clicking install...it has a setup file!
Step 1: Go to the Winpinator website and download the correct installer. Usually this is the 64-bit installer for newer computers.
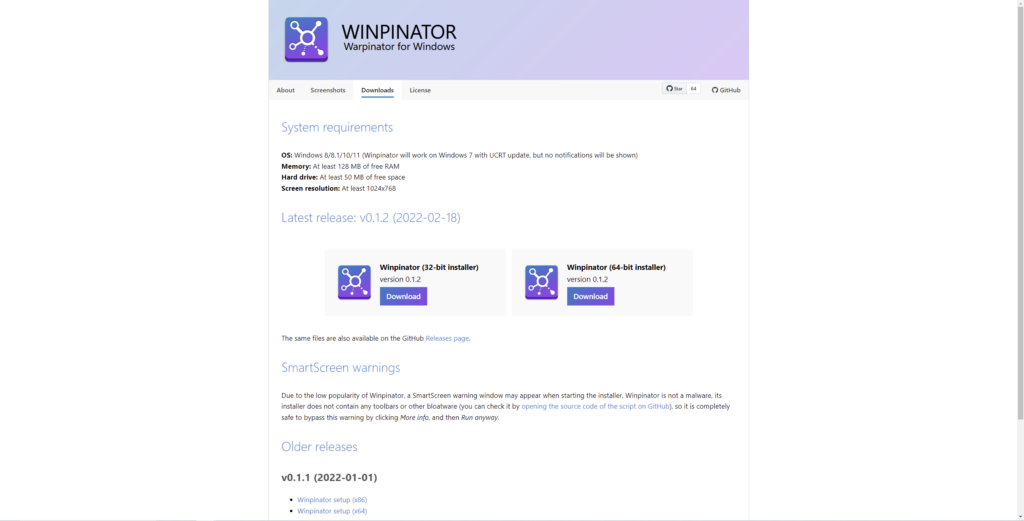
Step 2: Once downloaded, save and run the setup.exe.
Step 2.5: If you get a prompt from Windows about not recognizing the setup manufacturer, hit run anyway.
Step 3: Go through the setup, it doesn't ask about any malware or ads or random downloads, and it should be all good to go!
Setting up Warpinator/Winpinator
Now that both the programs are downloaded, now comes the setup. This is relatively easy as well, just need to make sure the programs can communicate with each other.
Warpinator Setup:
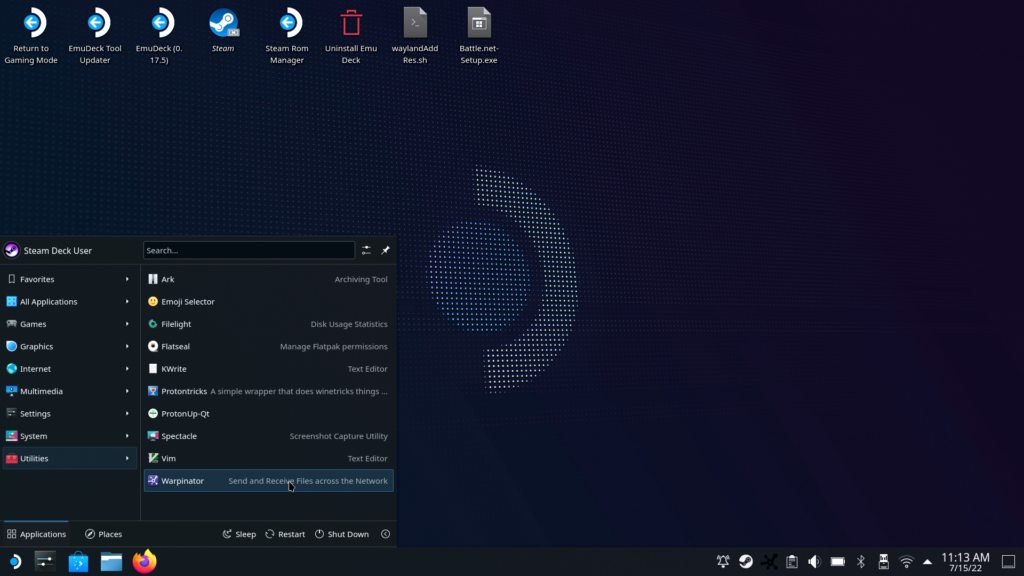
First, go ahead and find Warpinator in the programs list or search it. It should be under the utilities tab at the bottom:
Now that Warpinator is open, head over to the top left and click the three horizontal lines. This should bring up another menu, of which you will hit preferences:
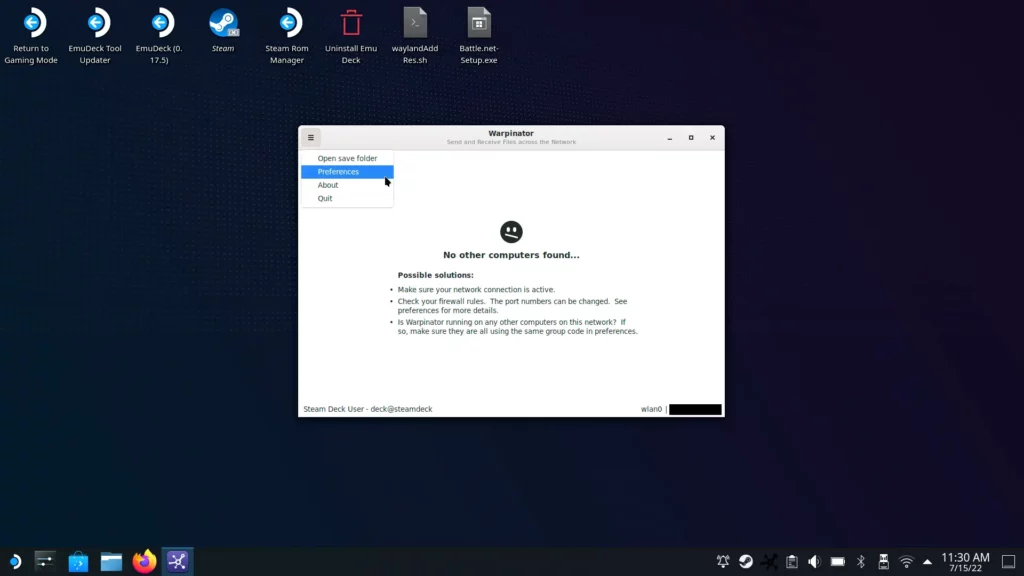
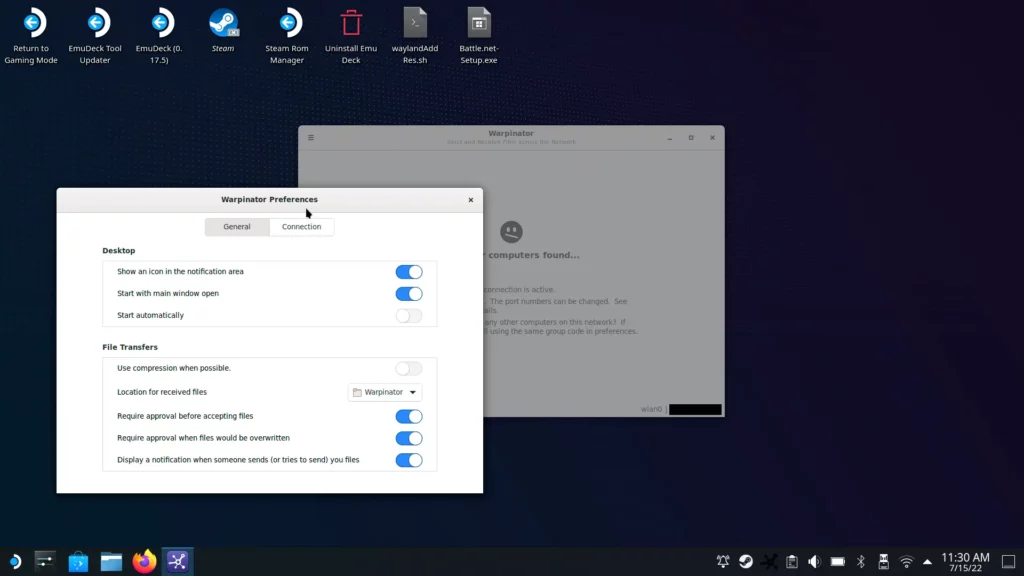
Here you will have 2 tabs in your preferences. The opening tab is the "General" tab. This tab has some general settings, including where you can choose where the transferred files will be. This can be easily changed, but I will just be keeping it going to the default folder.
The "Connection" tab is arguably more important. Here we have to make sure the group code is exactly the same as the one we will set in Winpinator. You can leave it as default, but I changed mine to "Warpinator789". You can change yours to anything you want, as long as the group code will be exactly the same on Winpinator.
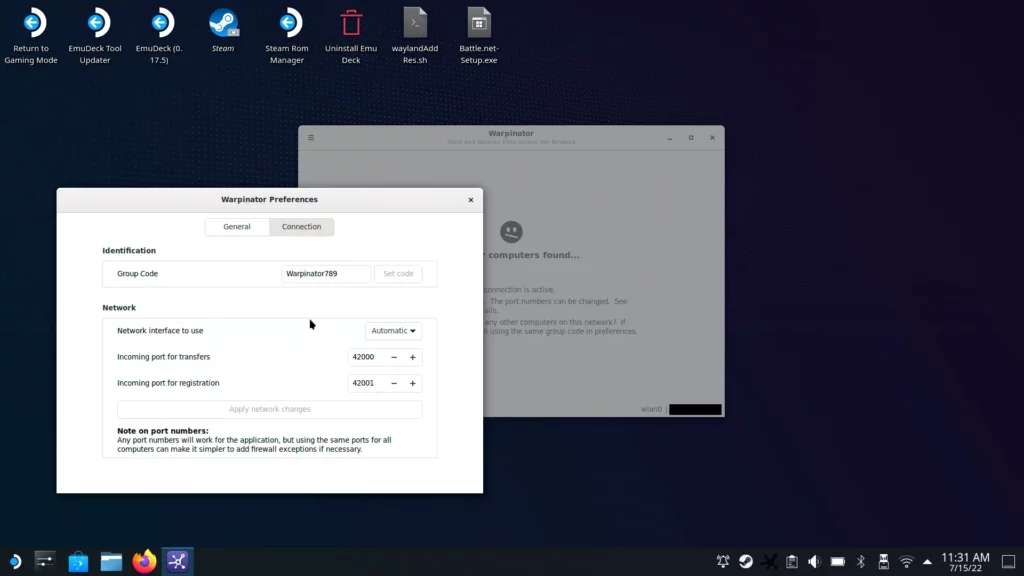
And that's it for Warpinator's setup! Let's head back over to your Windows computer and get Winpinator all ready to go.
Winpinator Setup:
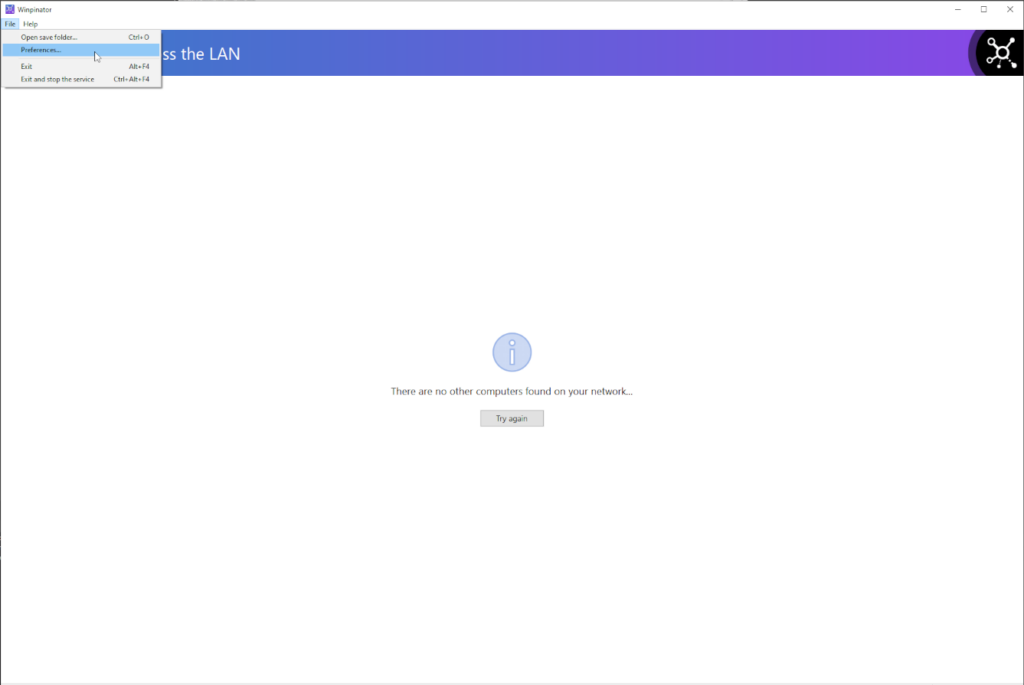
Now the setup is relatively the same for Winpinator, just located in a slightly different area. Head on over to the file tab and click it, then go into preferences there:
Next go into the connections tab and make sure the group code is the same as the Warpinator one (in this case, "Warpinator789"). You may also have to change the network interface to use. I had to change mine to my ethernet to get it working. If it does recognize the Steam Deck on your network but says it can't connect, that is more than likely why.
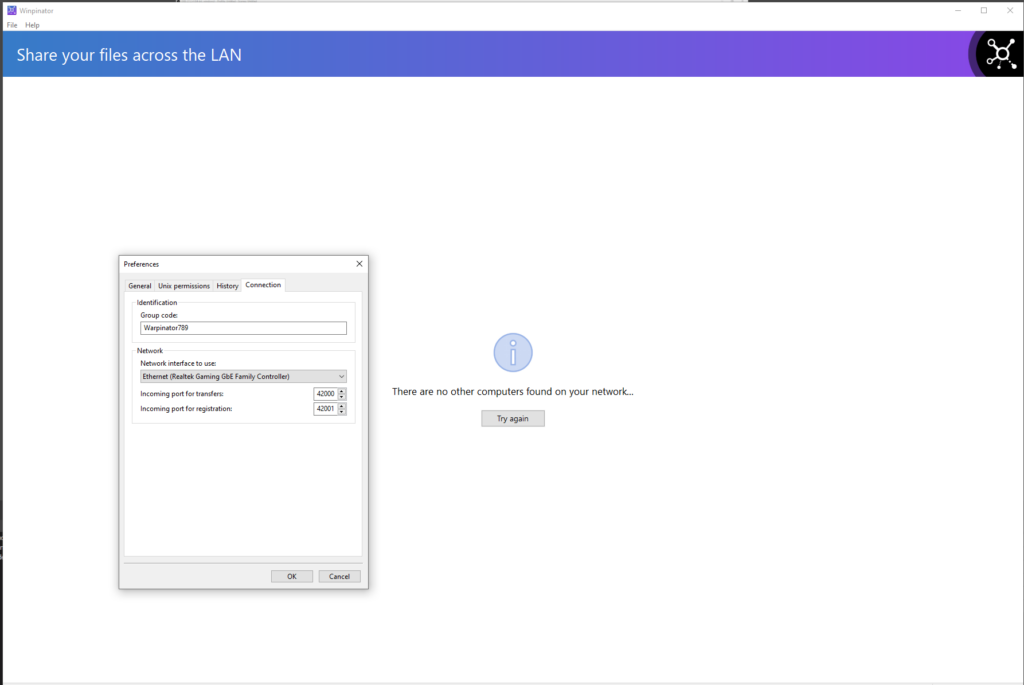
Go ahead and hit ok, you should be all good to go now! Let the 2 search for each other and then they should be recognizing each other and ready to connect!
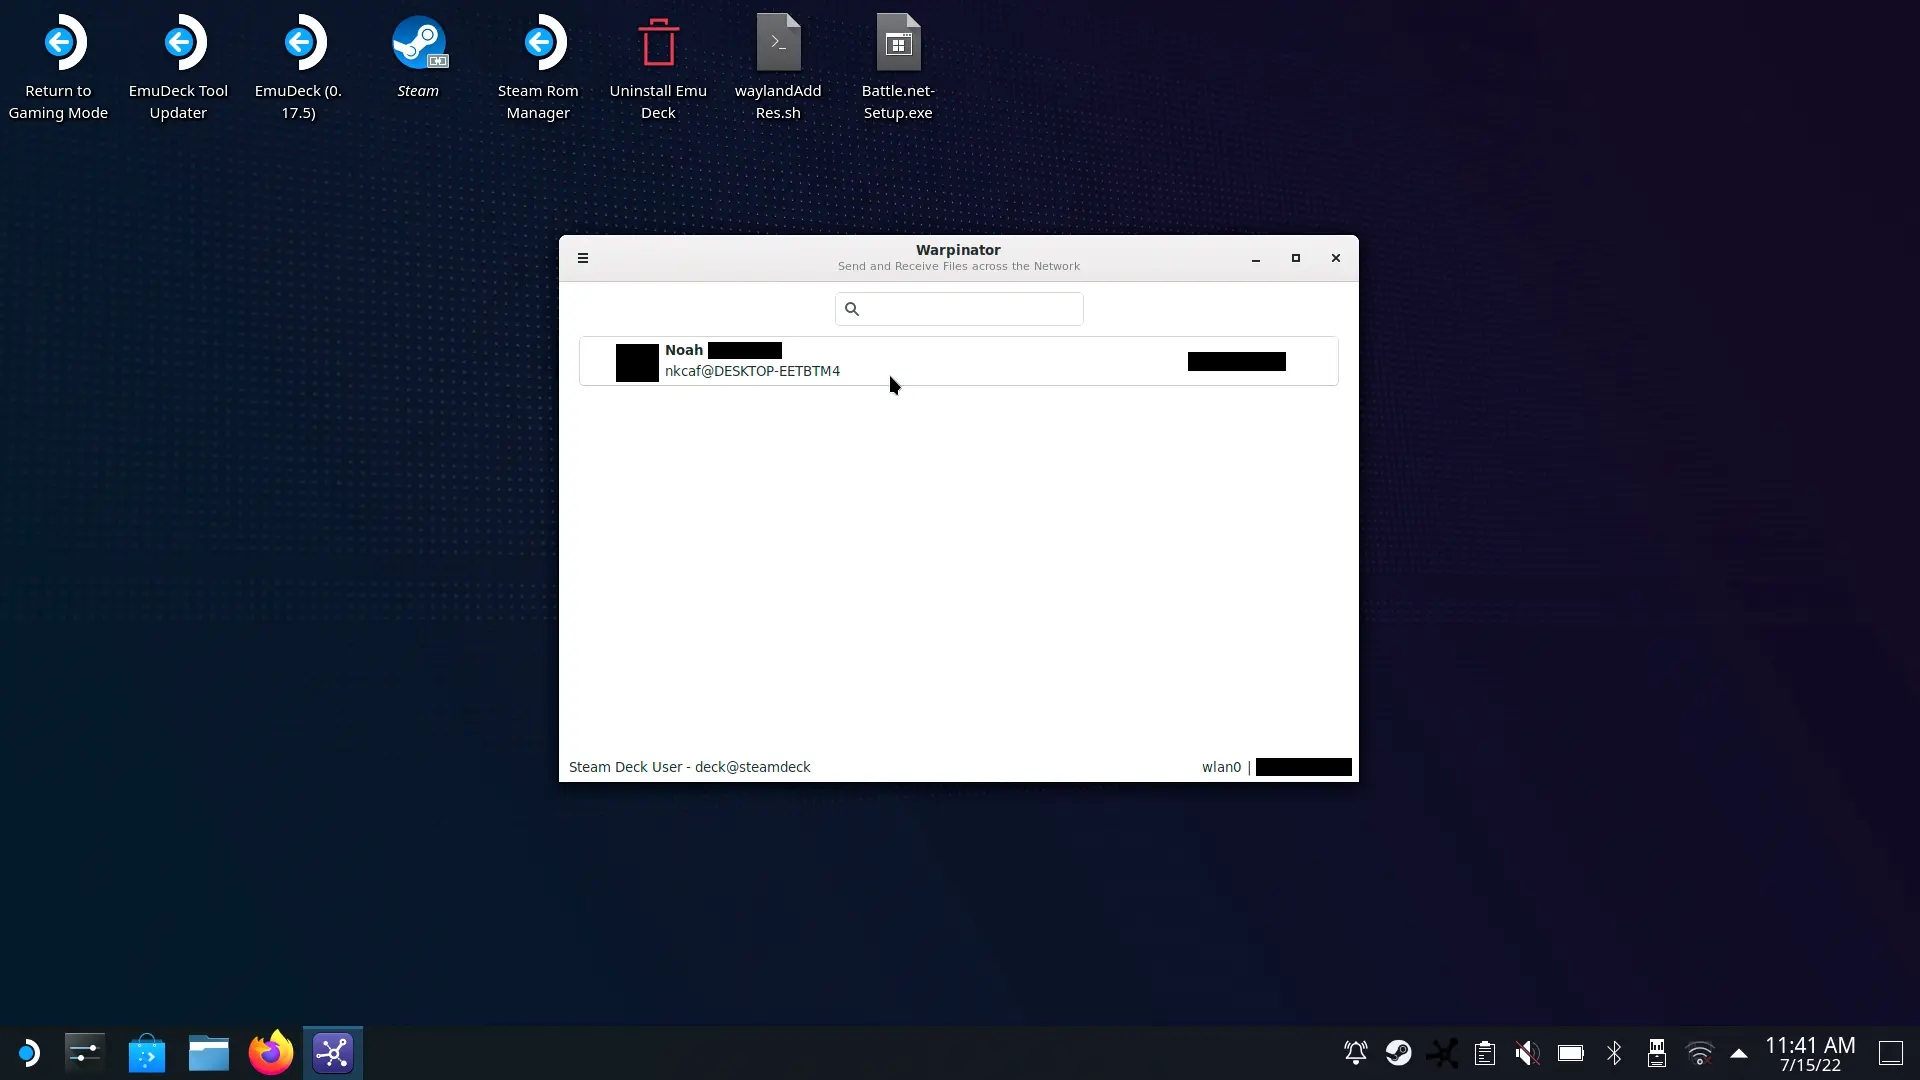
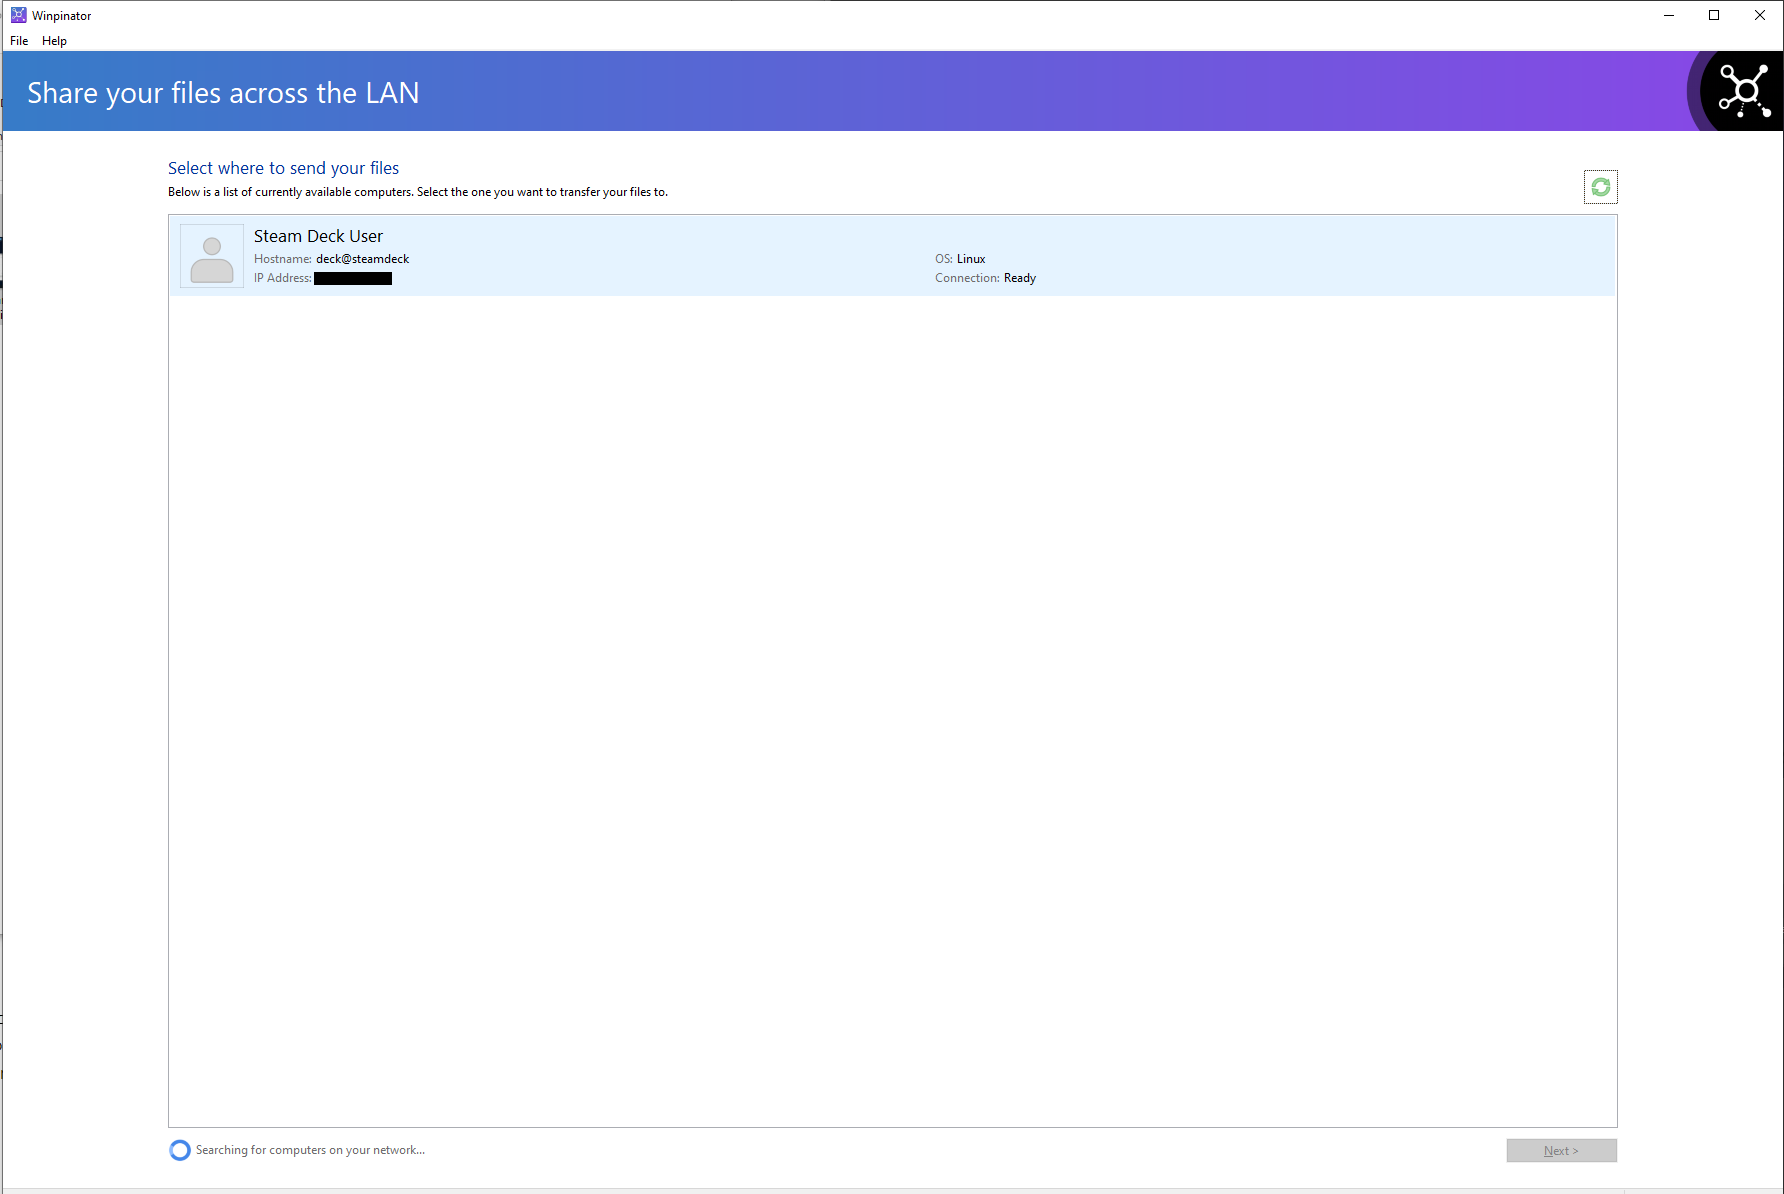
Transferring Files:
Now you should be all ready to transfer files! All you have to do is click on the names in each program and drag and drop files from the Windows computer into that middle box of Winpinator! It will automatically pop up on your Deck, where once you hit approval, the file will start to transfer!
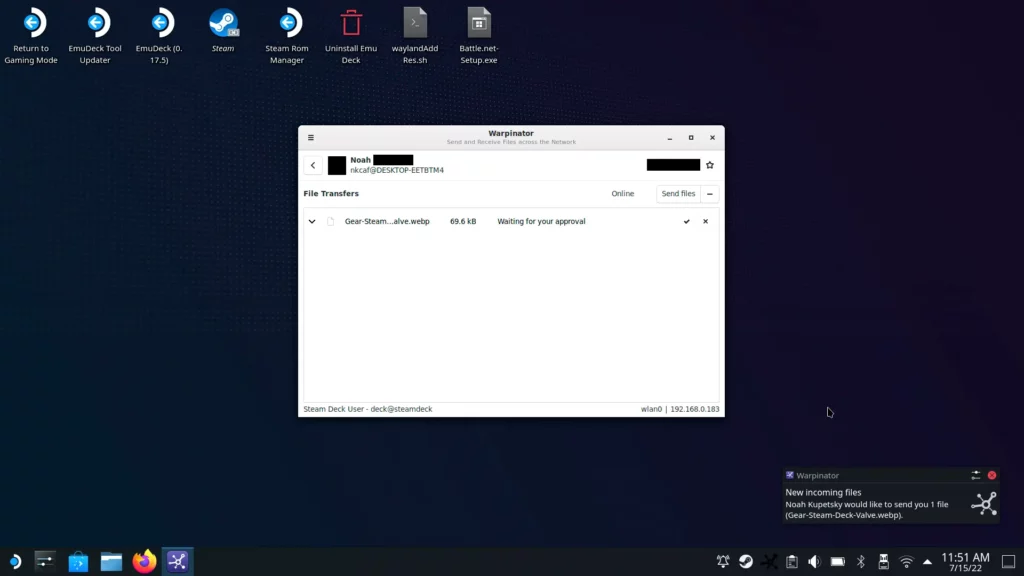
And boom. Go to the folder you assigned for everything to be downloaded and there you go. Easy and simple!
This program is super helpful and really makes file transferring from Windows to Linux/Steam Deck relatively easy. It will be essentially useful for our next guide coming up on compressing emulated games (since some need a Windows computer to do). In the meantime, you can check out our Proton GE guide to see how it could help some more unsupported games run better!


problem******
I love how you say how easy it is, but then you don't say how to get to this discover store on steam deck. No one seems to tell you. They just assume you know. Well, I don't. So tell me how to do it!
Apologies! It’s the icon in the middle of the 5 icons at the bottom left of your screen when you’re in desktop mode.
I keep getting an RCP error shortly after I start transferring.
Hi there. If you would be able to join our Discord or email us directly, we would be more than happy to troubleshoot and assist to fix this issue!
Discord: https://discord.com/invite/SDHQ
Email: [email protected]
Replace warpinator with syncthing and you are ready with less issues and more supported platforms.
I will look into Syncthing! Can't say I have heard of it until this mention. Happy to create a guide for it as well.
I followed the instructions, but the best I could do was getting my computer to find my Steam Deck and have it say it was offline. I wasn't able to transfer files. Any ideas?
Double check the Network Interface to Use on Winpinator (Windows Warpinator). I had that issue at first too and changing the network interface ended up fixing it.
hello, i have the same option, and there isn't a option to change network interface to winpinator????
on either my windows pc or steam, steam cant find my windows pc at all. and yep its offline on my windows pc??