If you haven't yet, follow us on X (Twitter), Mastodon, or Bluesky to know when we post new articles, and join our Reddit or Subscribe to us on YouTube to check out our content and interact with our awesome community. Thank you for supporting us!
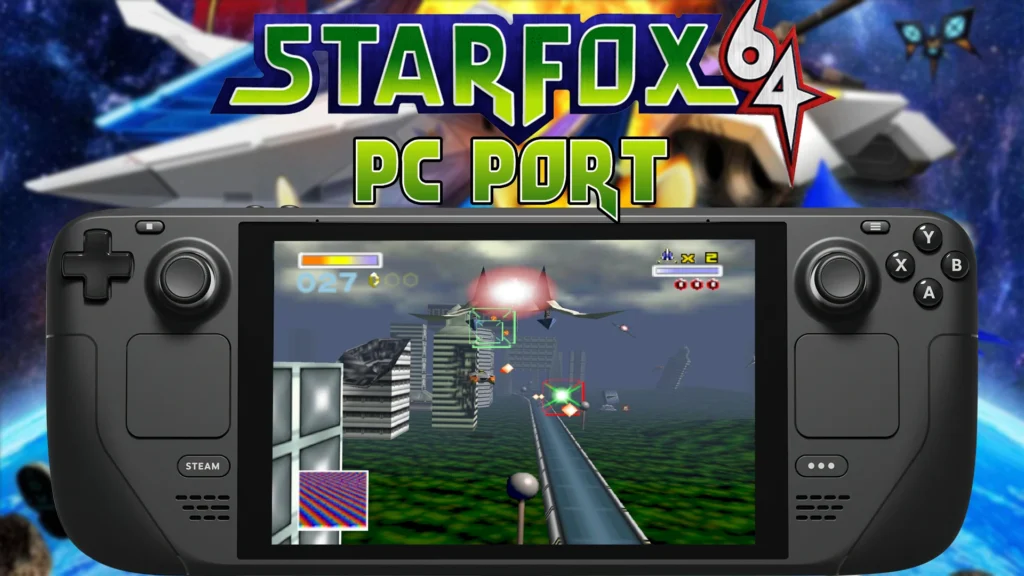
The Star Fox 64 PC Port created by Harbour Masters, the geniuses behind the The Legend of Zelda: Ocarina of Time and Majora's Mask, was released recently, and it is awesome. The project, named Starship, allows us to experience this classic in a whole new way with better support, enhancements, and higher framerate and resolution is outstanding.
When the port first launched, I tested it out and couldn't get it working on the Steam Deck. However, when there's a will, there's a way! A Twitter/X user (@Player2Joypad) commented on the post mentioning a change in the configuration file that they had to do to get it working. So, I went ahead and tried it, and it worked like a charm! However, there are some extra steps to get it working without needing another Windows computer (specifically for .bat files), and that's what this guide is for!
I have seen comments about it working with PortProton or just Proton Experimental, but none of these worked for me without the changes in this guide, so that's what I will be going with!
Theoretically, this guide will be useless once the Linux release is here, but since it isn't yet with no ETA on when it will be launching, this guide will help you get it up and running right now.
How To Play The Star Fox 64 PC Port On Steam Deck
Before I go into how to get the port running on the Steam Deck, I want to go over what you will need to get this running. The only thing you need to bring to the table is a genuine copy of Star Fox 64 that matches the hash of the version that is required. We can't provide links to where to get the game. You can follow the Quick Start instructions on the Starship Github page to verify your copy of the game.
The rest of this guide assumes you already have this copy of the game.
Step 1:
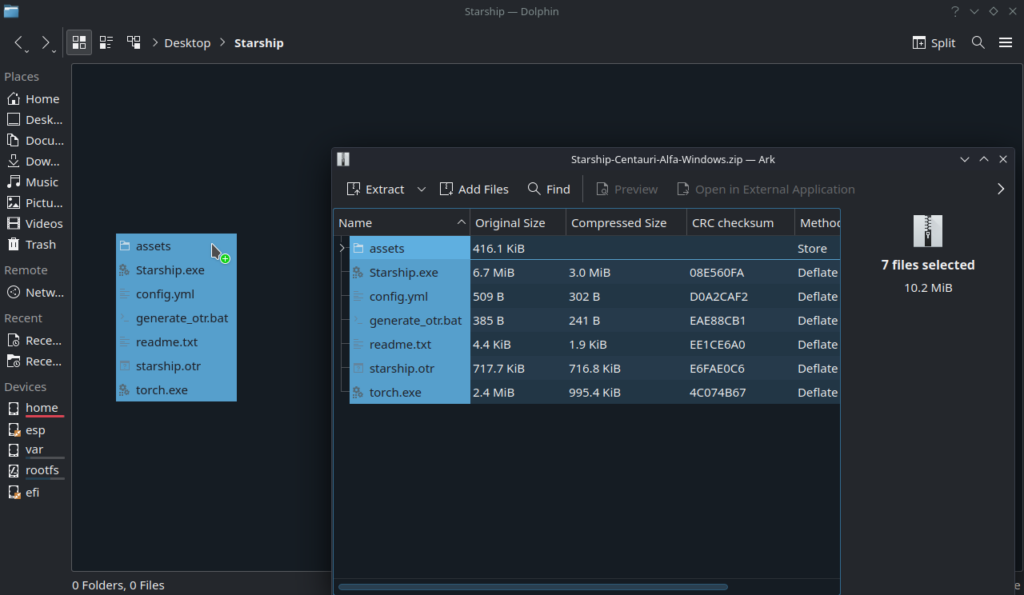
Download the Starship Windows release files and extract them to a folder on your Desktop. In this case, I created a "Starship" folder on my Desktop and moved all the files from the "Starship-Centauri-Alfa-Windows" ZIP file into it.
Step 2:
Get your copy of Star Fox 64 and move it into the folder with the Starship files.
Step 3:
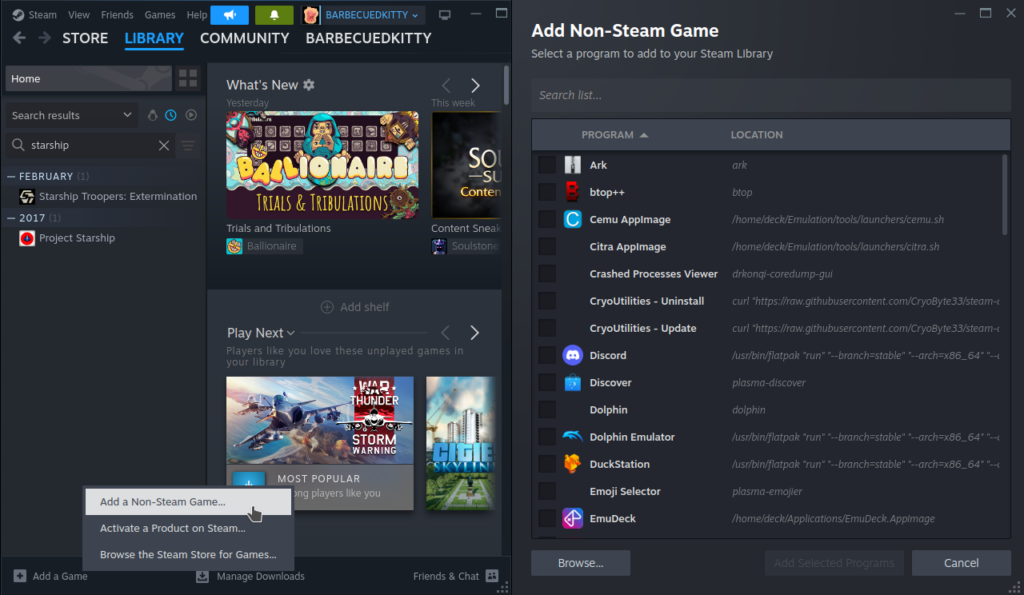
Now, we need to run the generate_otr.bat file. To do this, we need to add it to Steam. So, head on over to Steam and click on the bottom left of the window to add a "Non-Steam" game.
Step 4:
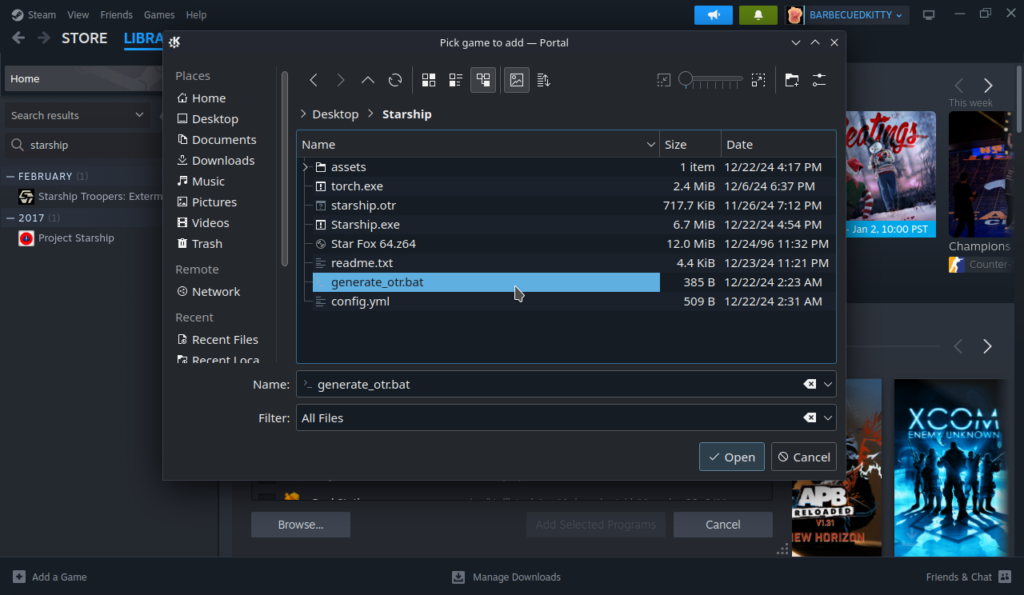
Hit browse and go to the folder where Starship's files are. To add the .bat file, you have to make sure the Filter is set to "All Files" or it won't find the correct file. Once selected, add the file to Steam.
Step 5:
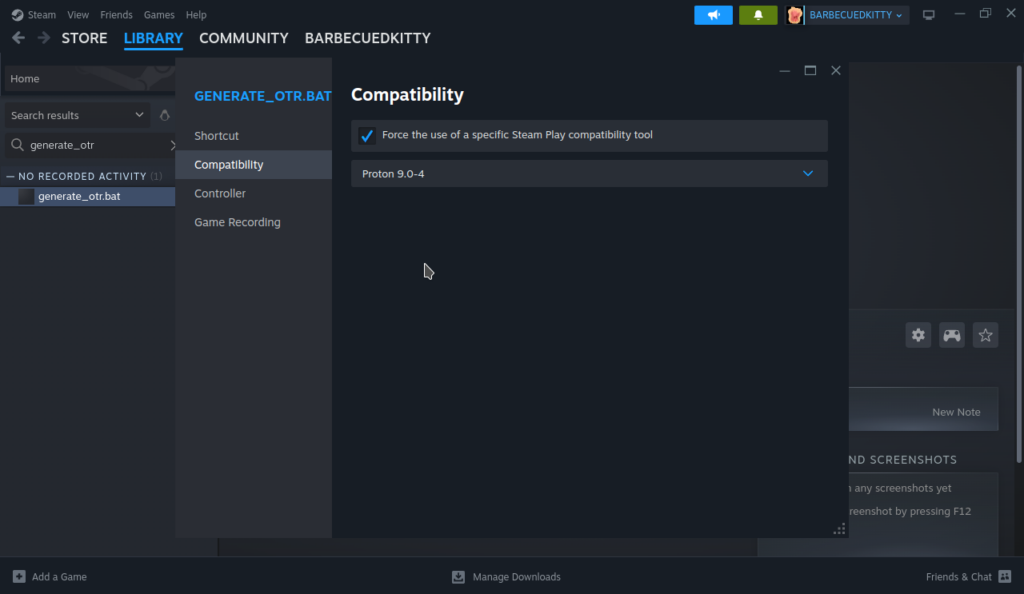
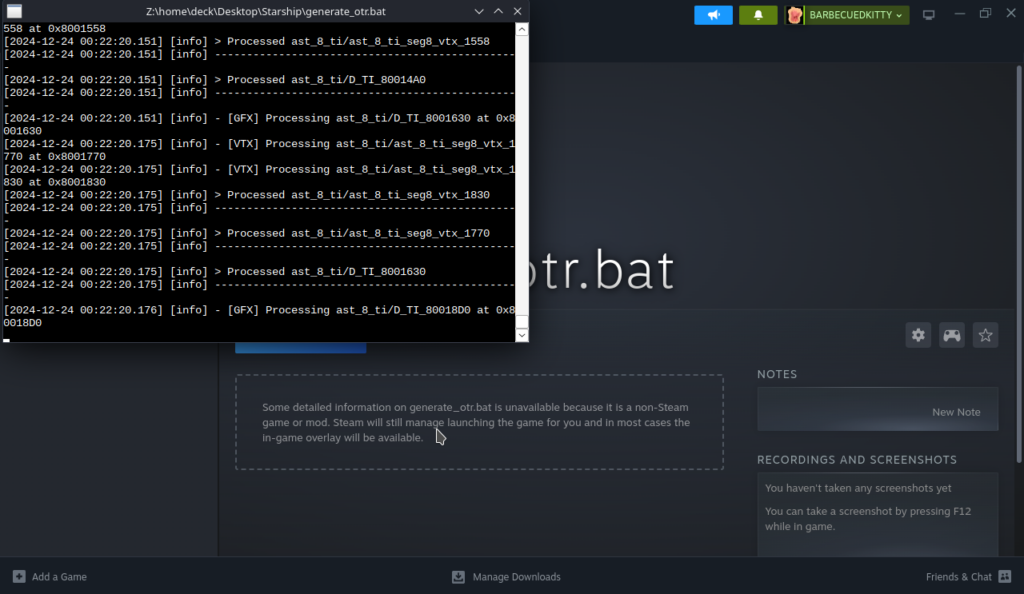
Go to the generate_otr.bat entry in your Steam library and go to preferences. Head to the Compatibility tab and force it to run with Proton 9.0-4. Once that is done, close the window and "Play" the file. It will run the bat file and it should take around 30-45 seconds. You can delete the Steam shortcut for the bat file once this is finished.
Step 6:
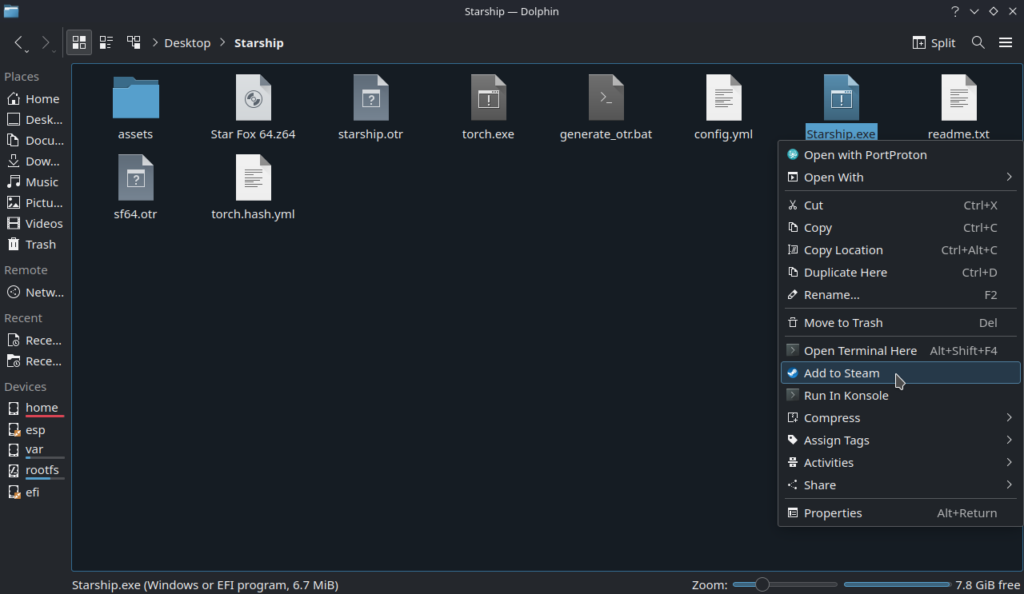
Now, we have to run the Starship.exe and let it crash once to generate a configuration file. In the Starship folder, find your Starship.exe and right click it to add it to Steam.
Step 7:
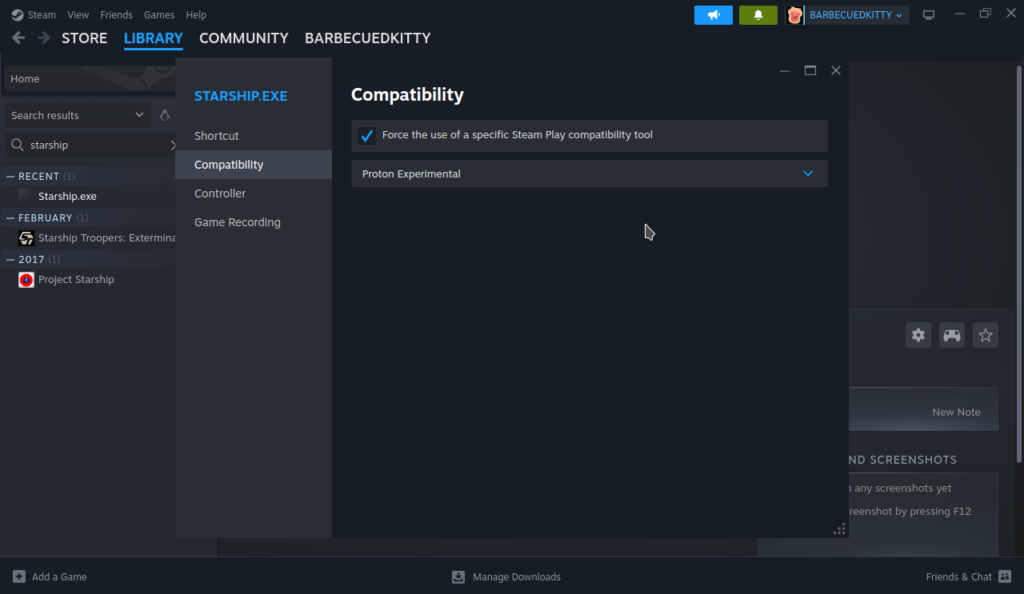
Find the Starship.exe shortcut in your Steam library and go to the Preferences for it. Find the Compatibility tab and force it to run with Proton Experimental. After that, press Play and let the game crash.
Step 8:
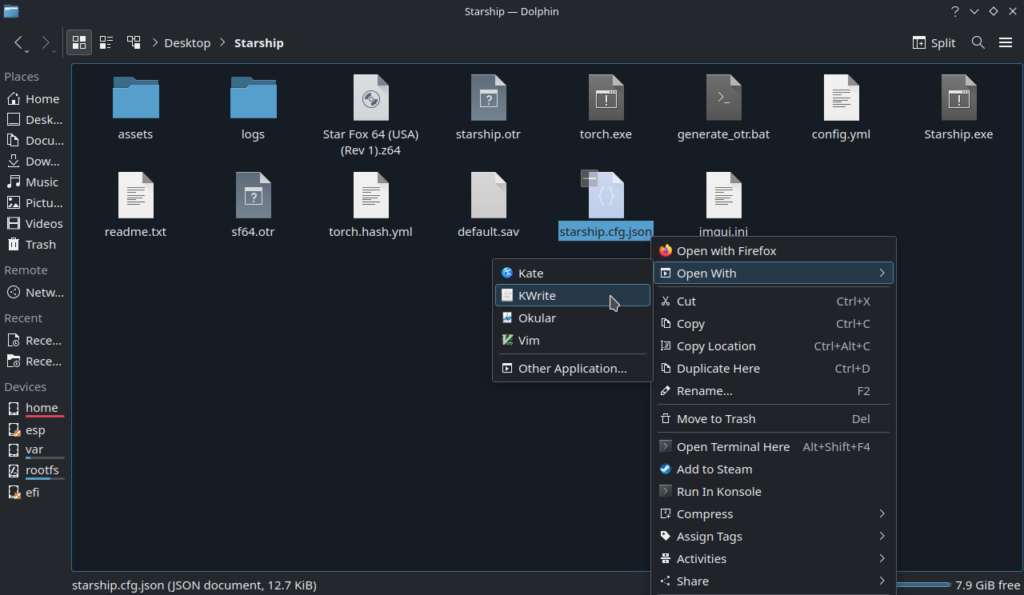
Now, we have to change the configuration file to make sure it will run on Linux without any errors. Go back to your Starship folder and and find the starship.cfg.json file. Right click it and go to "Open With" and make sure to select KWrite.
Step 9:
Scroll to the bottom of the file and find the "Window" block. You will have to change the "AudioBackend" to "sdl" and the "Backend" ID to "1" and Name to "OpenGL." Here is an image of how it should look once everything is changed:
"Window": {
        "AudioBackend": "sdl",
        "Backend": {
            "Id": 1,
            "Name": "OpenGL"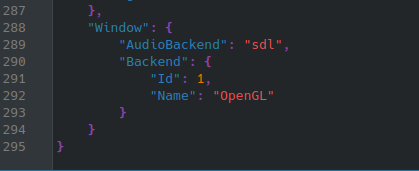
Step 10:
Save the file and close the window.
That's it! You should be able to start and play the game. It works perfectly on the Steam Deck from Game Mode with extremely low battery drain, and it's awesome to play. The port does feature some enhancements though, so if you want to interact with those, then I recommend going into your controller configuration and assigning one of the back buttons to "F1." This will open the enhancements menu and allow you to increase your framerate and resolution.
If you do this, I would also recommend making the right trackpad act as a mouse so you can navigate the enhancements menu. Otherwise, you will need to use the touchscreen.
If you enjoyed this guide, check out the rest of the content on SteamDeckHQ! We have a wide variety of game reviews and news that will help your gaming experience. Whether you're looking for news, tips and tutorials, game settings and reviews, or just want to stay up-to-date on the latest trends, we've got you covered!





On my Steam Deck, the Json file it created after the first crash does not have an "AudioBackend" section in Kwrite. Tried adding it in myself, but it still crashes the game...
I'm also getting that same exact error 🙁
When I run a .bat file via Steam, all the controls on my Steam Deck become disabled, except for the touch screen. This makes it impossible to press any key when prompted, as only the touch screen works. I am stuck at this step. How is everyone managing to do this?
Had the same issue, but its not important. Just close the window and you’re all set.
Thanks -- turns out I has bigger problems. I wasn't using a v1.1 file. Now it works like a charm. Thanks for this awesome guide!
Can't seem to adjust the resolution to full screen, tips?
Works like a charm with this guide
Only had time to play the first level so far, but it plays just great - just have to tweak the controls a little to have proper access to the boost / brake / looping.
Very helpful guide, thanks so much!
FWIW in order to run the generate_otr.bat file, I had to use ProtonTricks:
https://www.wswapps.com/books/steam-deck/page/running-bat-files-on-linux-or-steam-deck
Aside from that one step, everything else worked great.
thanks for the guide man. i followed step by step but unfortunately get the following error message when trying to start the game:
4:1 E5030: Unknown modifier
"StructuredBuffer".
4:18 E5000: syntax error, unexpected
'<'
i'm at loss here. what's the issue?
More I had to swap Z and L to get turn right / left on the triggers. Even fox in the enhancements menu.
Thanks so much!
Hi, followed the guide and still crashing on start up 🙁
One important missing step: you have to run Starship.exe once and let it crash for the config json file to be created. It is created at game runtime, instead of when the .bat file is run
So it is there, but I forgot to put why we were running the Starship.exe file before configuring the json. I added in the wording!
You're awesome! Tried playing last night but got hung up on the.bat and researching how to run it. Gave up and went to bed. Woke up, googled how to play on steam deck, and here you are with this awesome guide! Will give it a go later. Enjoy the holidays.