With the full release of Diablo 4 in a couple days, we have gotten a lot of questions as to how to install and run it on the Steam Deck! While we do have a guide on how to install all launchers, including Battle.net, but it is more of a general guide. Here, we will go into detail specifically regarding Battle.Net, installing it the easy way possible, and getting it installed on the Deck.
If you are curious how the game runs on the Steam Deck, check out our Diablo 4 First Look to see what settings we recommend so far.
Installing Battle.Net with NonSteamLaunchers
Before we get to playing, we need to install the Battle.Net launcher. There are multiple ways of doing this like using Lutris, installing the exe directly, or using Bottles, but they all require extra steps. Luckily, we can use this incredibly easy tool created by moraroy that can not only install the launcher in its own prefix folder, but will also install Proton GE for you to use both with the launchers and in general.
Step 1:
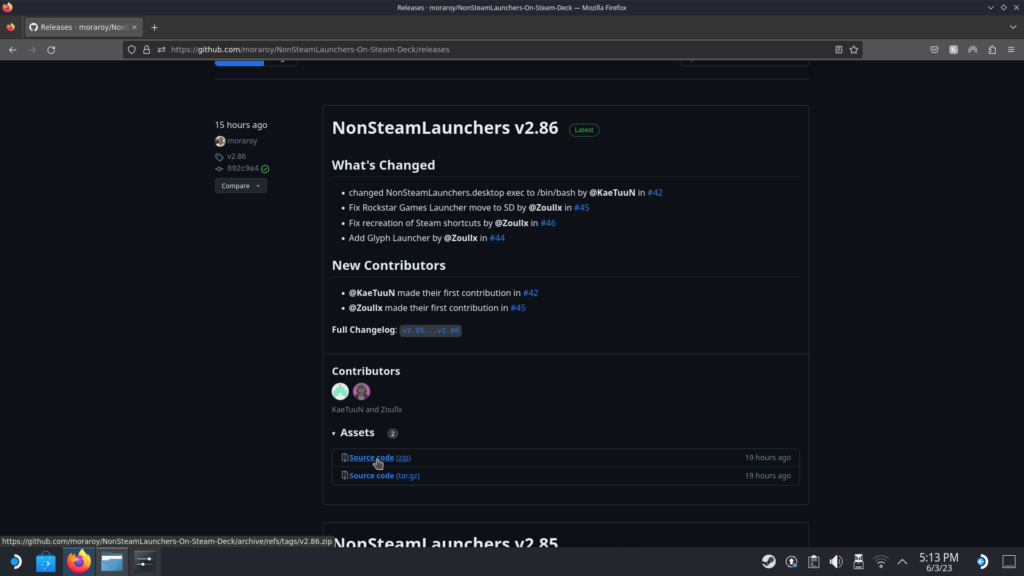
Go ahead and download the NonSteamLaunchers from the GitHub Releases page. To do this, make sure you download the Source code (zip). Make sure to choose the top version (as of writing, this is 2.86).
Step 2:
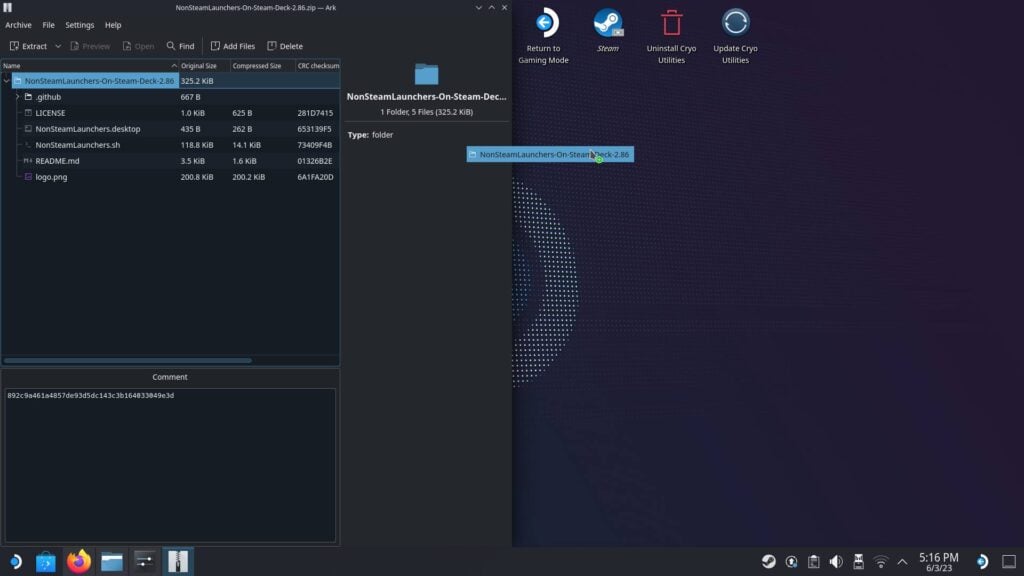
Open the downloaded zip and extract the folder inside to your desktop (or whatever location you prefer). It doesn't matter as the everything will be installing inside a different prefix folder.
Step 3:
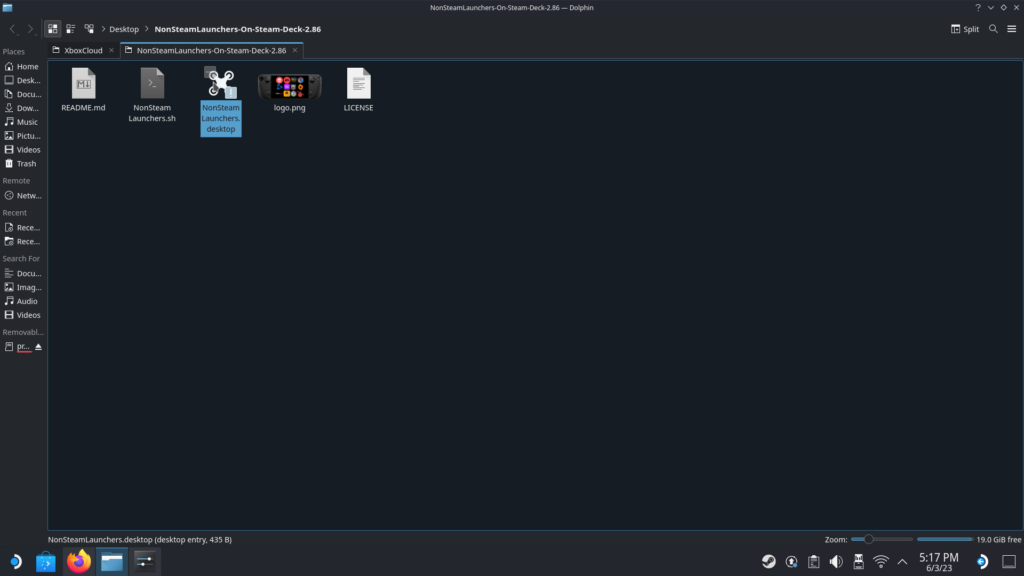
Double click and run the NonSteamLaunchers.desktop file. Make sure to hit "continue" when it asks if you are sure.
Step 4:
Choose whichever launchers you want to install! Once done, just hit "OK" and let NonSteamLaunchers do its work! The program will automatically detect and install the latest Proton GE, then use the compatibility layer to automatically install Battle.Net. You can also select the "Separate App ID's" option if you want to put each launcher into their own folders instead of all-in-one.
The shared prefix folder they install to is:
/home/deck/.local/share/Steam/steamapps/compatdata/NonSteamLaunchers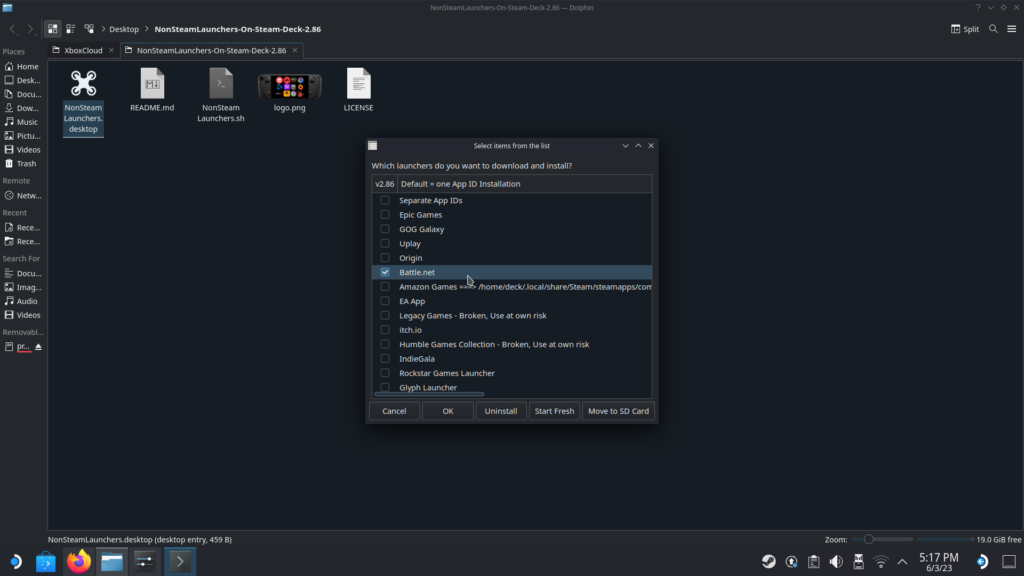
Step 5:
After going through the install processes, the program will restart Steam so the shortcuts will appear in the non-steam section of your library. The program did this for me while in Desktop mode and put me in big picture instead, so I had to exit big picture and manually go back to Game Mode, but the shortcuts should appear.
Step 6:
With this done, you will need to make sure to do 2 things: First, make sure the shortcut is forcing Proton GE (whichever the newest version is). Second, make sure the controller layout is "Gamepad with Joystick Trackpad". I recommend modifying the right and left trackpads act as a mouse to navigate the launcher with ease.
Now, you can launch and open Battle.Net. Once you do, you will be able to install any games that are in the new launcher. These will default to the internal storage, so make sure you have the space for it!
Downloading and Installing Diablo 4
Now that we can open Battle.Net, we need to set up and install Diablo 4. This is relatively straightforward once the launcher is in, but I will go over it regardless.
Go ahead and click on Diablo 4 and click on "Install". From there, you will get the option to change install folder and other options. Due to this being in its own prefix folder, I wouldn't change the install location, but if you know what you're doing, you can change it here. I would suggest not creating a desktop shortcut though as you are primarily playing through Game Mode anyways.
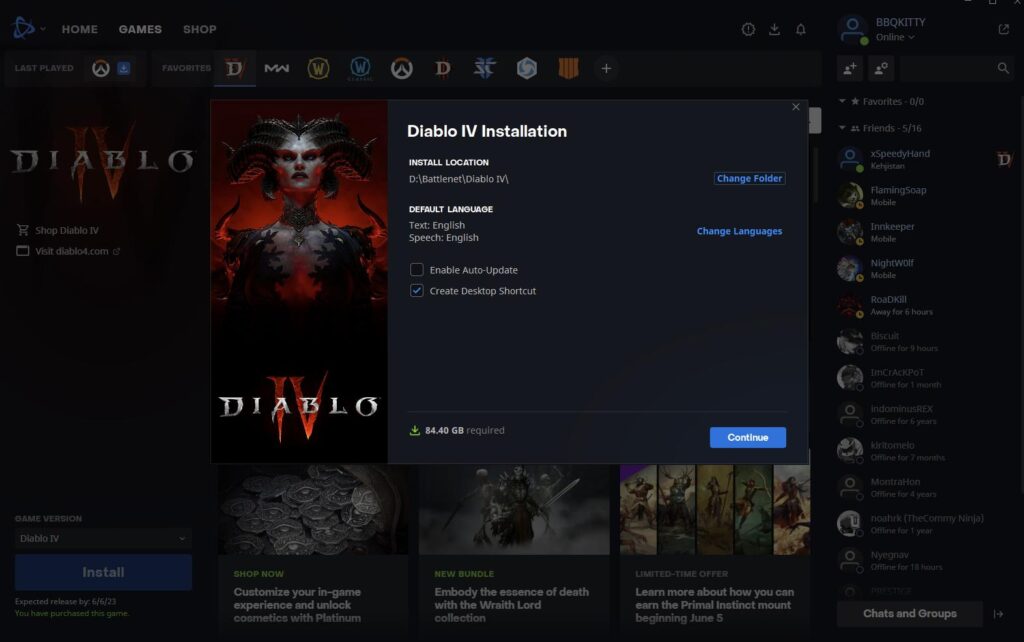
Once you click continue, I would go ahead and uncheck the "High-Resolution Assets" option. These assets are huge and are primarily for higher resolutions than the Deck can output on its screen. Unchecking this also reduces the install size from 84gb to 46gb, saving around 38gb of space. Then, go ahead and start the install!
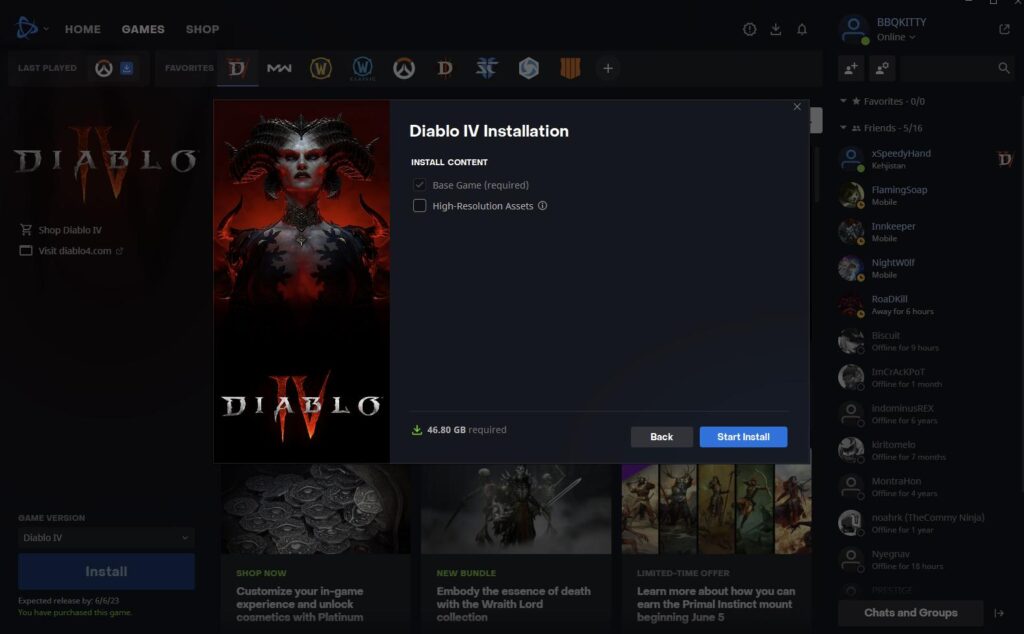
Once that is done, you should be all set! The game will be installed and you can now open Battle.Net whenever you want and play. The game is online-only, so you will always need an internet connection, and has full controller support!
Playing Diablo 4 on the Steam Deck is a dream come true. While we are still playing it for our full review, you can check out our first look which goes over some initial settings on how best to run it!
If you enjoyed this guide, be sure to check out the rest of the content on SteamDeckHQ! We have a wide variety game reviews and news that are sure to help your gaming experience. Whether you're looking for news, tips and tutorials, game settings and reviews, or just want to stay up-to-date on the latest trends, we've got your back.



When using the trackpad as a mouse, the "left" click function isn't working unless I hold down the steam button while in the battle.net launcher.
I changed the controller layout to "Gamepad with Joystick Trackpad" and edited that layout so the right and left trackpads work as a mouse.
Anyone else have this issue?
For refence I am in Gaming Mode on the deck.
Thanks for all the work here, appreciate you guys!
Thank you so much <3 We appreciate it immensely.
Can’t get bnet launcher to update
Another issue I've noticed using this method is that once installed, you cannot get Battlenet to update.
A new update came out this afternoon and everytime I click it restart and update it simply won't finish the process and I'm forced to "Stop" the app via Steam.
It's running fine on the previous Battlenet version but I'm sure eventually you'll have to update somehow and currently this method will stop working.
None of the shortcuts are there.
That has been reported to happen very rarely. You should be able to manually add by going to that prefix folder and adding as a non-steam game. This is something the NonSteamLaunchers dev is working on too.
step 6 says "First, make sure the shortcut is forcing Proton GE"
How do i verify that?
Go to the preferences for the shortcut in Steam and in the Compatibility tab, make sure it is checked off and it says GE-Proton 8-3.
I have run the installer, but Battle.net launcher will not appear in any library and does not appear in my non-steam games either. Has this not been a problem for anyone else??
Once Battle.net was installed, I went back to Game Mode and launched it from there. When I selected Diablo 4 (which I've already purchased), there was no "Install" button.
Do I absolutely need to be on Desktop Mode in order to install games?
You shouldn't need to no, I installed Diablo 4 in Game Mode myself. Are other games you have on Battle.net showing an install button?
I am having the same issue with all battle.net games. I have checked to make sure I am logged into the correct account.
Not sure where to go to next.
Let me take a look into it!
The problem is the screen size of Battle.net app on Game Mode. It happened to me a couple of days ago as well. To solve this you must go to Desktop mode, launch the Blizzard Launcher and click on the button for full screen. Close the app, go to Game mode and launch Blizz app again, it should now be OK and you'll see the install button. If that doesn't work you can always install/launch the game from the Desktop mode.
I wish there was an extra guide on how to create in-steam shortcuts to Blizzard games, so I won't have to go through the launcher.
This tool is terrible and should not be used. Creating a single prefix folder means that any issues affecting one game has the potential to affect all of them and you will have no idea why. The developer himself has even mentioned having no idea of what he's doing which is fine, but a badly designed product shouldn't be celebrated when there are other alternatives available that are more established and better designed.
There is an option to separate into each other Prefix folder though! Just choose the "Separate App IDs" option!
if I didn't check that option during the install, how do I uninstall and do it over?
There is an option when launching the tool to uninstall.