Update 8/30/2022
I have since connected my USB 3.0 external SSD to my router as an SMB file share, and was able to add it to my Steam Deck as a network-based library folder.
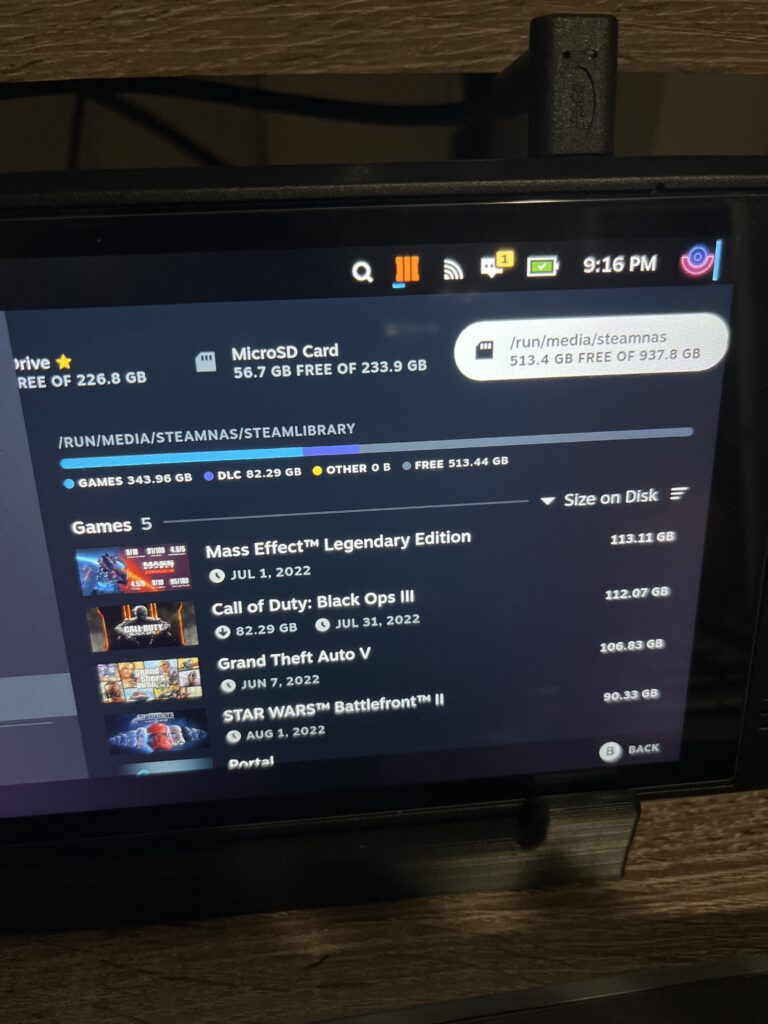
This can be accomplished by mounting your network drive to /run/media/[newfolder] using the following Konsole commands. Note: We do not cover setting up your drive as shared network storage and you'll need an admin password configured. We recommended following the guide below to get comfortable with local storage prior to setting up the network drive. Use the steps below in place of physically connecting your drive and replace the fstab edits with the information below.
Open Konsole and enter the following commands:
sudo mkdir /run/media/[yourfoldername]
sudo mount.cifs //[deviceIPaddress]/[devicefolder] /run/media/[yourfoldername] -o user=[fileshareusername] uid=1000
Example: sudo mount.cifs //192.168.199.199/External /run/media/steamnas -o user=vanderjud uid=1000
Instead of adding the UUID to your fstab in Step 6 below, you'll want to add your network drive using the following parameters:
sudo nano /etc/fstab
Add the line:
//[deviceIPaddress]/[devicefolder] /run/media/steamnas cifs uid=1000,x-systemd-automount,user=[fileshareusername],password=[filesharepassword],_netdev,nofail 0 0
Alternatively, you can set up a credentials file, but that is not covered in this guide.
Original Tutorial
We know Steam Deck users are able to install games directly to their internal SSD or micro SD card, but what if you want to leverage external storage via the USB Type C port? Sure, you can connect an external drive to your Steam Deck, even using the Deck’s preferred ext4 file system, but you’ll be faced with several limitations, like the drive not automatically showing up as available storage in SteamOS.
What if there was a way to connect an external SSD, hard drive, SD card, or any other storage drive for that matter, while being able to store, and even play, games on it directly from the Steam Deck’s gaming mode? Courtesy of Chinballs Gaming's YouTube video, there is now a way. This tutorial isn’t as straightforward as installing a Flatpak or changing some settings, but with a few simple Konsole commands and a bit of copying and pasting, you can add more storage options to SteamOS. This tutorial is best followed with a keyboard and mouse connected to your Steam Deck.
Since the time of writing, a script has been created to automate this process, however the results are very mixed. I recommend following the guide below, to ensure there are no issues with permissions, or the drive being detected automatically.
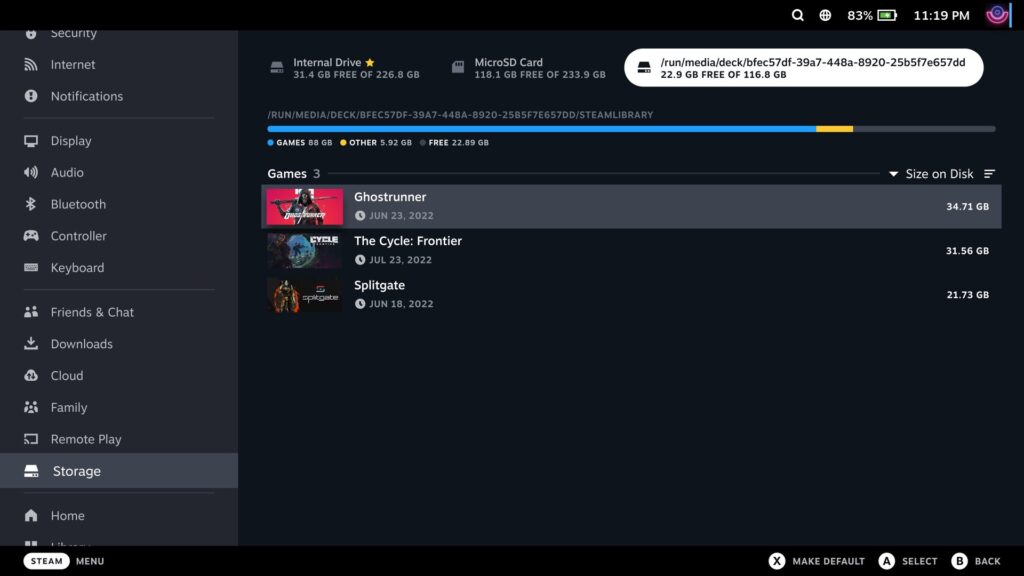
There’s two main reasons I use this technique:
- There are some games I only play while my Steam Deck is connected to my TV via USB Type C dock.
- I’d rather copy/paste games from external storage than re-download them
I currently use an Anker USB Type C hub for my Steam Deck, providing power delivery, 2x USB 3.0 ports, a USB Type C port, Micro SD card slot, and full sized SD Card slot. Its convenient to load and offload games without re-downloading and without needing to boot up a PC to transfer files.
Originally, I used a 128GB Crucial 2.5” SSD, but have since upgraded to a 1TB SSD. SATA 2.5” SSDs are incredibly affordable, costing only $60-$80 for 1TB, compared to $170 for a Sandisk 1TB Micro SD Card, $130 for an external USB Type C SSD, and almost $200 for an M.2 SSD in the 2230 form factor the Steam Deck Uses internally. Therefore, with the add-on of a cheap USB enclosure for a SATA 2.5” SSD, you can add a terabyte of storage to your Steam Deck for less than $100 total (my total cost was $74).
This is a cost-effective and useful method to store several 100GB+ games, while still having them at the ready. This method can be used for ANY external storage device with a few caveats:
- SSD and at least USB 3.0 are recommended for playing games. Some games may not perform well over USB 3.0 bandwidth.
- The drive must be connected and powered on when you turn on the Steam Deck for the drive to be recognized. I use an external SSD enclosure with its own power switch, so the switch must be turned on prior to booting the Steam Deck.
Formatting the Drive
Step 1
Delete all existing volumes from the external drive you want to use. This can be done in Windows by searching “Disk Management” then deleting any partitions on the drive you want to use, or on Mac by using Disk Utility to do the same. Its important for the Steam Deck to see the drive as completely blank, as it doesn’t always have the permissions needed to delete and replace disk partitions. Important: Doing this will delete any existing data on the drive, so if you’re repurposing an old drive, make sure to back it up first!
Step 2
Connect the drive to your Steam Deck. Its recommended to use a powered USB Type C hub. While USB operates under strict power standards, its best to do so with your home’s power source in this case to reduce battery strain on the Steam Deck. I’ve linked to the dock I use at the end of the tutorial.
Setting Up Admin Password
Step 1
Like many other guides, this process requires your Steam Deck to be in desktop mode. Enter it by holding the power button and selecting “Switch to desktop” or selecting it under “Power” in the Steam menu.
Step 2
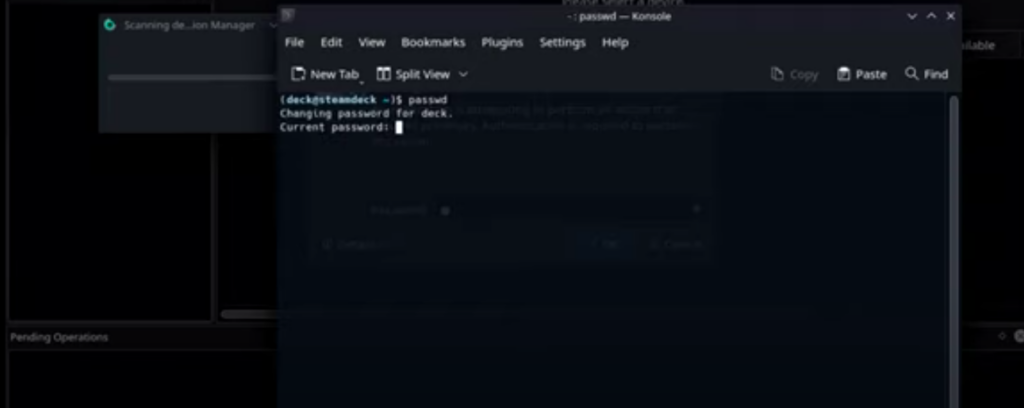
In order to format the partitions on your external drive, change access permissions, and complete other steps in this tutorial, you’ll need an administrator password set for your Steam Deck. Open up Konsole (found under the System category in your applications) and type passwd - you’ll be asked to set a password for your Steam Deck if you haven't done so already.
Formatting and Configuring Your External Drive
Step 1
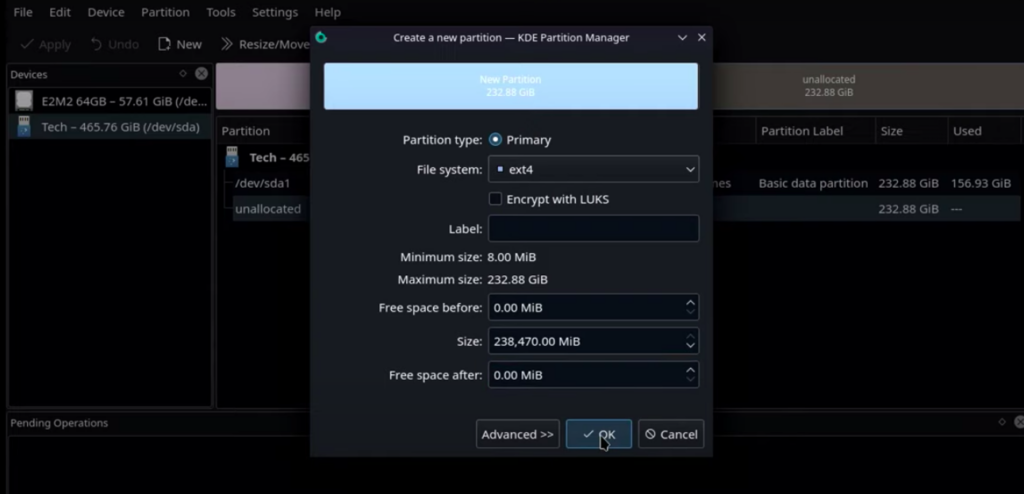
Now that you have a password set, open up KDE Partition Manager and enter your password when prompted. Here’s where we’ll format your external drive as ext4. Right click on the partition you want to use as external storage and select “New.” It should read “unallocated” if its a new drive, or if you deleted the volumes using a PC or Mac. If you've formatted the drive as NTFS, exFAT, or HFS+ on a PC or Mac, your Steam Deck may not have the permissions to delete the old partitions, and you'll need to reconnect the drive to your PC or Mac to delete the partitions or volume altogether.
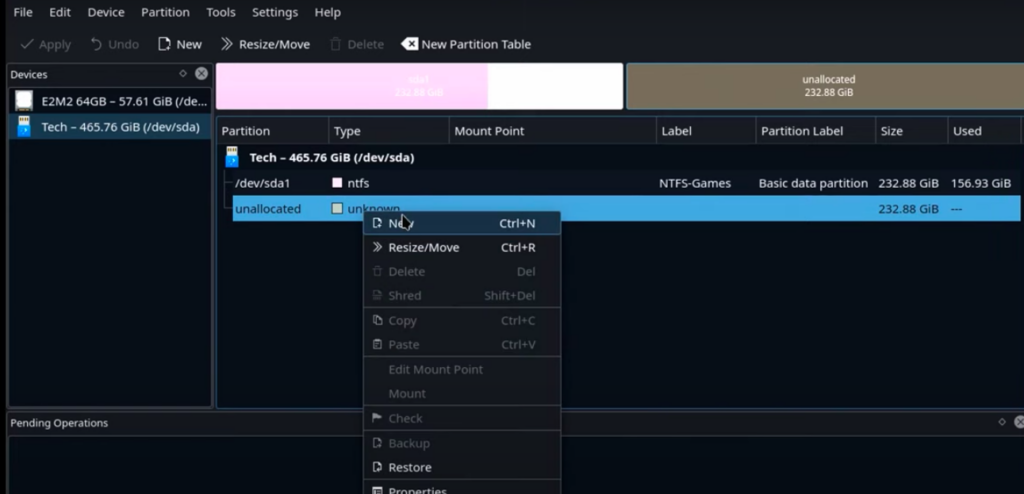
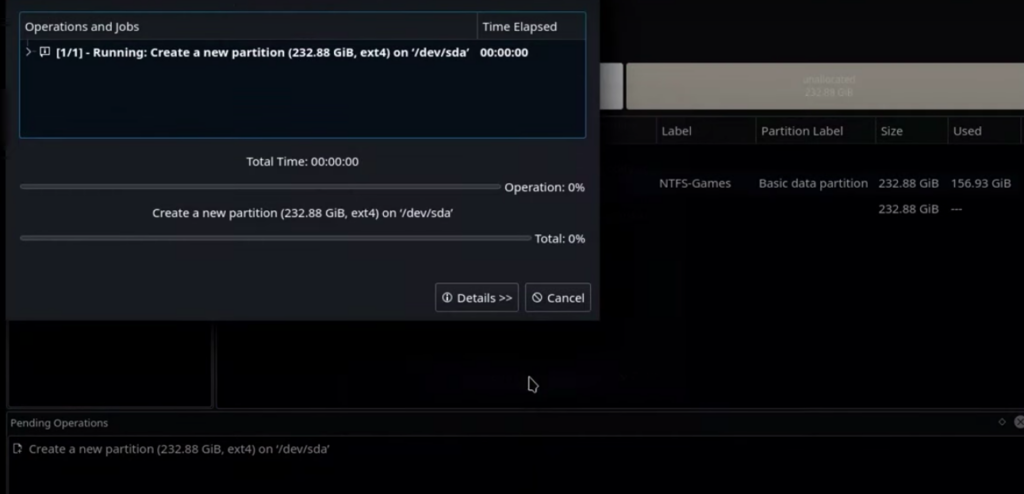
Select “ext4” as your file system and click apply toward the upper-left of KDE Partition Manager. Its recommended to assign the drive a label as well. When the prompt appears, click “Apply pending operations.”
Step 2
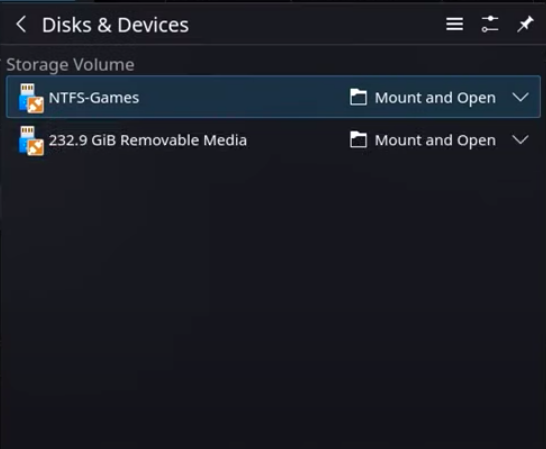
Now that your external drive is formatted, you’re ready to configure it for use in SteamOS. This involves a few steps: setting drive permissions, setting the drive to mount automatically, and adding the drive as a library location in Steam. Once the drive is formatted, you should receive a prompt in your taskbar to “Mount and open” the drive - go ahead and do so.
Step 3
Head back into Konsole and navigate to your external drive by typing:
cd /run/media/deck/ Press Enter on your keyboard, followed by “ls” without the quotes then Enter again. You should see the label you gave your drive earlier. If you did not give your drive a label, you’ll see a ~16 character device ID (UUID). Then, allow SteamOS to manage the device by typing the following command.
Sudo chown deck [your device label or UUID]/
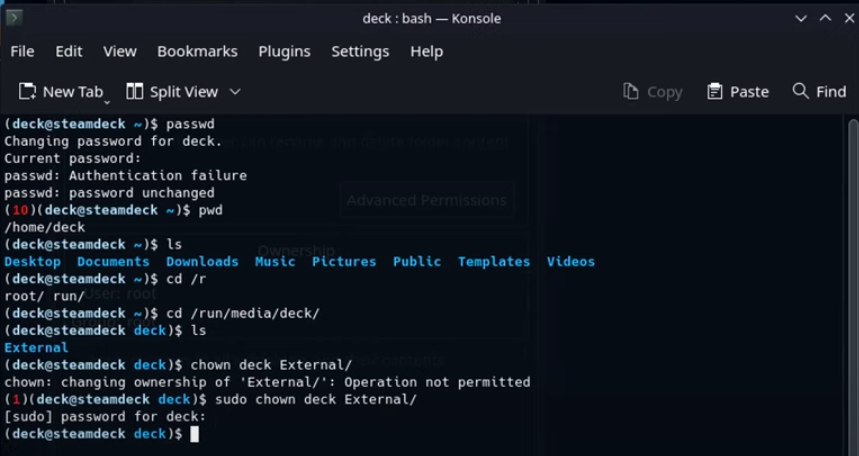
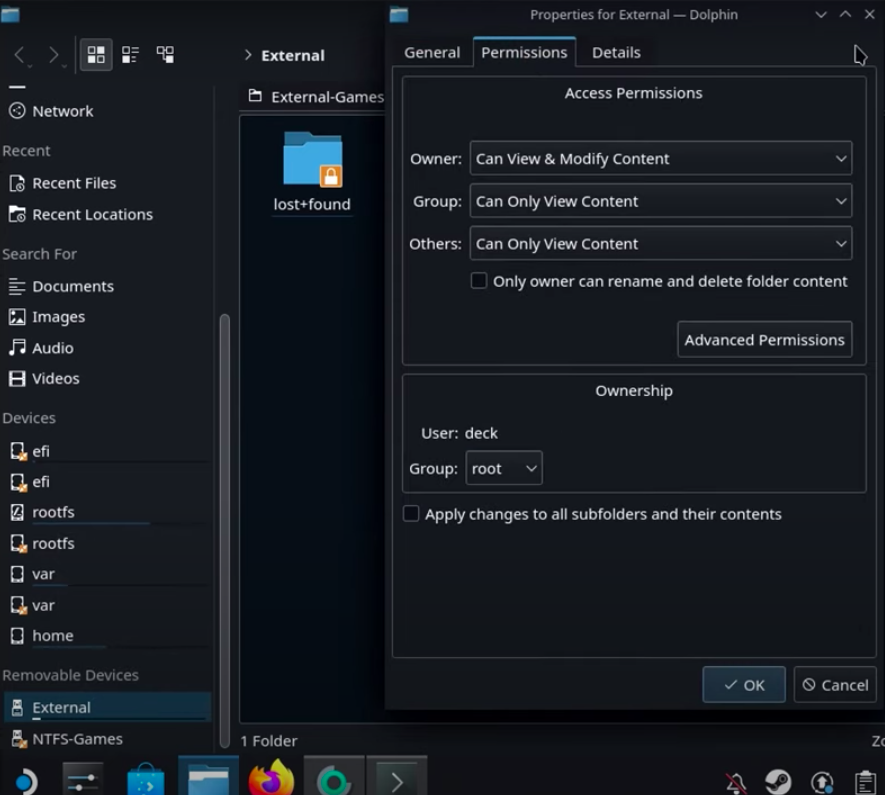
This command changes ownership of the drive from “root” to “deck” allowing SteamOS to read and write files from/to it. Enter the password you set in the beginning of the guide and hit Enter on your keyboard. If you forget to type “sudo” you’ll see the error above stating you do not have permission to make the change. If you did not use a label for your device, copy/paste the identifier that showed up when you typed ls in the step above.
You can verify this worked correctly, by right-clicking on your device in Dolphin file manager, selecting properties, and checking that the user shows “deck” under Ownership.
Step 4
To ensure your external drive is mounted automatically when you restart your Steam Deck, you’ll need to modify a table, called “fstab.” Return to console and open fstab using the following command:
Sudo nano /etc/fstab

Press Enter. If you haven’t closed Konsole from before, the file will open. If you have, you’ll need to enter your password again.

Step 5
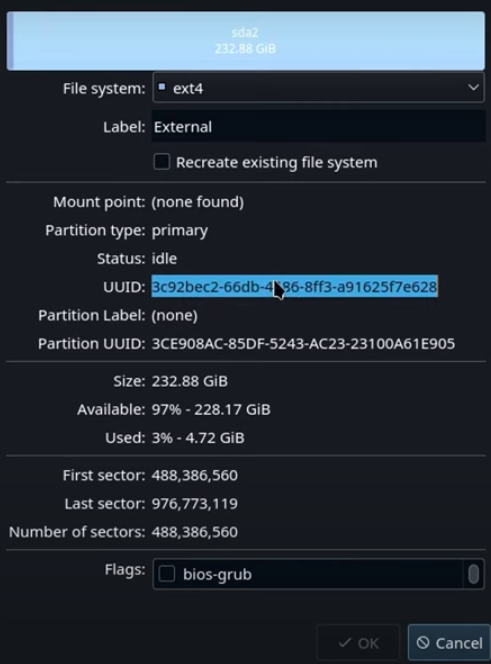
You’ll need to add your external drive to this table, but first, you’ll need its UUID. This step is easier if you didn’t apply a label to your external drive and still have the UUID copied. If you don’t have it, you can right-click on your drive’s partition in KDE Partition Manager, select “Properties” and copy the UUID from there.
Step 6
Return to Konsole and type the following into a new line in your fstab stable:
UUID=[yourDeviceUUID] /run/media/deck/[youMountPoint] ext4 defaults,nofail 0 0
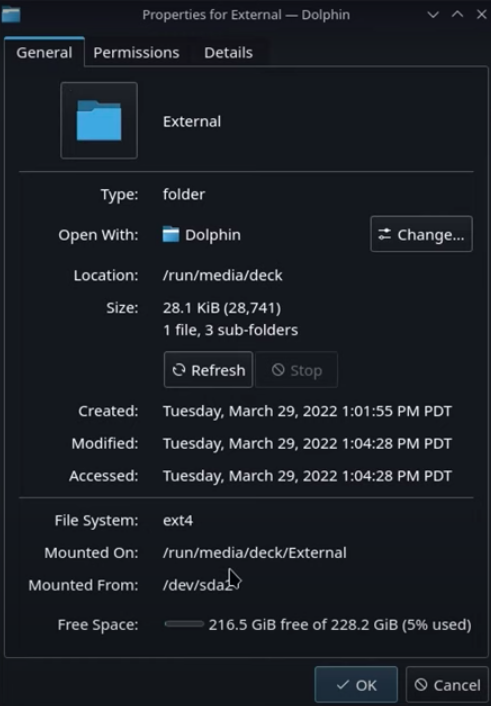
You can find your mount point by right-clicking on your device in Dolphin file explorer and selecting “Properties” - but its typically the label of your device or the UUID if you didn’t give your device a label. Example: /run/media/deck/External
Including “nofail” is extremely important. If you don’t, your Steam Deck will not boot without your external drive attached. If you have trouble getting to the last line in fstab where the text is entered, use the scroll wheel on your mouse or arrow keys on your keyboard. My mini keyboard has dedicated arrow buttons that worked perfectly here.

Click “ctrl+s” to save your fstab table, then “ctrl+x” to exit Konsole. We’re almost done! You can go ahead and close out of KDE Partition Manager and Konsole.
Adding Hard Drive to Steam
Step 1
Lastly, we need to add this new drive as a storage source in Steam, which again, can only be done in desktop mode. Open Steam and navigate to Steam -> Settings. Select “Downloads” in the menu, then “Steam Library Folders”
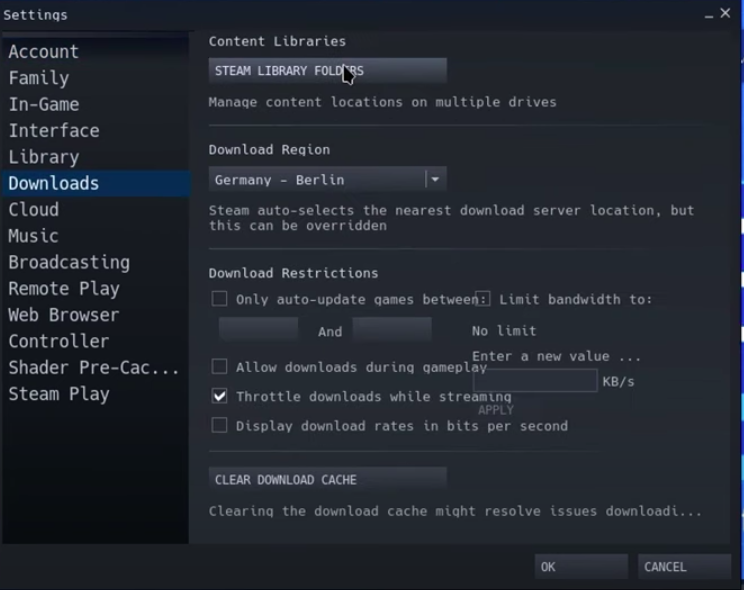
Click the “+” icons next to your existing storage devices and select your external device you’ve just set up.

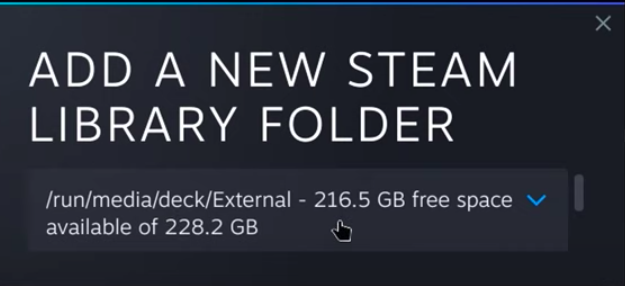
Click “Add.” If your device doesn’t show up, you can browse for other locations within this menu. If you can’t find your device, ensure it is mounted and accessible through Dolphin file explorer.
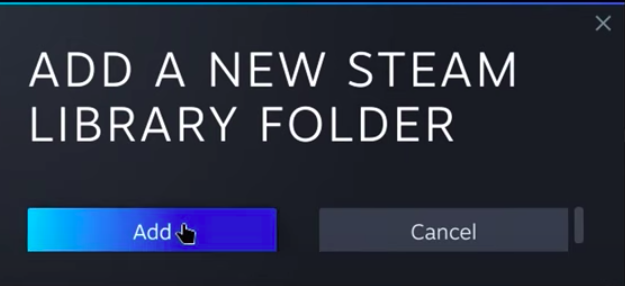

Once added, you’ll see your drive as a storage location within Steam.
Step 2
That’s it! Restart your Steam Deck with the external drive attached, and it will show up as a storage option in SteamOS. Testing gaming from an external drive is still a work-in-progress at SDHQ, but games can definitely be transferred back and forth. This process can be repeated for any additional drives you have connected to your Steam Deck!

Happy gaming!
Products used in this post:





Thank you very much, friend. I have succeeded. How did you find out about doing this? That's amazing
I have done what is listed above, but for some reason, I cannot get it to show up in game mode, until I boot to desktop first. I do not have to do anything in desktop mode, but for my own Peace of mind, I open dolphin explorer, to make sure it is there and it is.
So not sure what I've done wrong, if anything
But its working with the Toshiba 4tb that draws 1amp
"defaults, nofail, 0 0"
should be
"defaults,nofail 0 0"
Good catch, thank you! Not the type of line we want grammar correction flagging! Post has been updated.