As Overwatch 2 is available on Steam now, this guide is outdated. You can install Overwatch 2 on Steam and run it via the Proton Compatibility layer for a pick-up-and-play experience.
Now Overwatch 2 has been out for some time, but it has been a struggle to get it running on the Steam Deck. When it was released, there was a shader cache issue that froze the game after running it for 3-4 minutes. There have been some ways around it, including the most popular method using Bottles, but this requires installing Bottles, then installing Caffe, and installing BattleNet. But luckily, with the newest Proton GE update, Overwatch 2 can be much more easily played!
Now I did have a discussion with the creator of Proton GE, GloriousEggroll, and he mentioned that he recommends using Lutris and playing through that. I was going to write this guide with both methods listed here, but as of right now, playing directly through Steam results in significantly better performance. When playing, there will be some drops when you encounter other people. After some time though, these drops dissipate. The Lutris version still has minor drops, while the direct Steam version has none. Once performance is more on par with each other, we will add Lutris to this guide.
Downloading and Installing Proton GE and BattleNet
Downloading Proton GE and BattleNet
The first step in this guide is to get all the tools you will need, which will be Proton GE and BattleNet. You also have to be in Desktop mode for this guide. Once everything is installed, you can swap and play from Game Mode. For Proton GE, we created a guide on how to get it using ProtonUp-QT from the Discover Store. Make sure Steam is closed and you are downloading Proton GE 7-39 specifically. As of this writing, it is the newest version and we don't know how future versions will interact with Overwatch 2. If Steam is open when you downloaded the new Proton, you will NEED to close and re-open it so Proton GE 7-39 shows up.
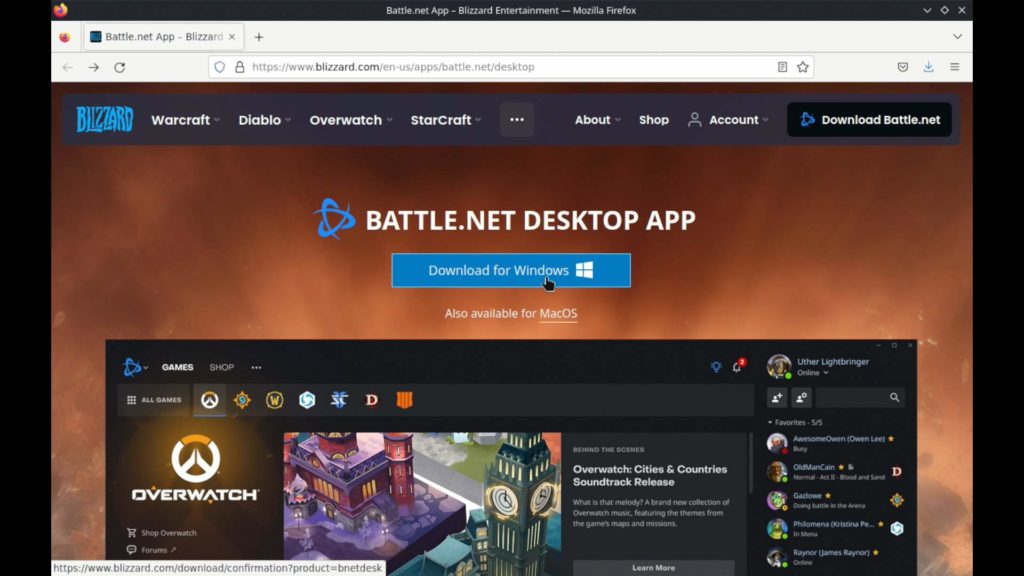
After that is done and installed, let's download BattleNet. Go to the BattleNet page and click "Download for Windows". This will automatically download the installer.
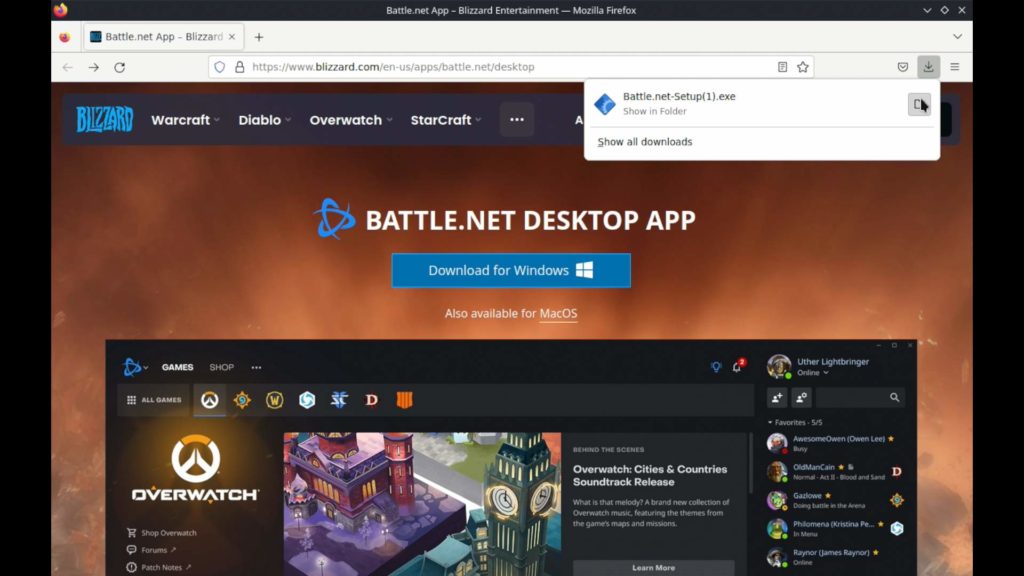
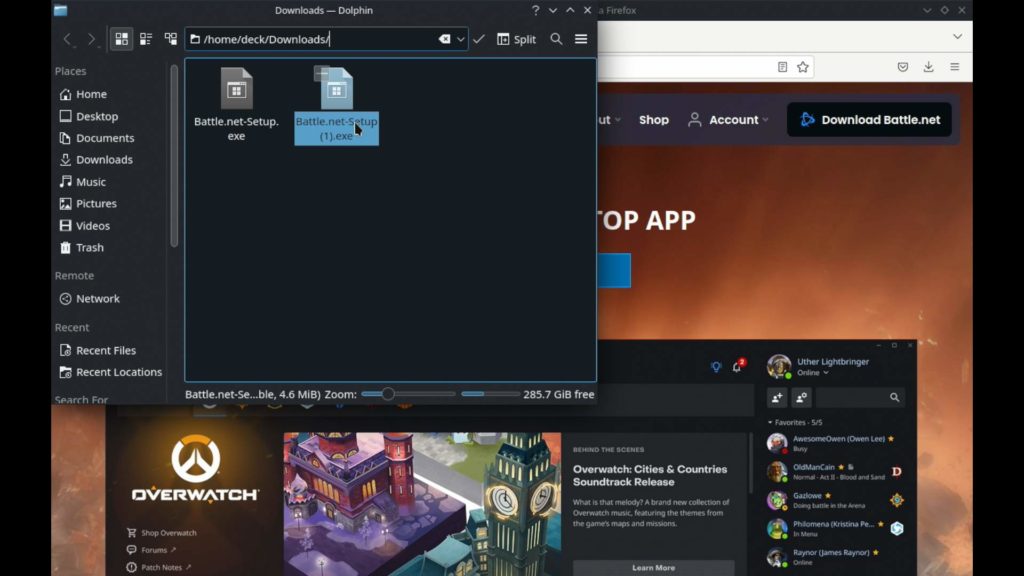
Once that is done, go ahead and click on the download button on Firefox, or your respective browser, and navigate to the folder where it downloaded. Make note of where this is installed as it will come in hand momentarily. Firefox will default to downloading in the /home/deck/Downloads folder.
Installing BattleNet
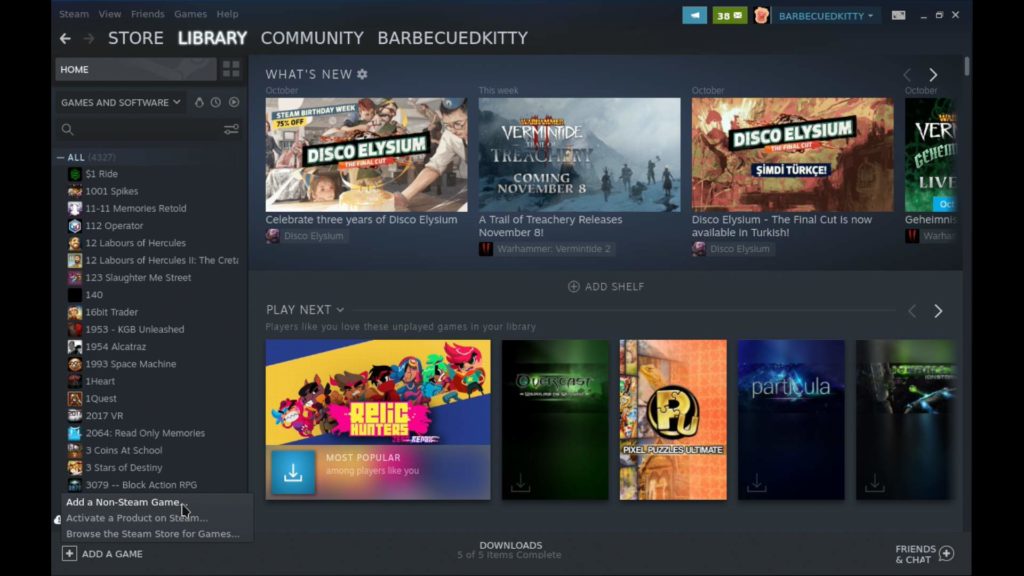
Now we have to install the BattleNet Launcher. Since we know exactly where the installer is downloaded, let's go to Steam. Go ahead to your library tab and at the bottom left, click "Add a Game" and then "Add a Non-Steam Game".
Once you do that, a new window will pop up. Click "Browse" at the bottom. At the top of that, you should see a drop down menu next to the "Look in" text. Click it and select /home/deck.
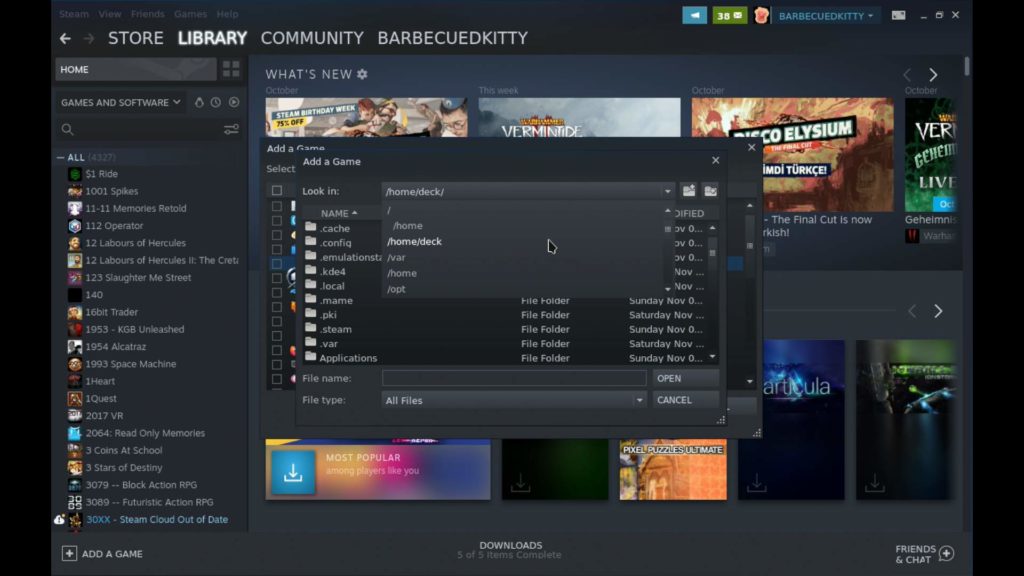
From there, scroll down to the "Download" folder and double click it. Then, select "All Files" from the "File type:" drop down at the bottom. Once you do that, the BattleNet Setup EXE should show up!
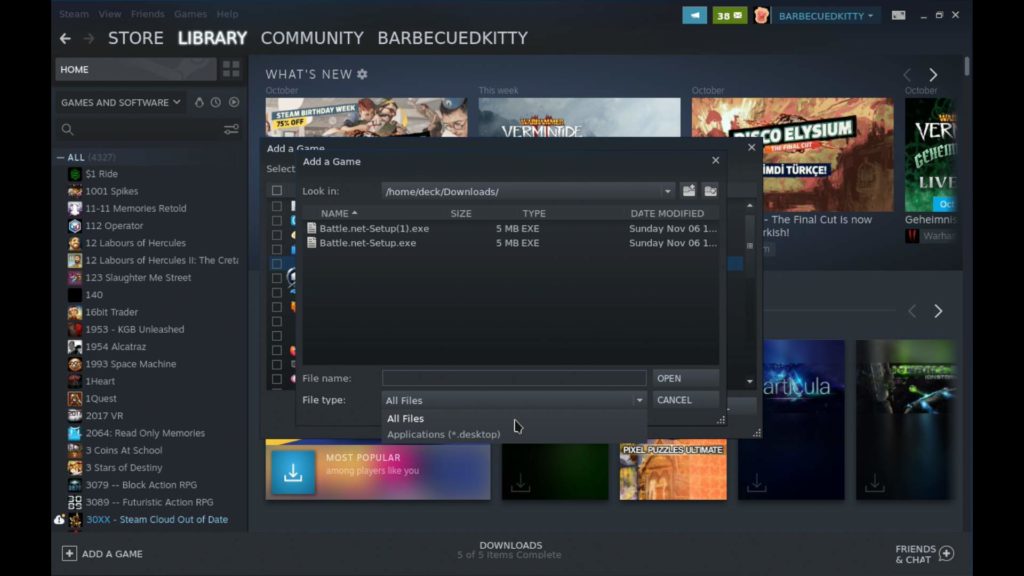
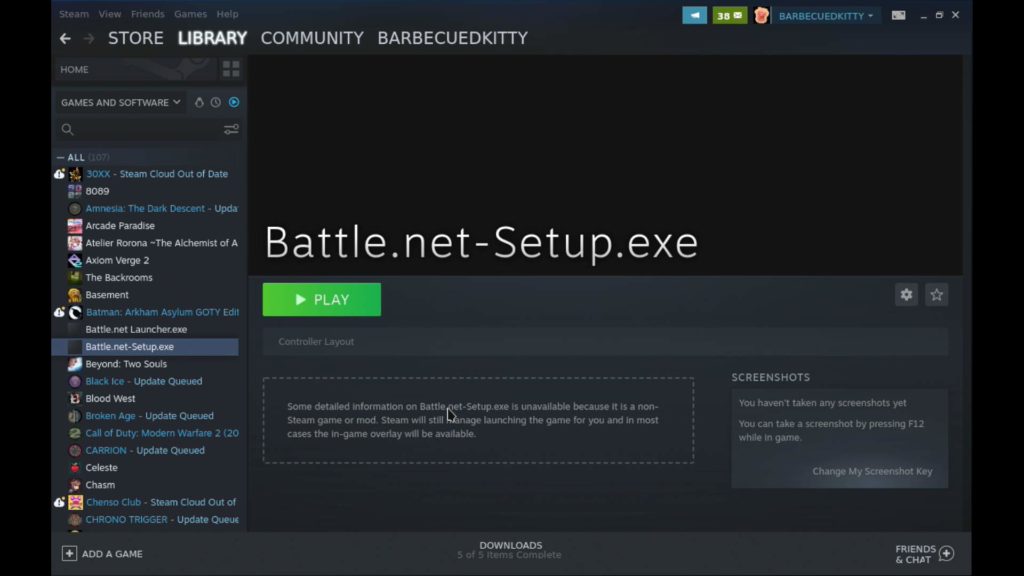
Click on your setup EXE and hit "Open". It should take you back to the main non-Steam game window with a box checked next to the EXE, click on "Add Selected Programs". Now, it will appear in your library without any artwork or logos and just directly named "Battle.net - Setup.exe".
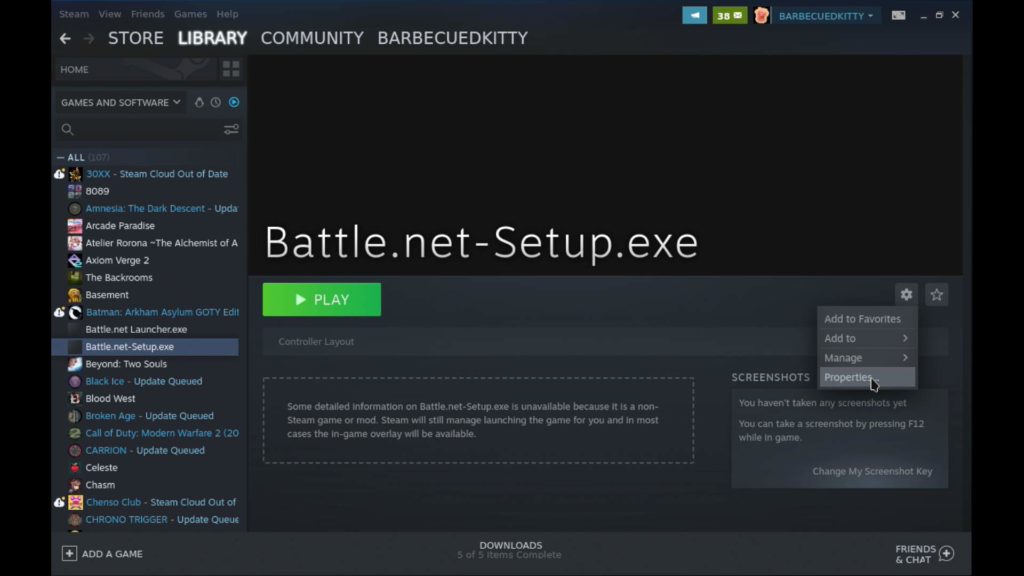
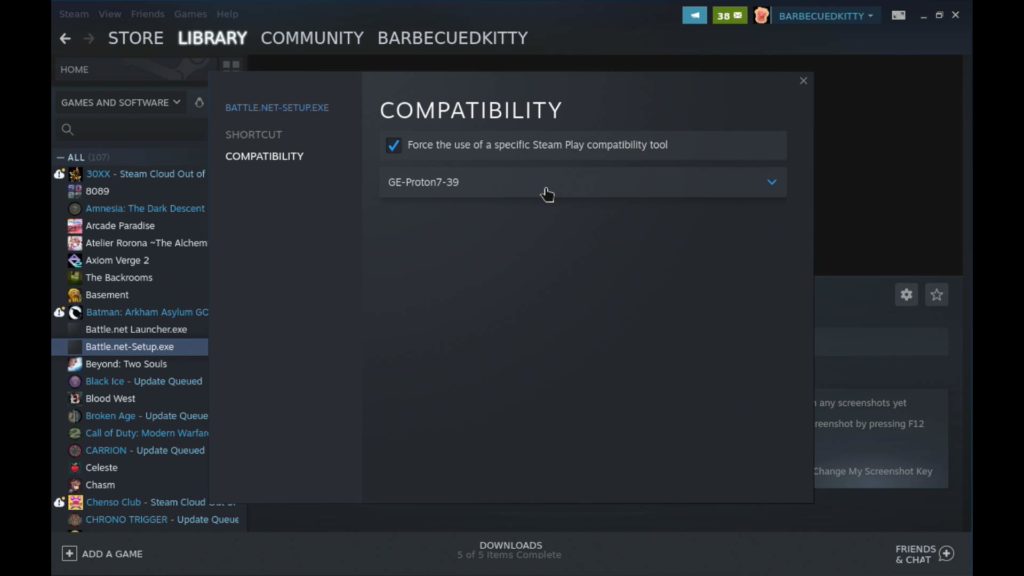
Before we hit play, we do need to switch over to the correct Proton GE! Go to the cogwheel for the setup and click "Properties". Go to the Compatibility tab, check the box there, and then select GE-Proton7-39 from the list. Then you can close the window and Play/Start the setup in Steam.
IMPORTANT: Change the Install Location
Now it should just start to take you through normal installer steps. You can do this one on your own, but there is 1 VERY IMPORTANT thing to do: change where BattleNet is installed. This isn't something you have to do if you know where it will install to, but this will make everything SIGNIFICANTLY easier in the long run.
Once you get to the "Install Location" screen, go ahead and click change.
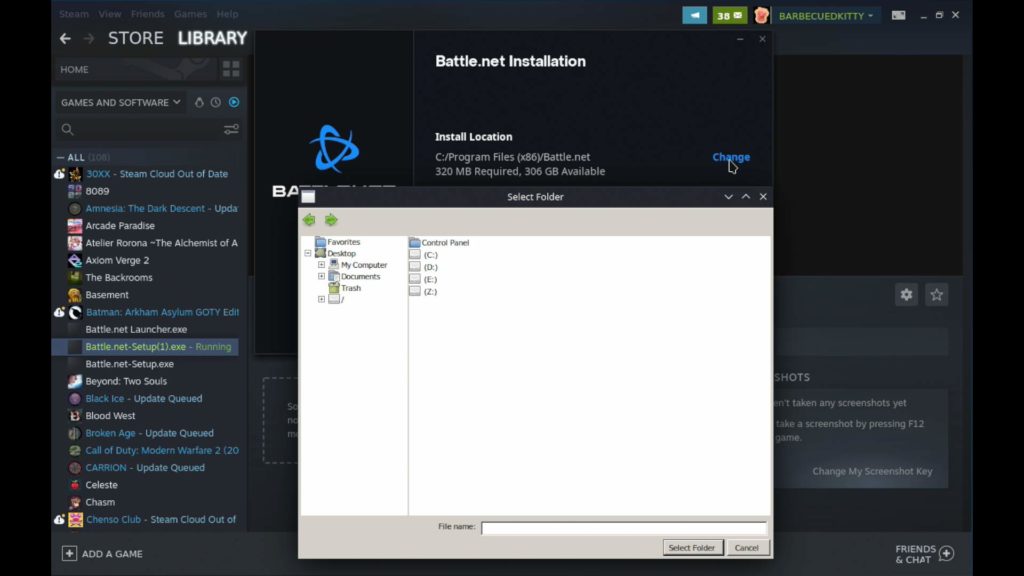
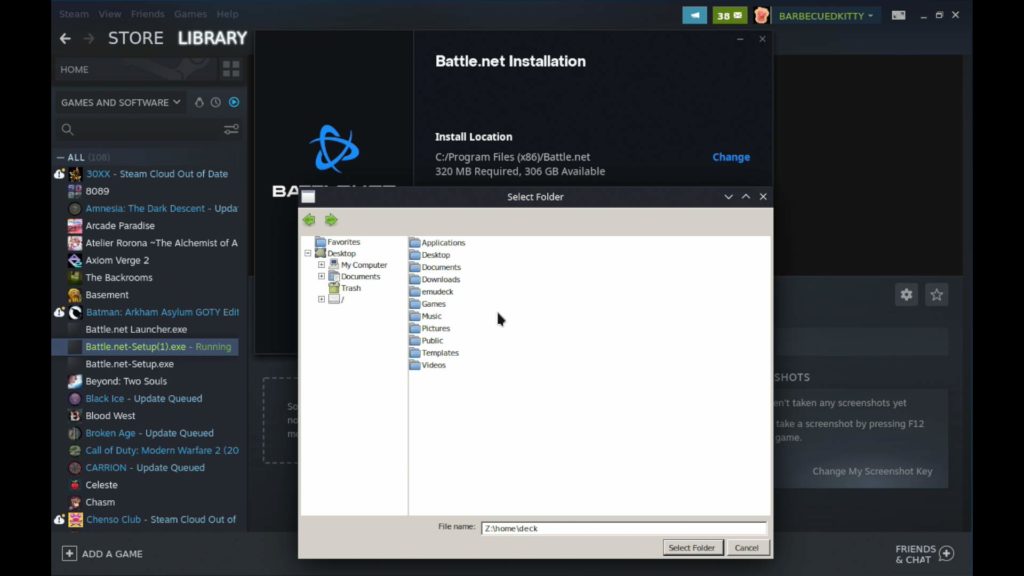
The default goes to the C drive, but that exists inside a prefix and will be more obnoxious to get to. Once you are at this screen, click on the Z drive. This drive is your actual SteamOS filesystem that you can more easily access. From here, click on "home" and then "deck". For this guide, and my own personal purposes, I went to this directory in Dolphin and made a "Games" folder and installed it there. If you want, you can create a folder on your Desktop for BattleNet and navigate to it by going to the "Desktop" folder in the lineup. Once you find the folder you want to, click once on it and then click "Select Folder".
I also recommend unchecking the "Launch Battle.net when you start your computer" option, but it is up to you. After that, just hit continue and you are good to go! It will now install BattleNet for you to the folder chosen. Once it is done, it will automatically take you to the login screen, which once you do, will bring you to the launcher itself!
Adding BattleNet to Steam and Installing Overwatch 2
Now that the BattleNet Launcher has been downloaded, we need to add it to Steam directly. First, go ahead and delete the setup non-steam game that was added and click "Add a Game" and "Add a Non-Steam Game" again. Using the same process as before, navigate to where you installed BattleNet and add the "Battle.net Launcher.exe" to Steam. It should be located in the new Battle.net folder!
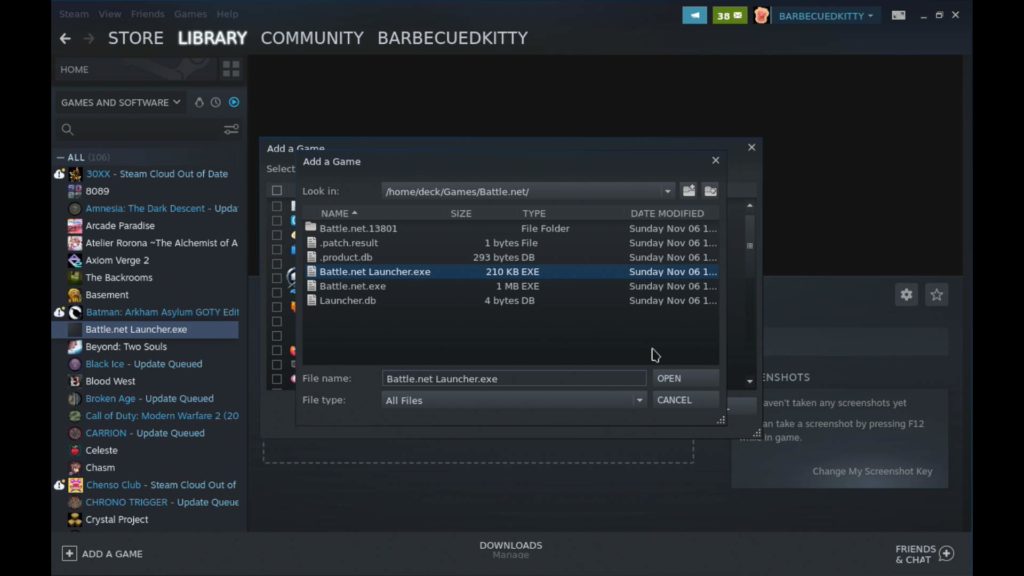
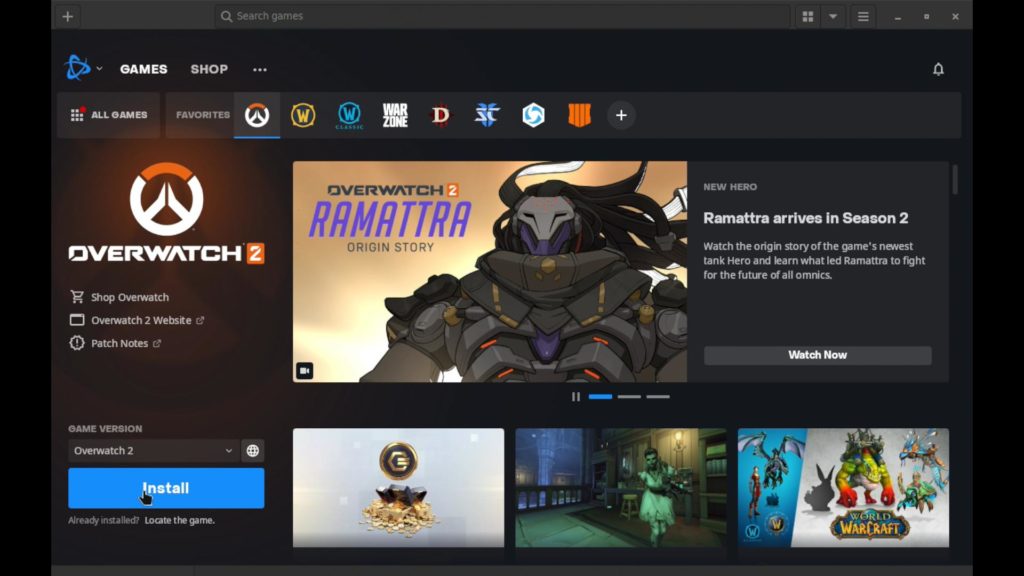
Just like for the setup, make sure the compatibility is being forced to GE-Proton7-39. After this, go ahead and launch it. After you log in, you should be taken to the launcher where you can now download Overwatch 2! Just like before, I recommend changing the install location to the same folder you installed BattleNet or a different designated one. You might have to navigate to the folder on the left side by clicking the + next to the "/" and navigating via drop downs.
After that, hit download and there you go! Now for whenever you want to play Overwatch 2, you just launch the launcher from Steam, tap on the Overwatch 2 "Play" button, and you are set! Our Overwatch 2 review will be out shortly with some recommendations on how to play, including a way we were able to cut down on even more drops!





This doesn't work anymore. The installer just gets stuck in "Updating Battle.net Update Agent... (45%)" forever.
This is no longer required as Overwatch 2 is natively on Steam. You can just install it from there.
When downloading it says only available for windows tho
It is a Windows game, but runs fine via Proton on Steam.
I've put a note on the top of this guide now to say that it is out-dated and no longer needed. This guide was for installing Battle.net and then Overwatch 2 via Battle.net and play it on Steam still. As Overwatch 2 is now on Steam, there is no need to follow this guide, just install Overwatch 2 and play it.