God of War (2018) is the first game in the rebooted-ish God of War series. You play as angry man Kratos who, with his son Atreus, must honor his partner’s dying wish. Along the way, you will travel across the land, encountering the gods of the norse mythology, all while training his son to be an angry boy. This game detracts from its predecessors heavily, focusing on telling a compelling story in a third person view over a beat-em-up style game. The game is phenomenal all around and is easily one of the greatest games to have ever been made. Saying this was a worthwhile experience is an understatement, so I was praying this would run well on the Steam Deck.
Knowing how this would turn out, I started my benchmarking with everything set to max. Lo and behold, it was horrible. Everything set to max with native resolution and no caps resulted in a 20 FPS average with a 24W+ battery drain and temps that were rising up to the high 80s. And this was in one of the less heavy areas of the game. I had no intention of using max settings though and here is where the review gets a bit tricky.
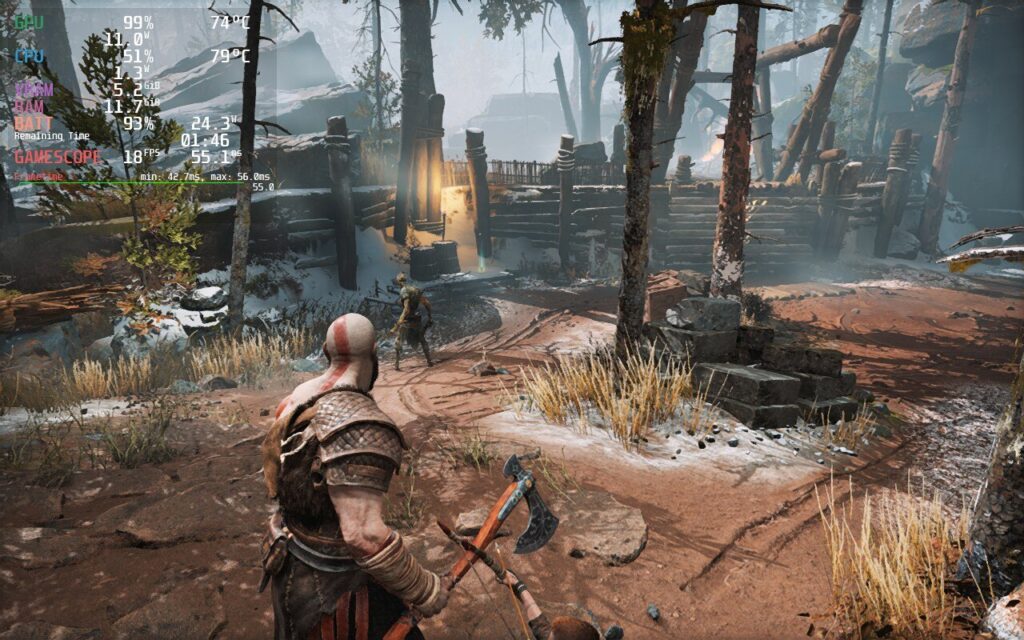
While God of War looks beautiful, battery drain and temps are high, as well as the framerate hanging around 20 FPS or lower.
God of War is a super intensive game and I feel there are two ways to play this: 30 FPS with a battery/quality focus and 40 FPS with a performance focus. In my testing, having a specific quality-focus build results in battery drain that hits a bit too hard, though it is possible to play.
Seeing as how draining God of War is, I wanted to see how far I could get the drain and temps down while keeping a stable 30. Thankfully, God of War does have FSR 2.0 integration, so I didn’t have to turn the resolution down as much to save battery. I set the TDP to 9 and started reducing some quality settings to make sure the stable framerate was hit. I ended up with a nice mix of original and high settings, with 3 of them being low. With those settings and a 1152x720 resolution with FSR 2.0 set to quality, we get a fairly nice picture with a mostly stable 30 FPS. There are some framerate spikes, but I don’t feel they are noticeable in general play without the graph there. I have seen some minor slowdowns too, but these tend to happen in cutscenes or entering new areas, which don’t impact gameplay as much. Turning up TDP could mitigate some of these, but will also drain everything much faster. Even when all the settings are set to low, I still experienced some form of spike, so while these settings may cause a little more, they still don’t feel noticeable and give more to the game while saving a significant amount of battery drain.
When it comes to 40 FPS, it is possible to achieve it while still looking quite good, though at a cost to stability. I would say overall, the game is 80% stable at 40 with these settings, though there are still mini spikes which are much more noticeable due to the increased framerate. On top of that, battery drains significantly more and temps get up to 80c, which in itself is still not that bad. It is also slightly blurrier as the resolution is changed down to 960x600, and FSR 2.0 set to balanced, but the smooth framerate does make up for this. It is still decent looking, though personally, the upgrades to quality and less noticeable spikes win out for me.
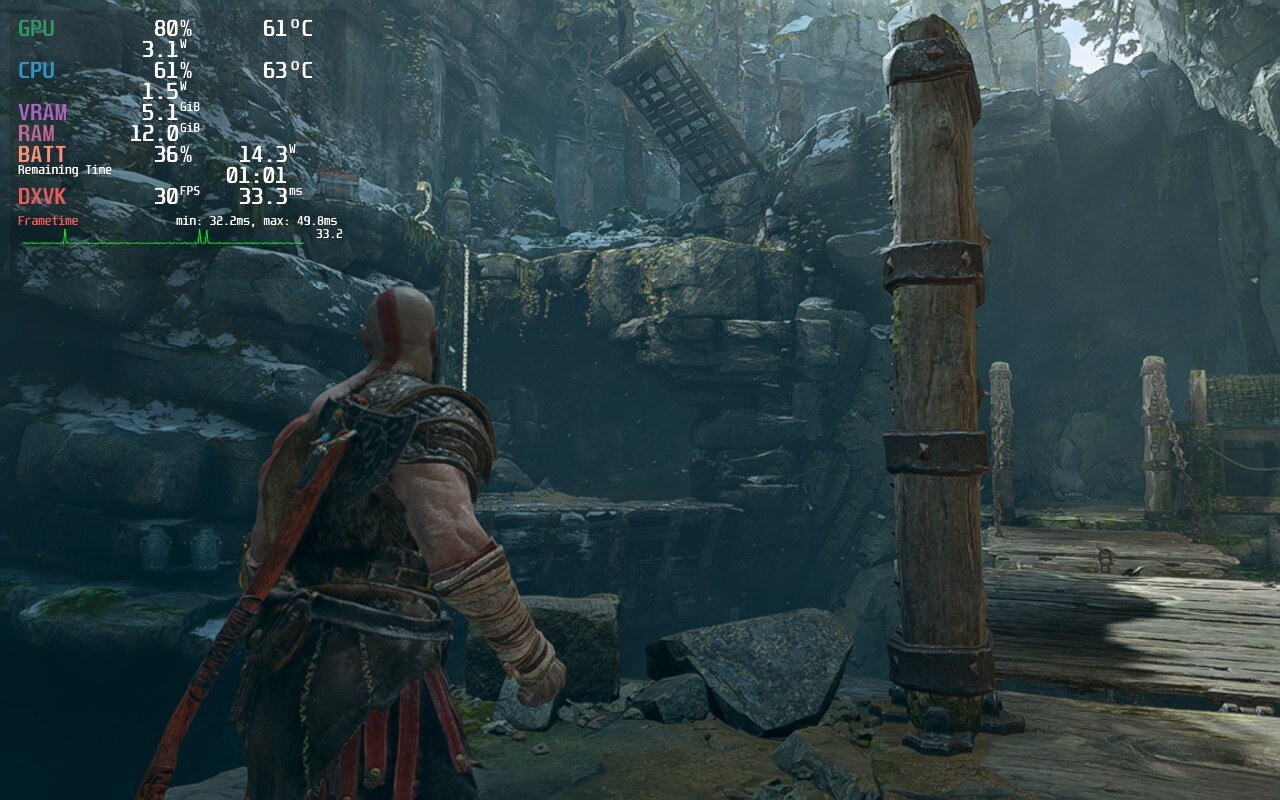
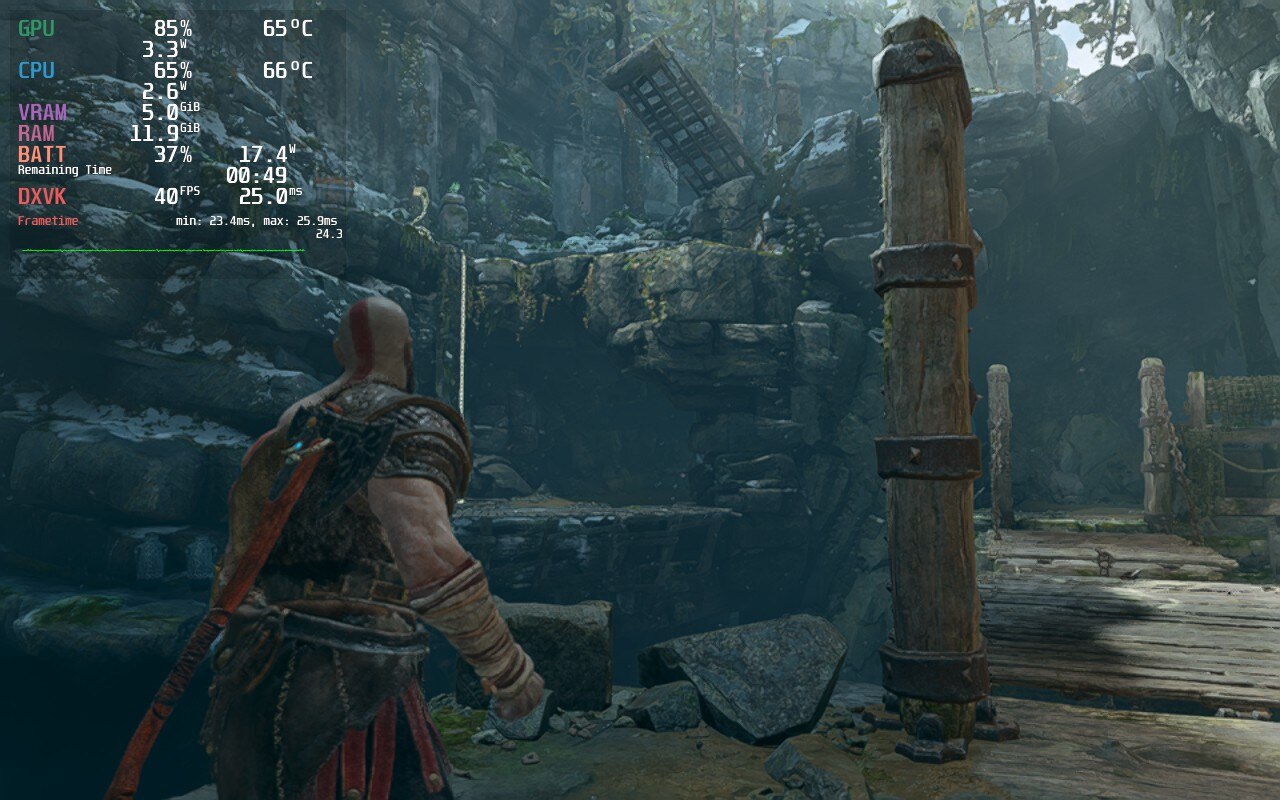
The difference in quality is clear and while 40 FPS can be hit, the temps and battery drain are massive.
There were no clear differences when using a different Proton version for God of War, so you can pick and choose which one you would like to use. I prefer using Proton GE when I can. If you don't know about it or want to install, you can follow our guide for it!
I did also encounter a couple bugs with the Deck. I noticed that after some cutscenes in God of War, my controls would stop working. This was easily fixed by hitting the "Steam" button and then going back into the game, but it was a bit annoying to deal with. I also did notice that moving the left analog stick has a very slight delay. I tested to see if this was due to SteamOS's cap, though even when Vsync in game was on with no cap, there was still that delay. It wasn't really noticeable when getting into the game though, just when I specifically stopped to test it.
I still am in shock as I tested and wrote this review, I was playing God of War on a handheld device. This game is so good and I was pleased with the performance. Of course, in terms of technicality, it could be better. It does still have framerate spikes and some bugs, but overall, this is a huge AAA game that has no business running as well as it does on Deck. If you haven't played the game before, or on the fence about it, do yourself a favor and grab the game. The compromises are well worth it.
Our review is based on the PC version of this game.
If you enjoyed this review, be sure to check out the rest of the content on SteamDeckHQ! We have a wide variety game reviews and news that are sure to help your gaming experience. Whether you're looking for news, tips and tutorials, game settings and reviews, or just want to stay up-to-date on the latest trends, we've got your back!
Star Wars: Jedi Fallen Order was released in 2019 as a new take on the Star Wars gaming genre. Mixing “Dark Souls”-esque combat, action-RPG elements, and “Uncharted” styled platforming, the AAA release sought to immerse players in a graphically detailed environment containing new characters and a style of gameplay that is distinctly different from past Star Wars games. Having completed my first playthrough on Playstation 4 at release, I was excited to pick this up during the Steam Summer sale and evaluate how the game would perform on the Steam Deck.
When I first booted into the game, I intended to push the Deck as far as it could go. I installed the game to the internal SSD (my Deck has the 256GB NVME SSD) and fired it up with Steam OS set to 60fps and all in-game settings set to maximum quality. While the game was certainly playable, I found it maxed out in the low 40 FPS range, frequently dropping as low as 25 FPS during heavy combat or cutscenes.
Using these settings, the game was consistently drawing 25+ watts from the Deck, leading to GPU temperatures in the high 80s and overall poor battery life of only 1.5 hours. Any changes to TDP essentially made the game unplayable, with it performing in the 15-20 FPS range. With this, I promptly decided to configure a 40 FPS build.
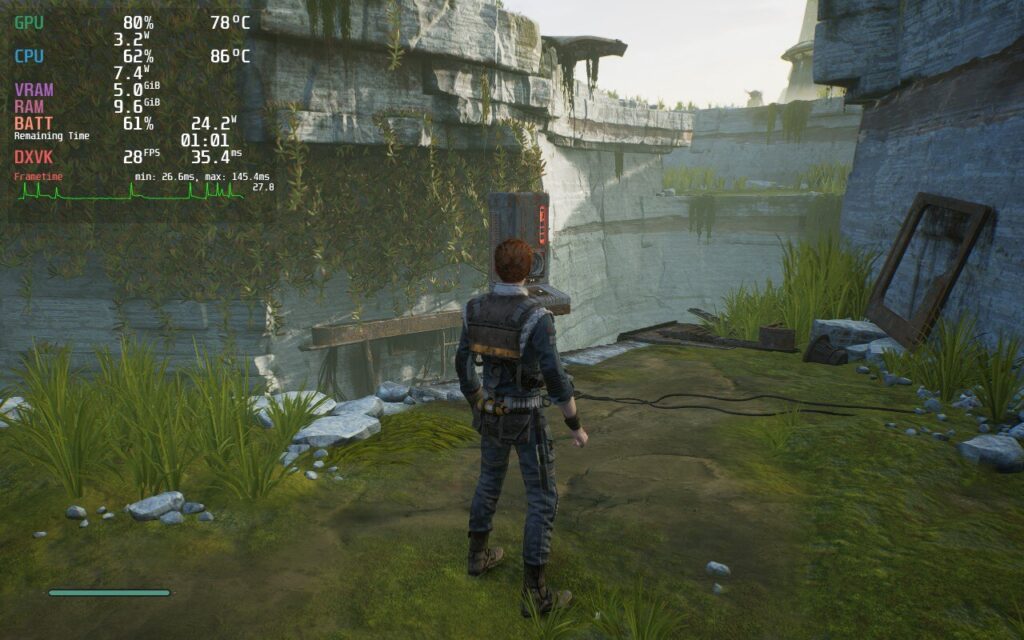
While max settings can look nice, the battery drain, temps, and framerate instability make it not playable.
I reduced the refresh rate in SteamOS to 40hz and set my framerate cap to match. Overall, the game performed better than when set at 60 FPS, even off the Micro SD card. I did notice slightly longer loading times, and framerate drops of 10-15 FPS when loading or entering areas with more than 4 or 5 enemies.
Upon returning to those areas, however, there wasn’t any lag, leading me to believe the stutters had more to do with the read/write speeds of the Micro SD card rather than the Deck hardware itself. Looking into it further, the Fallen Order PC port seems to suffer from “micro-stutters,” which could be what I was experiencing. Also noteworthy, menus seemed to behave in the 20-35 FPS range in each configuration I tried.
The framerate in Star Wars averaged around 35-40fps in this 40 FPS configuration, dipping as low as 25fps for a second or two when loading, which is more than playable for me. The battery lasted about an hour and a half pulling around 20 watts on average.
Further optimizing the 40 FPS build, I lowered the in-game resolution to 1152x720, set the display to fullscreen, applied FSR scaling with 0 sharpness, reduced the TDP to 10 watts, manually set the GPU clock to 1000hz, and lowered the settings to medium. I didn’t notice any difference in overall performance or visuals, but gained an extra 30 minutes of battery life and the Deck ran at lower temperatures, which is a bonus in itself.
While the issues at 40hz were minor, I did end up dropping down to 30 FPS on 60hz, which performed the best and bought me an extra 30 minutes of battery life. The only time these settings suffered was during the final cutscene (no spoilers) and menus, where the framerate dipped as low as 20 FPS.
I retained the resolution, FSR, and GPU clock settings from the 40 FPS build, but dropped the TDP even lower to 8. This build, by far, provided the best battery life, and the TDP drop had minimal impact on performance. I did notice some of the visuals weren’t as vivid as they were on high settings, but the increased battery life was worth it for me.
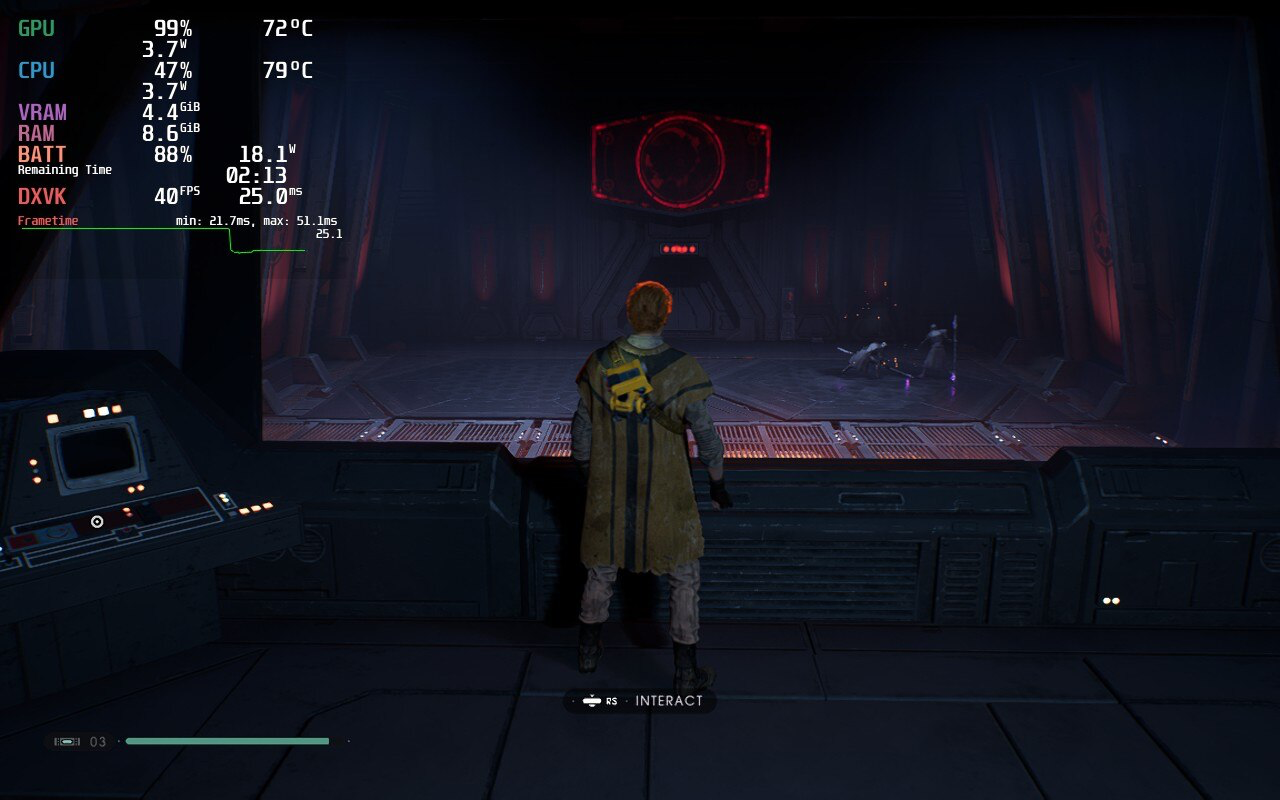
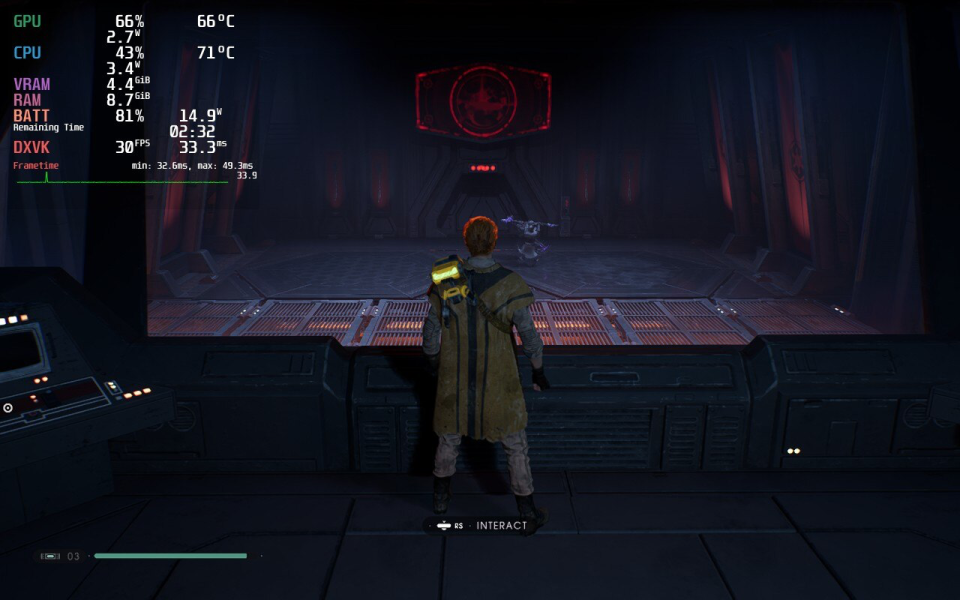
Both the 40 FPS and 30 FPS builds performed well, but I’d recommend the 40 FPS build due to its decent battery life, low temperatures and GPU utilization, and overall performance. If you’ll be away from a charger for a long period of time, the 30 FPS build is an excellent alternative. There is also some stuttering in every build we tested, but this could be due to the PC port and there are reports of stuttering not just on Deck, but on desktop PCs as well.
As far as controls go, the default configuration works great out of the box. I found myself preferring the left trackpad over the D-pad for actions like using stims and switching lightsaber configurations. Even though my hands are rather large, it was easier to reach the trackpad with my normal grip.
I haven’t explored the possibility, but thought the rear buttons (L4-5 and R4-5) would work well mapped to some lightsaber combos, such as jump attack (A then X), double power strike (Y then Y), throwing your lightsaber (LB + Y), etc. I didn’t end up trying this in game, but did create a controller layout, details below the review. Feel free to modify it for your own uses.
Overall, I am thoroughly impressed with the Steam Deck’s ability to handle such a graphically intense AAA game and I found myself surprised several times during the playthrough. The visuals are stunning, even on the 1280x800 screen, and I found new appreciation in the color balance.
Notably, the blacks were “blacker,” making the areas where I needed to use my lightsaber as a flashlight much more realistic. Combat and platforming were fluid, and although temperatures and battery life varied, the experience was enjoyable overall. If the upcoming sequel, Star Wars: Jedi Survivor, plays this well on the Deck, it will be a “must have” in my game library.
Need some help understanding how we got to our score? Check out our Guide to Steam Deck HQ.
Our review is based on the PC version of this game.
If you enjoyed this review, be sure to check out the rest of the content on SteamDeckHQ! We have a wide variety game reviews and news that are sure to help your gaming experience. Whether you're looking for news, tips and tutorials, game settings and reviews, or just want to stay up-to-date on the latest trends, we've got your back!
Doom Eternal is the latest evolution of the grand-daddy of first-person shooters. Its "push forward combat" approach to gameplay throws a barrage of enemies, explosions, and pixels on the screen all at once which the Steam Deck handles with aplomb! Thanks to some impressive hardware packed into the (relatively) tiny Steam Deck, as well as amazing optimization on the part of ID Software, the Deck handles this intense shooter with ease.
Right out of the box, Doom Eternal fires on all cylinders at a solid 60fps but at the expense of some higher temps (up to 89*C in my initial testing) and higher power consumption (23-24W, giving about 1.5 hours of battery life). A little fine tuning of settings and limiting TDP gives you options for either high quality graphics with 60fps 95% of the time (Quality Build) or lower graphical settings but at a rock solid 60fps (Performance Build). I personally preferred the performance build as a consistent 60fps helped the feel of the action in Doom Eternal and lowering the graphics as noted in the performance build did not make the game visibly unpleasant at all.
The really good news is that you can achieve both of these with greatly reduced temps and significantly more battery life. The quality build played at 50fps most of the time with minor dips to 48-49 fps for a split second. Without the Steam overlay, I don't think I would have noticed these moments, but they were most present when the screen got extremely hectic (mostly during glory kills which don't require player control in the moment). The performance build gave a rock solid 60fps, but with noticeable aliasing on some elements, like the targeting reticle, that took a while to get used to. This required lowering the resolution, turning on FSR, and adjusting the graphics settings as noted in the performance build. The builds kept the GPU temps down to 73*C on quality and 68 for performance, while CPU temps were 75c for quality and 70c for performance.
The battery build, while does save some battery and temps, makes the game’s text very hard to read. It gets around 65c for GPU while CPU hovers around 68c-70c. FSR saves the day at the resolution used for this build, but the quality downgrade doesn’t really justify the battery that can be saved from this setup.
When using the quality build I played with motion blur on. Yes, motion blur - wait, put down your pitchforks, let me explain. Yes, I know motion blur is regarded as horrible, but with the help of DRS, it becomes much less horrible and adds to the quality of the game in the performance build. Basically, Dynamic Resolution Scaling (DRS) will adjust the game’s resolution as needed, often lowering it temporarily, in order to try and maintain a higher framerate at the expense of blurring the image some. Since motion blur seemed to be implemented on a per object basis. This made the DRS’s downscaling much less noticeable while still keeping the frame rate and temperature gains.. Turning off motion blur didn't dramatically increase stability or allow for major graphical setting changes, and even in the quality build, it added to the experience. This could be a Doom only setting, and I understand why motion blur is hated, but I feel it really helps this game shine.
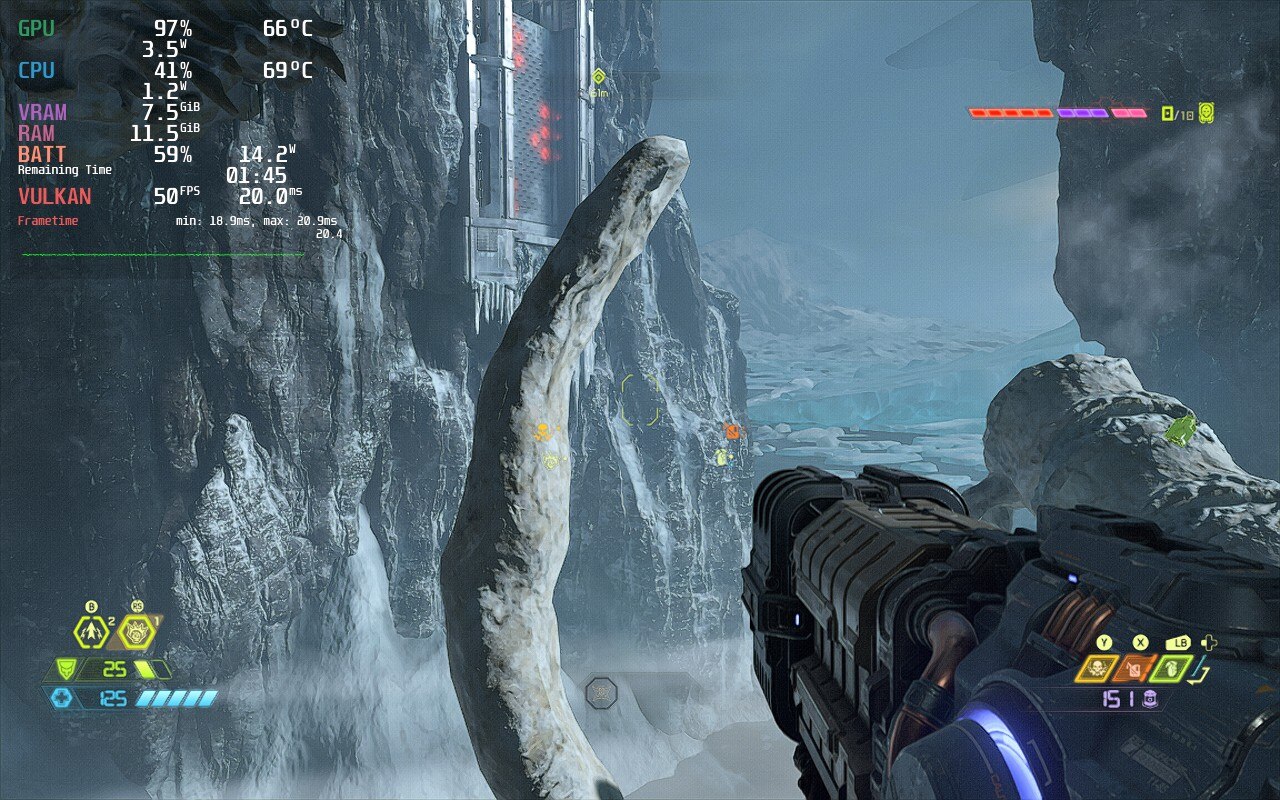
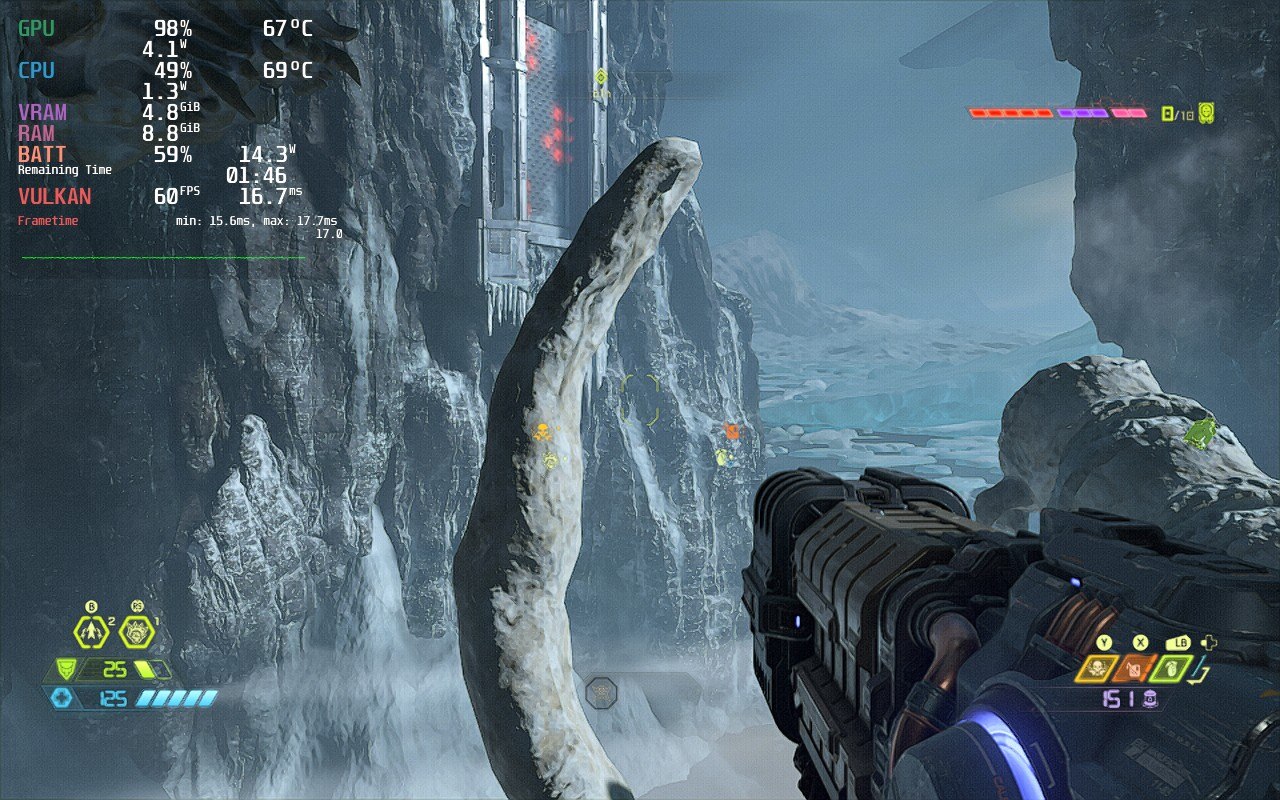
Interestingly enough, one of the greatest pleasures running Doom Eternal on the Steam Deck was the ability to fully remap the buttons (an option available in the Doom Eternal setting as well, but greatly expanded with Steam). I used the back buttons for jumping, dashing, grenade switching, and flame belch which let me keep my fingers on the joysticks at all times and I enjoyed some fine-tuned gyro aiming with the capacitive right joystick. I also set up the right track pad as a radial dial, giving each one of Doom Eternal's weapons its own spot for quick switching with a rapid light tap that just isn't possible with other console controllers. You can go even deeper down the customization rabbit hole by adding double tap weapon switching and action sets with controller chords to switch weapons even faster. It can take a little while to wrap your head (and hands) around it, but there is a very deep level of controller customization possible. I would definitely say weapon hot swapping and animation cancels are mandatory at higher difficulty levels. The controller scheme can be found in the Community Layouts and is called "Doc Jones SDHQ".
As a friend said to me when I talked about playing Doom Eternal on the Steam Deck: "That thing is so well optimized it could run on a toaster." He may be right, but it doesn't short-change the Deck's impressive hardware. The ability to customize the button layout even more via Steam allowed me to create a layout that was much closer to keyboard and mouse precision. There were also no game breaking or distracting graphical bugs/glitches that I noticed as I played through the main campaign and horde mode (which includes enemies from The Old Gods expansion). I ran a few multiplayer deathmatches and they ran very well with these settings. From all of my testing, I can easily say Doom Eternal is amazing and playing on Deck will be well worth your time.
Our review is based on the PC version of this game.
If you enjoyed this review, be sure to check out the rest of the content on SteamDeckHQ! We have a wide variety game reviews and news that are sure to help your gaming experience. Whether you're looking for news, tips and tutorials, game settings and reviews, or just want to stay up-to-date on the latest trends, we've got your back!
Tiny Tina’s Wonderlands is the newest entry in the Borderlands series, but with a unique DND twist. The game retains its looter shooter DNA and rolls in some stat building and a full overworld with random encounters and secrets to explore. This kind of one-off encounters and dungeons are a perfect fit for the Steam Deck’s pick-up and put-down style. Coupled with the Borderlands charm, this is one of the best Borderlands yet!
Gameplay aside, I was astounded by the ease of configuring the game. Due to the graphical style, upscaling through SteamOS FSR brought the 1024x640 resolution looking close to native, while saving a significant chunk on performance and battery.
To change resolution, go to the cog wheel for the game and under the general tab, change the resolution to 1024x640. With my test of FSR 2.0 though, I felt it didn't make a significant enough difference for the recommended build, but helped stabilize the 40 FPS build.
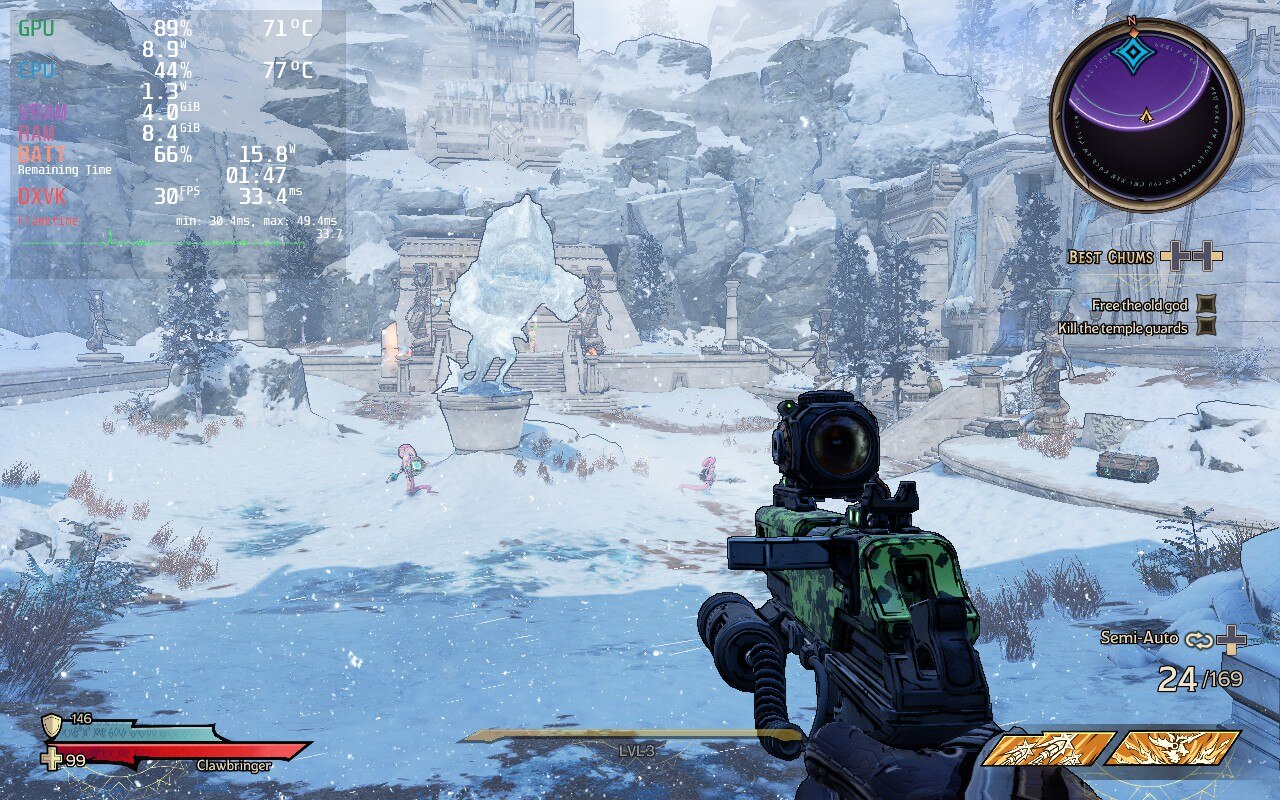
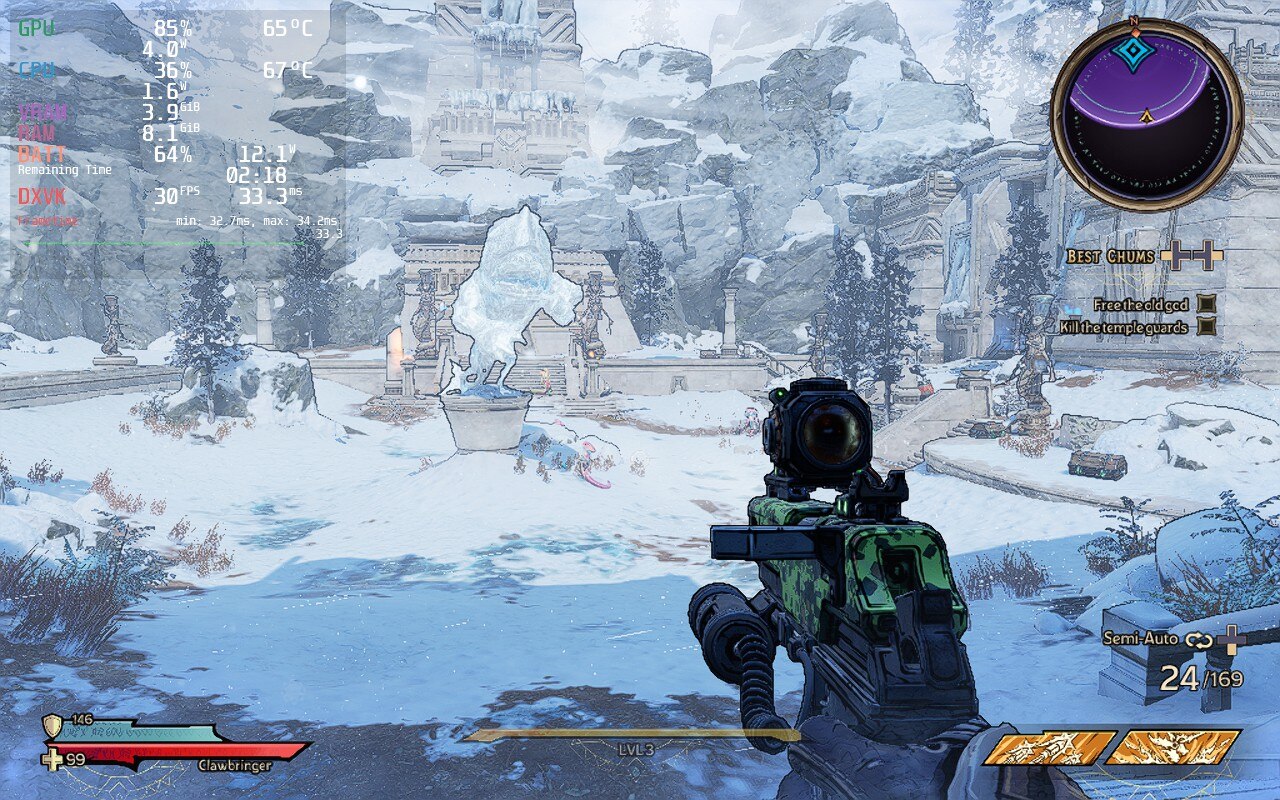
The text is a little blurrier at 1024x640, but the sharpness is noticeably better with a fantastic saving to battery and temps.
30 FPS lock was very stable on Tiny Tina's Wonderlands. I did test 40 FPS a couple times, but my Deck shut itself down from overheating while trying to test it, do not have TDP limit off for 40 FPS.
I also ended up turning the in-game settings to medium, anti-aliasing off, and draw distance to low. I didn’t feel these inhibited the look of the game and ended up saving even more battery while keeping temps to around 65c - 70c.
Proton GE is also required simply due to the videos in the game being broken trying to use regular proton. I also checked DX11 vs DX12 and felt there was minimal difference, so either or can be chosen. Multiplayer did end up increasing battery by 1W, but temps largely remained the same and it still felt stable.
Throughout gameplay, I didn’t really feel any huge bugs or glitches that inhibited my playthrough. I did encounter one bug where when I paused the game and tried to scroll down on the menu, my first button press downwards would bring me back up. I did also have 1 crash trying to go into a mirror in a town, but so far that has been an isolated incident. This is a UE4 game as well, so expect some temp and battery spikes when loading environments in.
Tiny Tina's Wonderlands runs significantly better than I could have expected. For a game that really just came out not long ago, it runs cold and stable most of the time. Other than the spikes from loading the environment in, fights are stable and looking gorgeous. With multiplayer being so easy on the system, this is a perfect fit for a portable device.
If you need help understanding how to use this guide, don't forget to check out the How to use SDHQ tutorial!
Our review is based on the PC version of this game.
If you enjoyed this review, be sure to check out the rest of the content on SteamDeckHQ! We have a wide variety game reviews and news that are sure to help your gaming experience. Whether you're looking for news, tips and tutorials, game settings and reviews, or just want to stay up-to-date on the latest trends, we've got your back!
Update 7/4/2022: Tested Devil May Cry HD Collection with the updated Proton GE 7-24. It does run and also gets rid of all pre-rendered cutscenes that don't work including the menu cutscenes. It does not fix them, just gets rid of them entirely so you do not have to skip them. If the cutscenes won't work anyways, this will save a little more time.
Updated recommended build with Proton GE 7-24
As someone who loves to relive the classics and play games from the beginning, Devil May Cry HD Collection was first on my list to play on my Steam Deck after my initial testing of how powerful the deck could be. DMC HD is the remastered collection of the first three Devil May Cry games, all released on the PS2 initially. With the first game helmed by Hideki Kamiya, known for his studio Platinumgames and franchises like Bayonetta, this game created a new genre and quickly became a major success for Capcom and Kamiya.
Luckily, these games are older ones, which means optimization for the best playthrough is relatively easy. With full controller support, DMC HD immediately recognizes the Steam Deck controller without needing to fine-tune keybindings, though it does not show Steam Deck controller icons when playing. In-game settings don’t really need to be touched with either, though my resolution defaulted to 1920x1080, so I changed that to the native 1280x800. DMC 1 ran with a solid 60 FPS for almost the entire game, with minor slowdowns when coming out of real-time cutscenes. DMC 2 and 3 did experience some slowdowns throughout the game, primarily DMC 3, but otherwise maintained 60 FPS through all the important parts like the fighting and boss battles. And with battery usually staying below 10W, there wasn’t much to complain about with performance.
Unfortunately, there are a couple of issues that may inhibit your experience with the game. In all 3 games, pre-rendered cutscenes do not work. You may hear the audio, but it will be a black screen. You can just hit the start button and it’ll skip and go right back to the game, but you will miss out on the cutscenes. I did attempt to fix this with different proton versions, but none worked with Proton Experimental doing the same as base proton and GE stopping the game from loading. This could be a big deal to some, which is totally understandable. My alternative was to watch the cutscenes on YouTube after I had skipped them. There’s not many to skip in DMC 1, but DMC 2 and 3 have a chunk more with 3 being the bulk.
While Steam says this game’s deck support is unknown, I would say this could be marked playable. Other than the cutscenes and minor slowdowns in DMC 2 and 3, the game is in a very playable state with a solid 60 FPS throughout the game, low battery usage, and automatic recognizing of the controller. If you do not mind the cutscene issue, this is a very solid way to playthrough the classic DMC games. Also, just a heads up, DMC 3 kicked my ass in certain parts, but I think that was because I am terrible at the game.
Need some help understanding how we got to our score? Check out our Guide to Steam Deck HQ.
Our review is based on the PC version of this game.
If you enjoyed this review, be sure to check out the rest of the content on SteamDeckHQ! We have a wide variety game reviews and news that are sure to help your gaming experience. Whether you're looking for news, tips and tutorials, game settings and reviews, or just want to stay up-to-date on the latest trends, we've got your back!
Horizon Zero Dawn is an open-world action game taking place on an Earth recovering from a terminator-like event. Developed by Guerilla Games, you play as Aloy, the girl wonder with no parents, who has been tasked to save the world from a corruption taking over the rampant machines roaming the wildlands.
Throughout the journey, you will have to fight, craft, and explore your way to saving this world and figuring out who you are. With a beautiful setting, enjoyable combat, and a unique story, this game is definitely worth your time. I am a sucker for post-apocalyptic settings and open-world games in general, so this already checked so many of my boxes before playing. Just based on the game’s content, I would say it is a worthwhile purchase, but what about the performance on deck?
After my initial testing, I ended up feeling that 30 FPS was the way to go. While it’s possible to increase it, I felt a much more stable 30 still plays really well and keeps temps and battery further down than I expected. There were some drops still, but they were few and didn’t impact gameplay. Game settings wise, I ended up feeling a slightly lower than native resolution with low settings, shadows at medium, and FSR turned on in-game to Ultra Quality, was the best medium for stable performance and quality visuals. This also kept battery life around 2.5-3 hours with around 14W - 16W usage.
I did see some performance and battery spikes under certain situations though. The biggest one that spiked both was when traveling around the world fast. When running, the world would render more and this would cause spikes in battery, usually up to 17.5W, and some performance hiccups. The only other one I really noticed was when walking around crowded cities, but leaving the immediate area remedied that.
There thankfully wasn’t too many game-breaking bugs that I encountered, though there were two that stick with me. First, when loading into the game, I opened my quick access menu, the button with the ellipses, and it froze on that screen. The game kept playing in the background and I had to power cycle the device since no buttons worked to close it. Second, there was one time I was running around and fighting robots, but my right analog stick randomly stopped working.
I could still press down on it and it responded in game, but I could not move it around. I had to close and re-open the game to fix that one, and luckily, I had just saved the game. Both of these only happened once though and I don’t expect it to be a huge issue. There was some minor audio stuttering at a few points, but that could have been the speakers and wasn’t anything of significance.
Overall, Horizon Zero Dawn ended up running better than I anticipated. Getting around 2.5 - 3 hours of battery life while temps staying around 70c. Framerate was stable 95% of the time at 30 FPS and still looked wonderful with FSR on and resolution slightly under native. It was a blast to play this game as much as I did on the Steam Deck and I cannot wait to see how Horizon Forbidden West and even Marvel’s Spider-Man will fare!
Side Note: For those who have Power Tools installed through the plugin manager, make sure CPU Boost is turned off. When it is turned on, temps and W usage jump a lot due to the CPU overclocking. This is not necessary for the game though and just adds unnecessary temp and battery usage.
Need some help understanding how we got to our score? Check out our Guide to Steam Deck HQ.
Our review is based on the PC version of this game.
If you enjoyed this review, be sure to check out the rest of the content on SteamDeckHQ! We have a wide variety game reviews and news that are sure to help your gaming experience. Whether you're looking for news, tips and tutorials, game settings and reviews, or just want to stay up-to-date on the latest trends, we've got your back!