Now that we have learned how to setup emulation and how to split the screens across multiple monitors for Citra (3DS) and Cemu (Wii U), it only feels right that the next guide will be how to enable Gyroscope for Cemu as well. Enabling gyroscope does have some intricacies to it, but when all is done, you will be able to use your Steam Deck with gyro controls for any Wii U games that use them. So let's get right into it!
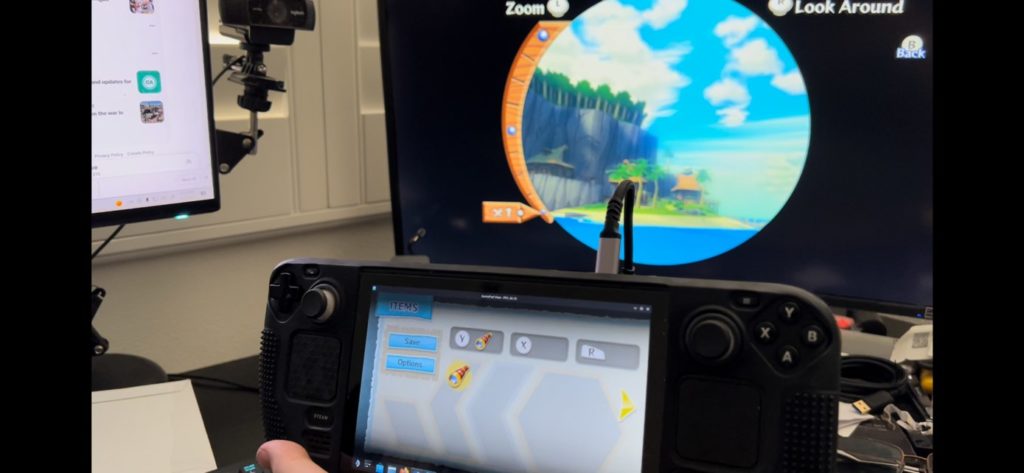
This guide assumes you are installing Cemu using EmuDeck. Using EmuDeck is super easy and configures all the emulators specifically for the Deck. We recommend using it entirely!
Pre-Setup: Setting a Sudo Password
For this tool to work and allow Cemu to register your Deck's gyro, it will need a sudo/root password. If you have set one up already, then you should be ready to skip this step. But if you haven't we will show you how to do so below.
WARNING: Do not share this password with anyone and make sure to remember it. There is no way to reset this password, so if you lose it, you will need to completely restore and reimage your Steam Deck.
Setting a password is super easy. To do this, run your Konsole and type in:
passwdIf you haven't set a password yet, text will pop up allowing you to set a password. Whatever you type in WILL NOT show up on the screen, so be extra careful. If you have set one up, you can use this screen to reset the password to a different one.
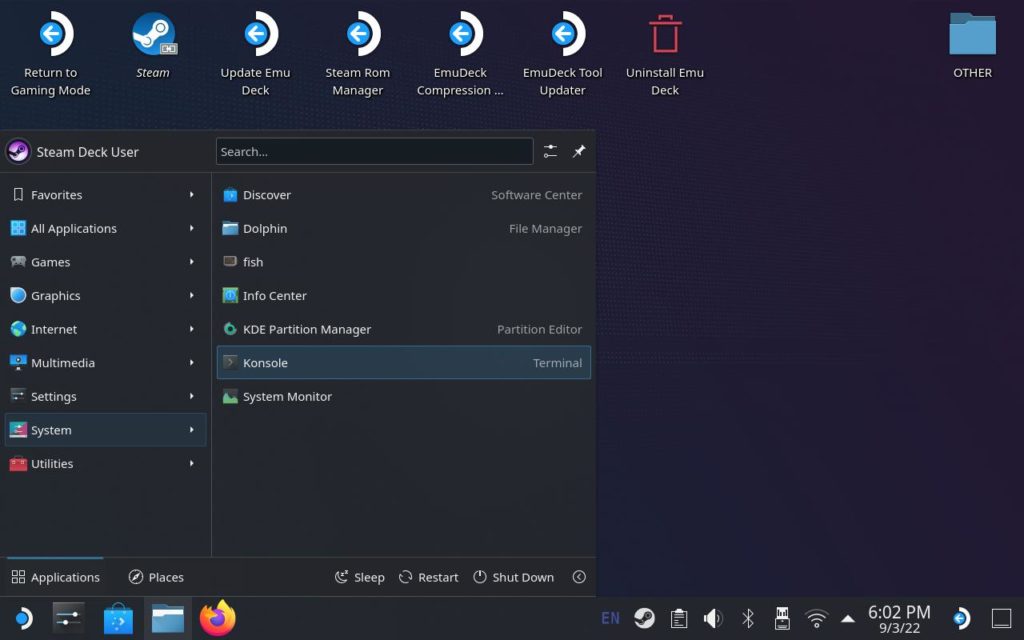
This is where you will be able to find the Konsole.
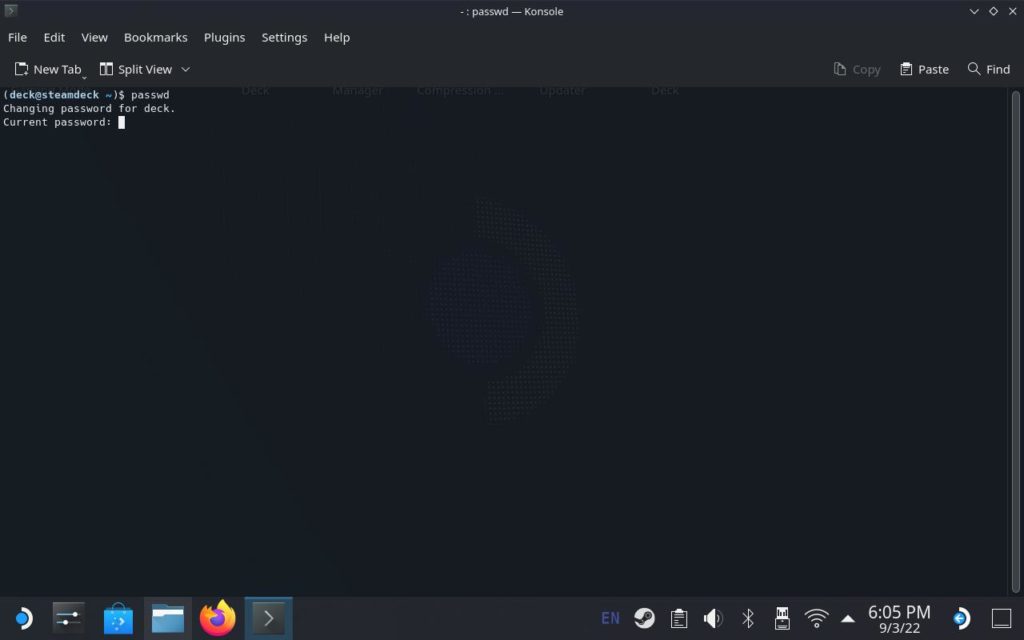
And this is what it will look like entering passwd. If you haven't set a password yet, it will prompt you to create one.
With that done, we are ready to start installing the Gyroscope tool!
Installing SteamDeckGyroDSU with EmuDeck Expert Mode
While there may be other ways to do this, we are going to be showing how with EmuDeck specifically. You can check out the SteamDeckGyroDSU's Github if you'd like to try going a different way, but we will only be covering using EmuDeck as it installs everything for you. This can also be done if this is your first time installing everything with EmuDeck as well:
Step 1:
Go ahead and click "Update EmuDeck on your desktop. Hit the OK button at the changelog and then click on "Expert Mode". Then choose where you installed EmuDeck before (Internal or SD Card).
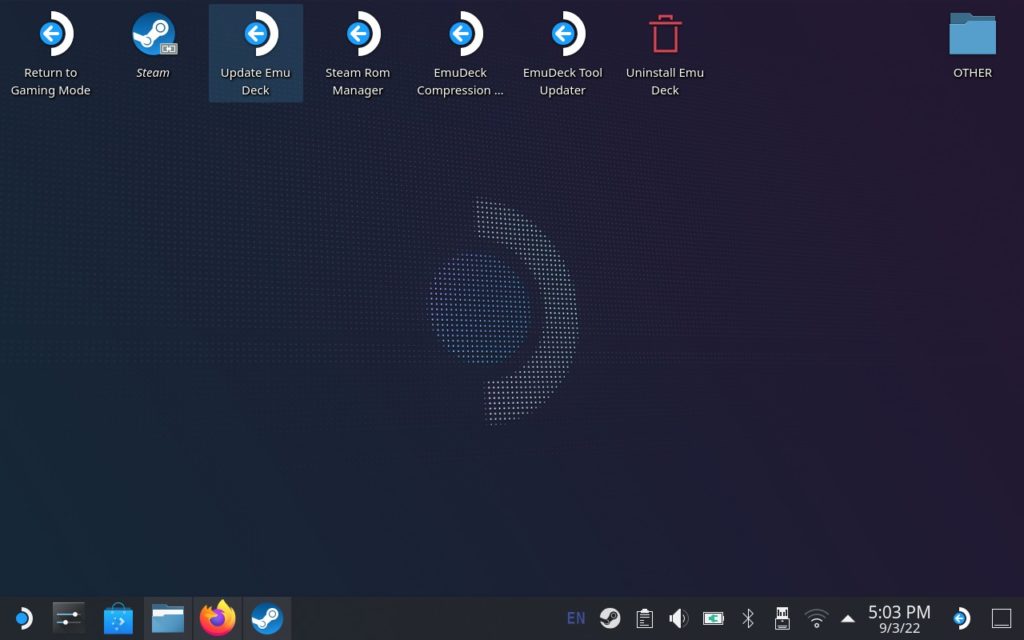
Step 2:
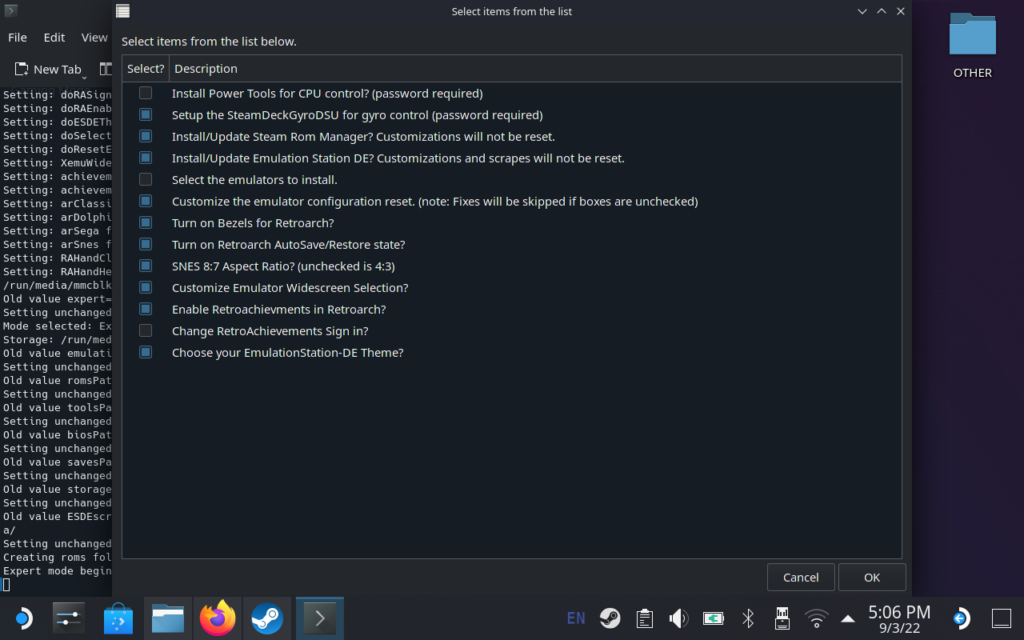
After that, you will come across this selection. Now, we won't be going into this as much in this guide, but here is what we chose to get as close to the "Easy Mode" setup without any issues. The main one will be to enable the option second from the top, "Setup the SteamDeckGyroDSU for gyro control". I also de-selected "Select the emulators to install" since we want them all and no need to install Power Tools currently (that will be a future guide). Once everything is selected, hit "okay" in the bottom right corner.
Step 3:
Now you will come across a couple new windows. First, type in the sudo password you either already have or setup earlier.
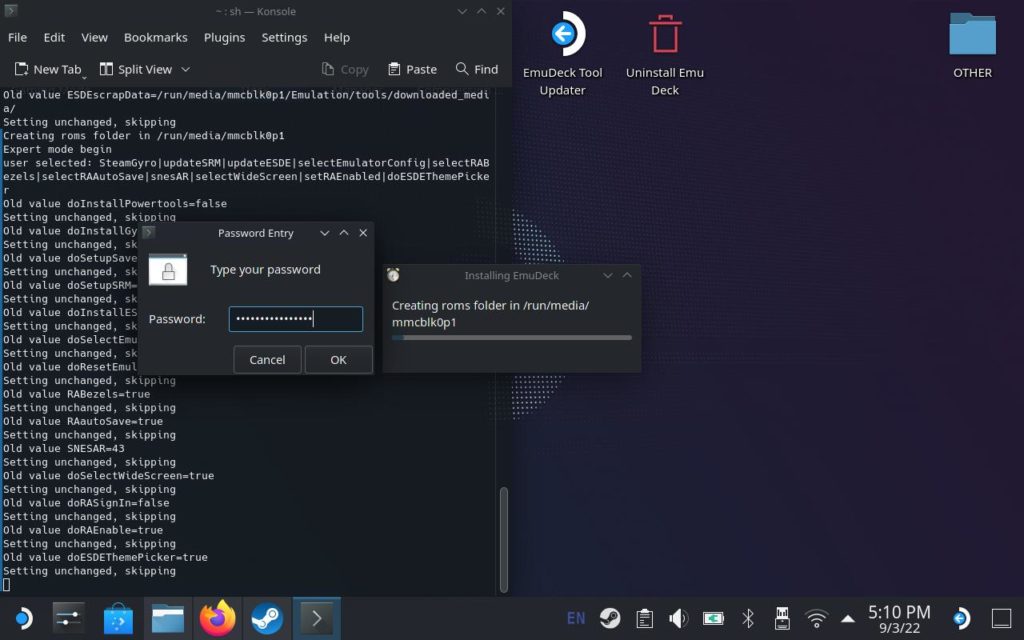
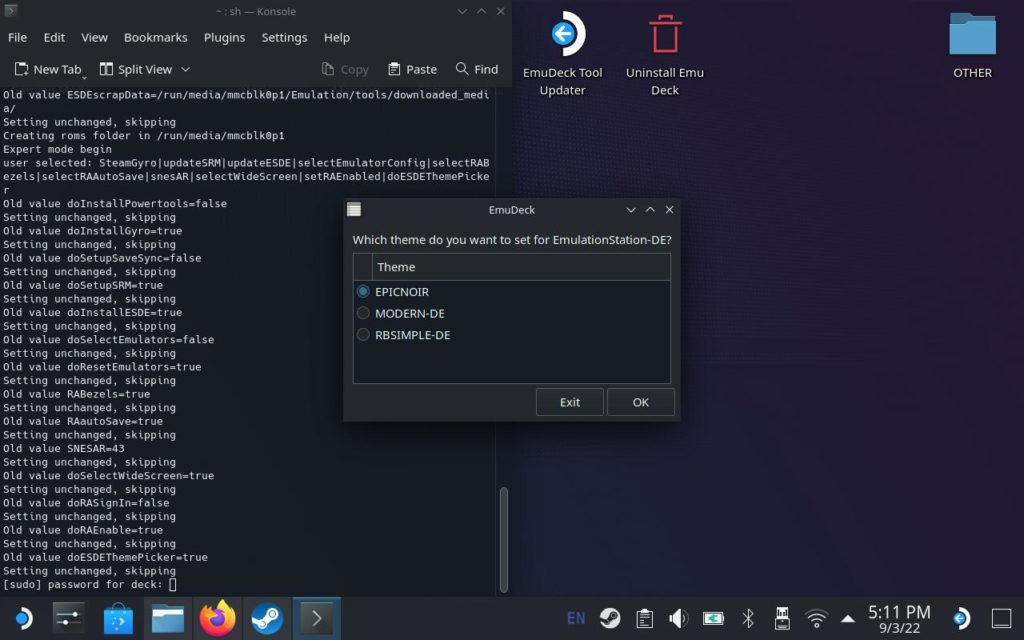
Once entered, choose the theme you want to set for EmulationStation-DE (I am a big fan of the EPICNOIR theme myself.
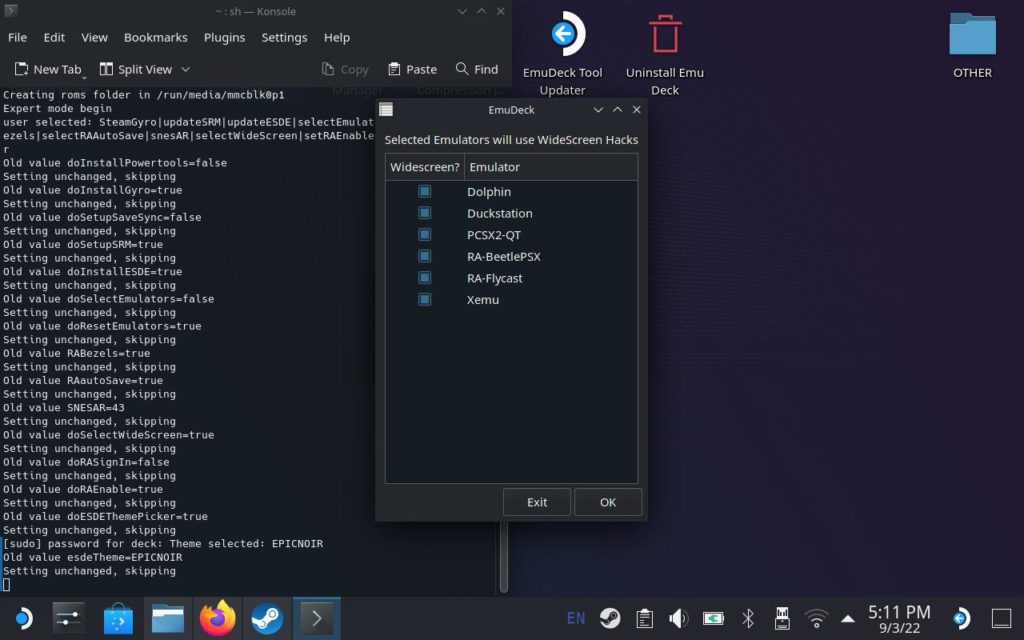
Next is choosing which emulators to put Widescreen hacks on. We have them enabled for all so we can utilize the full screen of the Deck for each emulator.
Next we reset all the emulator's configurations. This is completely up to you to do, especially if you custom configured each emulator, but since we kept everything the same and like the default configuration, so we kept everything enabled.
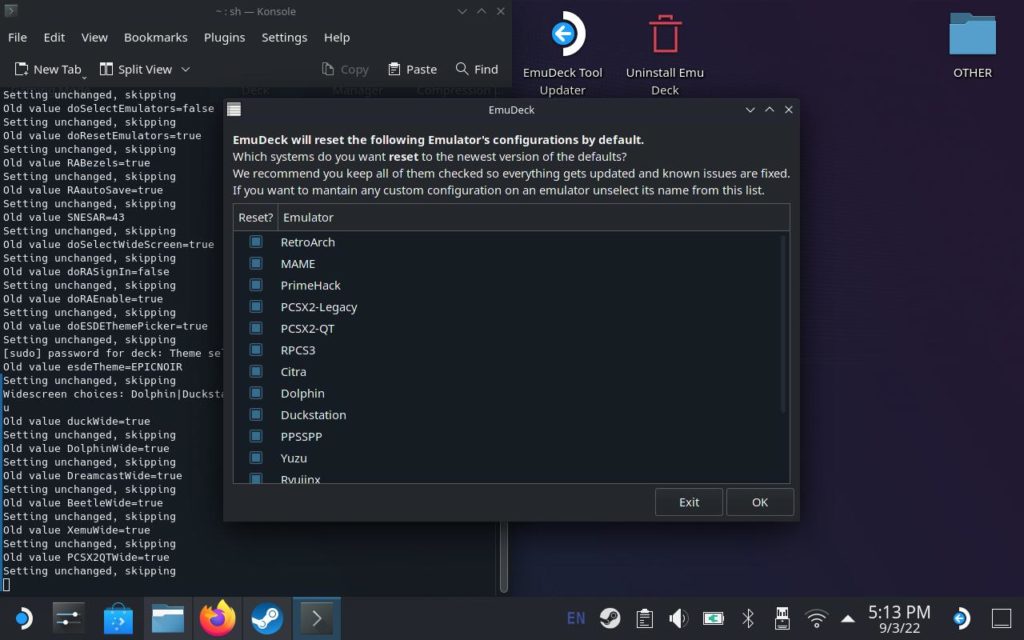
Now after that, everything should re-install with the new configurations. This won't get rid of any of your games or saves. Now we just have to quickly update Cemu.
Updating Cemu to 2.0 Experimental (Optional)
Now this is completely optional, but we highly recommend updating Cemu to 2.0 experimental. This update brought full Vulkan support to Cemu which is huge for Linux devices. It is also really easy to do this!
All you have to do is go to the "EmuDeck Tool Updater" on your desktop, make sure "Nintendo WiiU Emu" is the only one selected, and then choose the bottom choice for version 2.0.
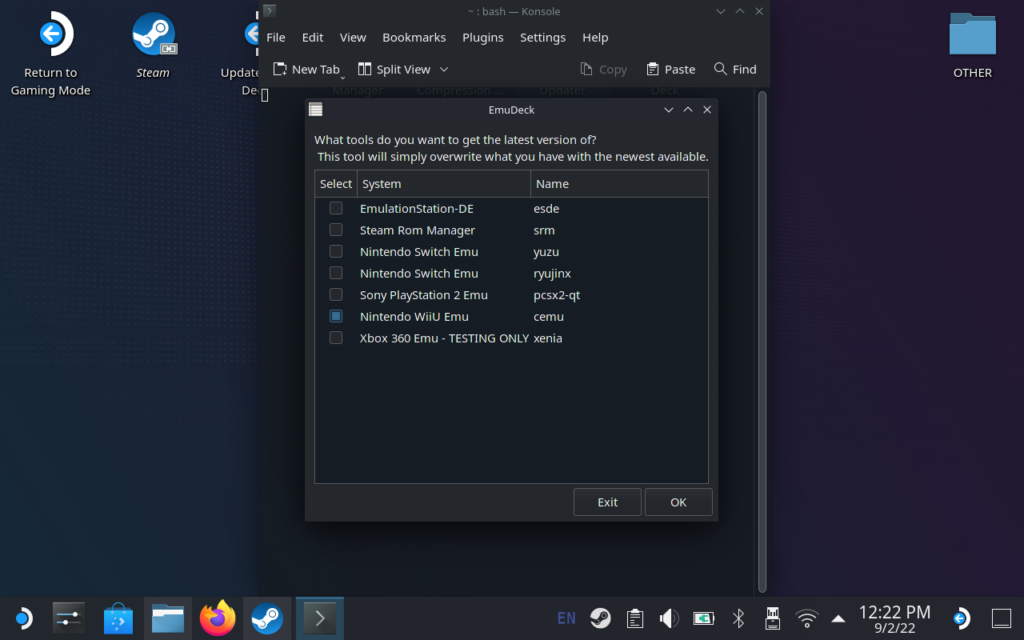
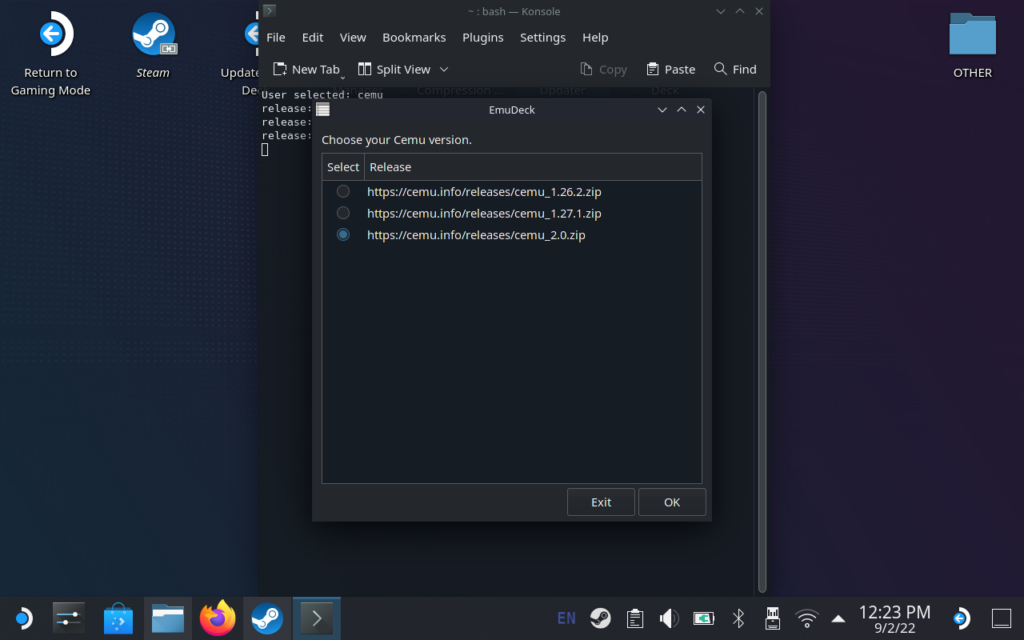
After that, Cemu will be updated and...YOU ARE READY TO PLAY SOME GAMES!
Play Some Games
That is it. You should be all set to go. Now you just have to go into Cemu and boot up a game. Everything should be automatically configured to your Deck and that's it! Enjoy!!



i don't think we can do that same thing with the new emudeck. it's only giving me easy and custom mode. i found gryo installer but i'm so lost because the instructions are not the same as the current version.
It’s possible it has changed! I will go back and take a look and update the guide in the next few days! Apologies.
I don't like or want to use EmuDeck. How do I just get this working on the regular install?
Hi there! There is a way to do this without EmuDeck. We will update the guide in the next few days, but for now, follow the "Install/Update" section on the Github repo.
https://github.com/kmicki/SteamDeckGyroDSU